Last Summer's Projects
Reach at sunrise
As we are now starting our summer of 2023 in Guatemala with a moderate project list, I realized that I have been neglecting a blog update on the previous summer’s projects in Brunswick in 2022.
It’s nice to keep the blog up to date on our boat and travel events, both for our own memories, and for putting information out there for family, friends and other cruisers with similar boats or sailing destinations.
So, now that I have wifi ~ and a minute without jumping underwater every day ~ I have some catching up to do! (Once we get Starlink, I’ll have no excuses…)
As usual, Mark worked very hard every day… so much so that our neighbors thought he was one of those kind of people who always needs to be busy and just can’t sit still. I told them to wait for the rest of the year… Lol.
There is definitely a project-mode Mark and cruising-mode Mark ~ just like there is a project-mode Reach and a cruising-mode Reach.


The LIST ~ Summer 2022
Design and build new pantry
Add a recessed box with side hatch in shower
Make chart plotter box
Replace air conditioners (x2) in hulls
Add a 2nd autopilot
Build new rudders
Add 150’ new chain & optimize anchor roller
Add 2nd solar panel & aluminum frame to stern
New fresh water pump
Fix port engine injection pump leak
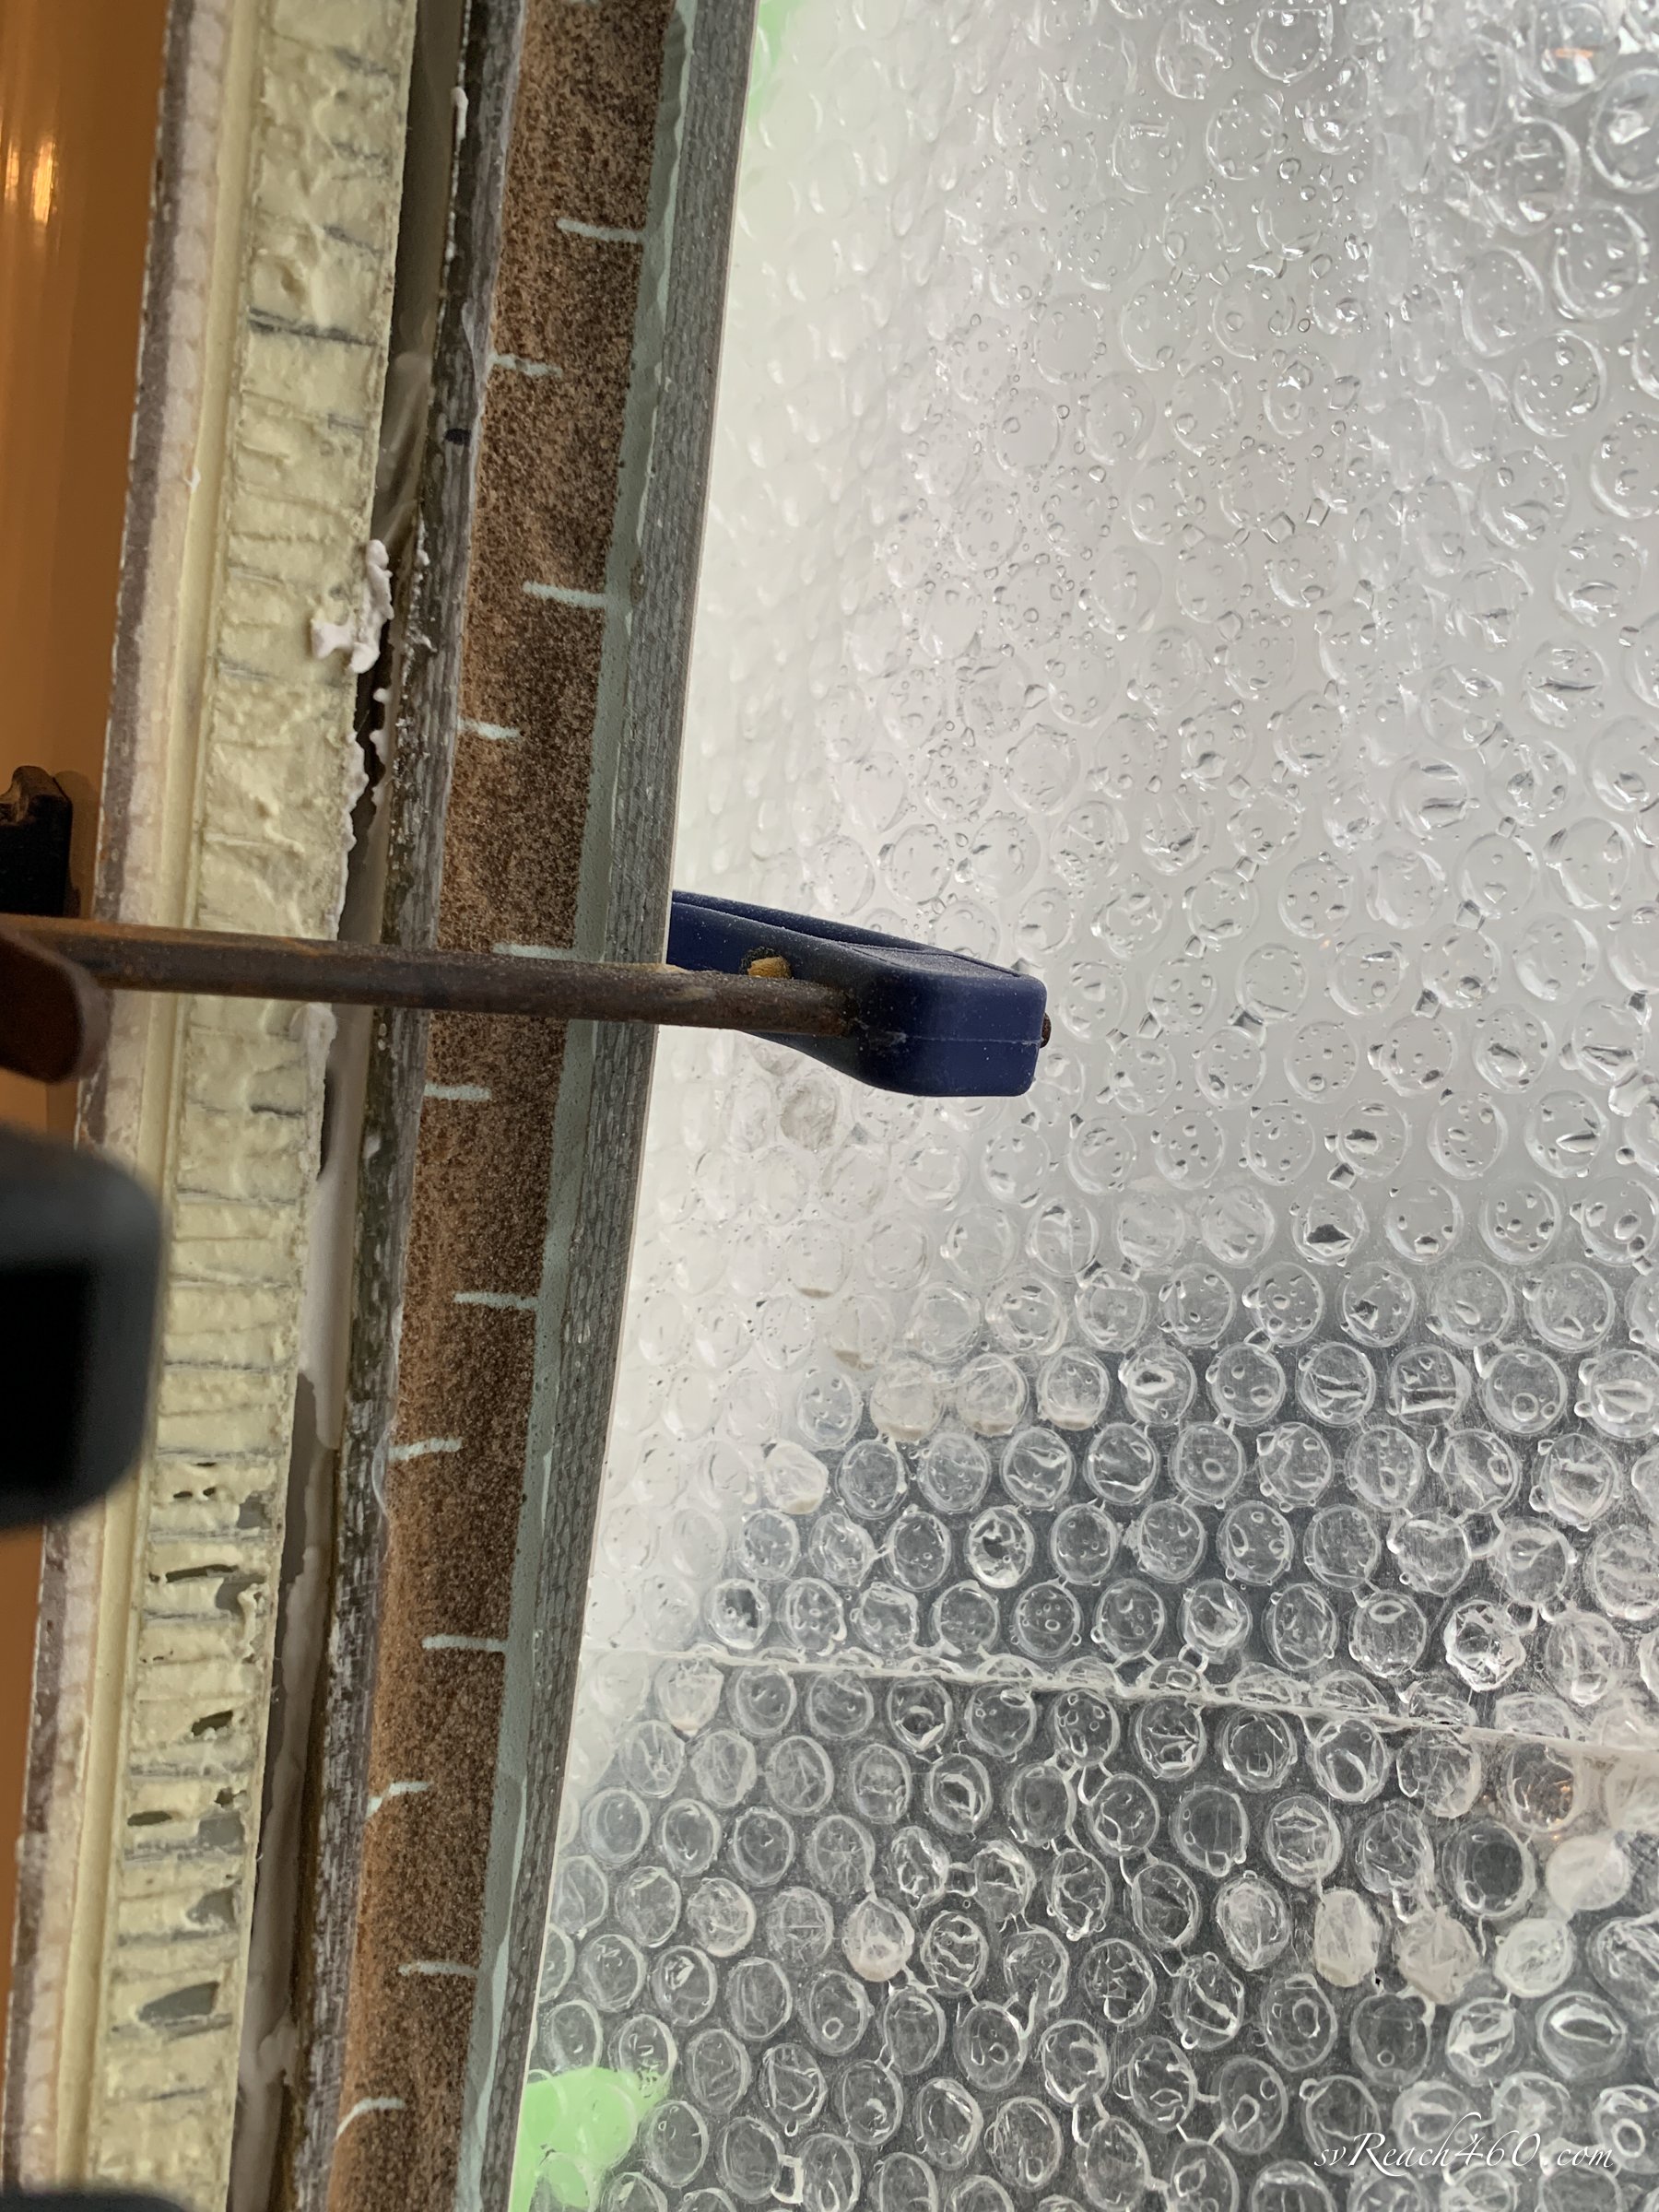
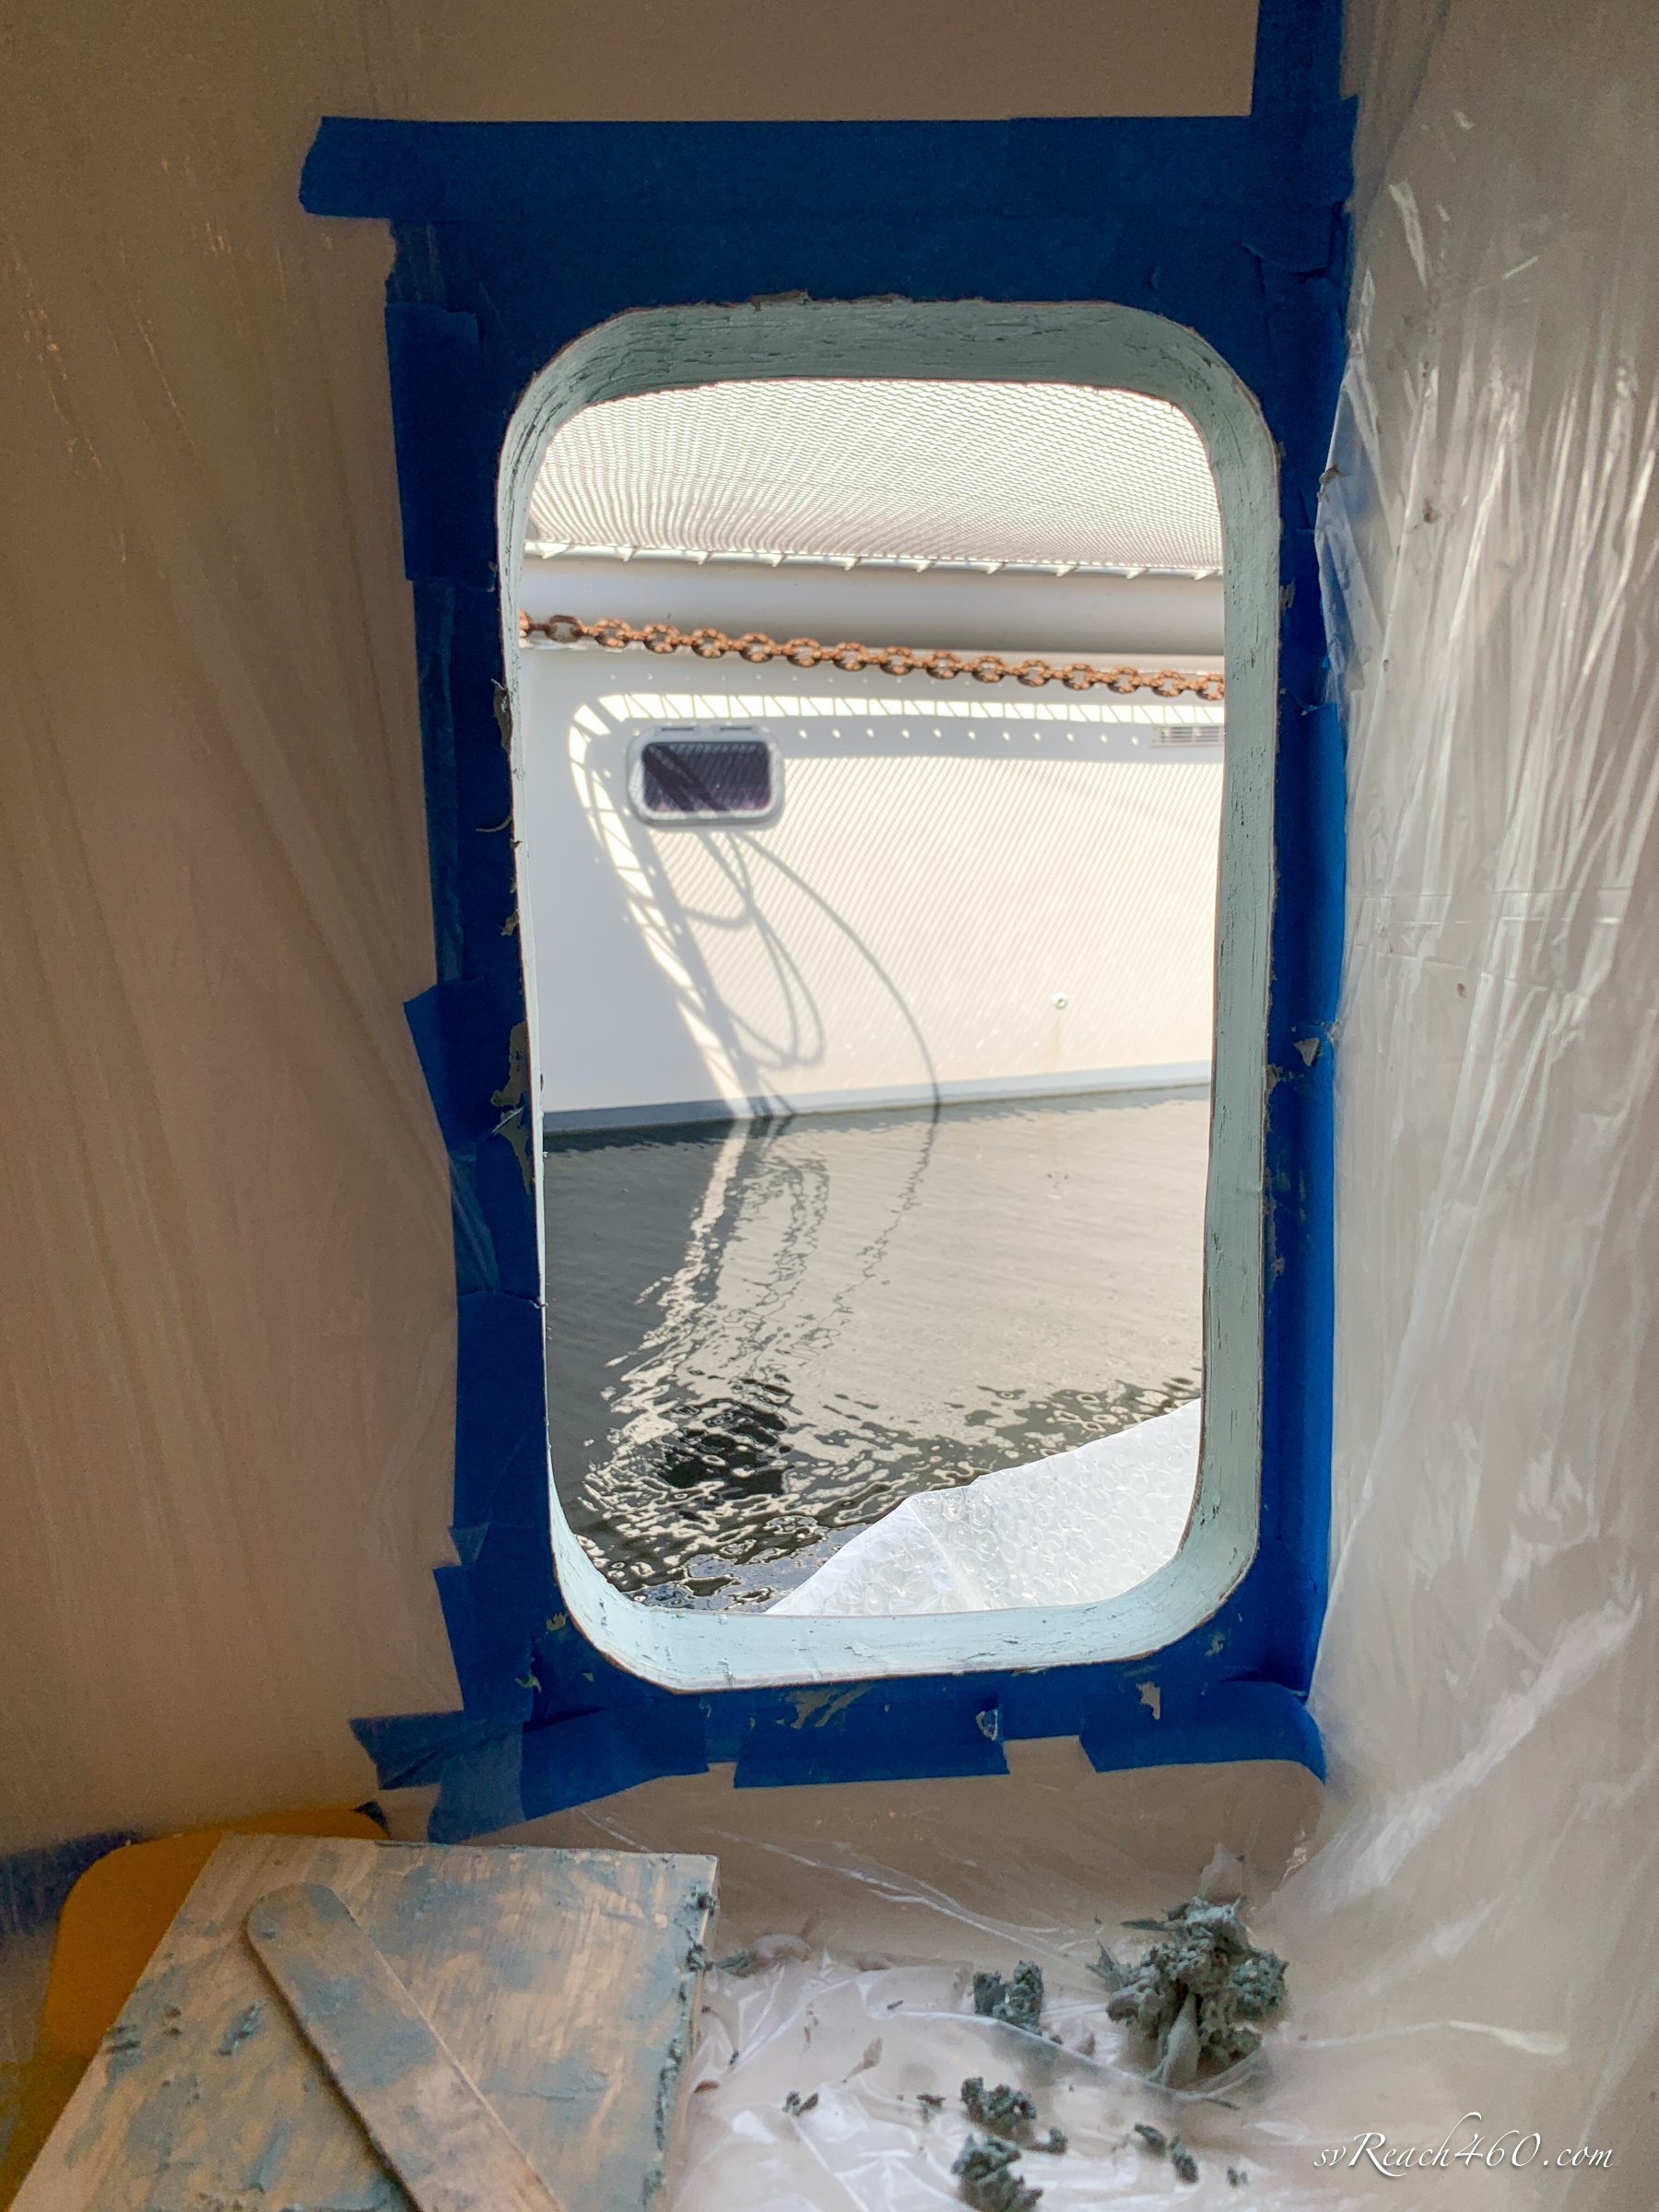
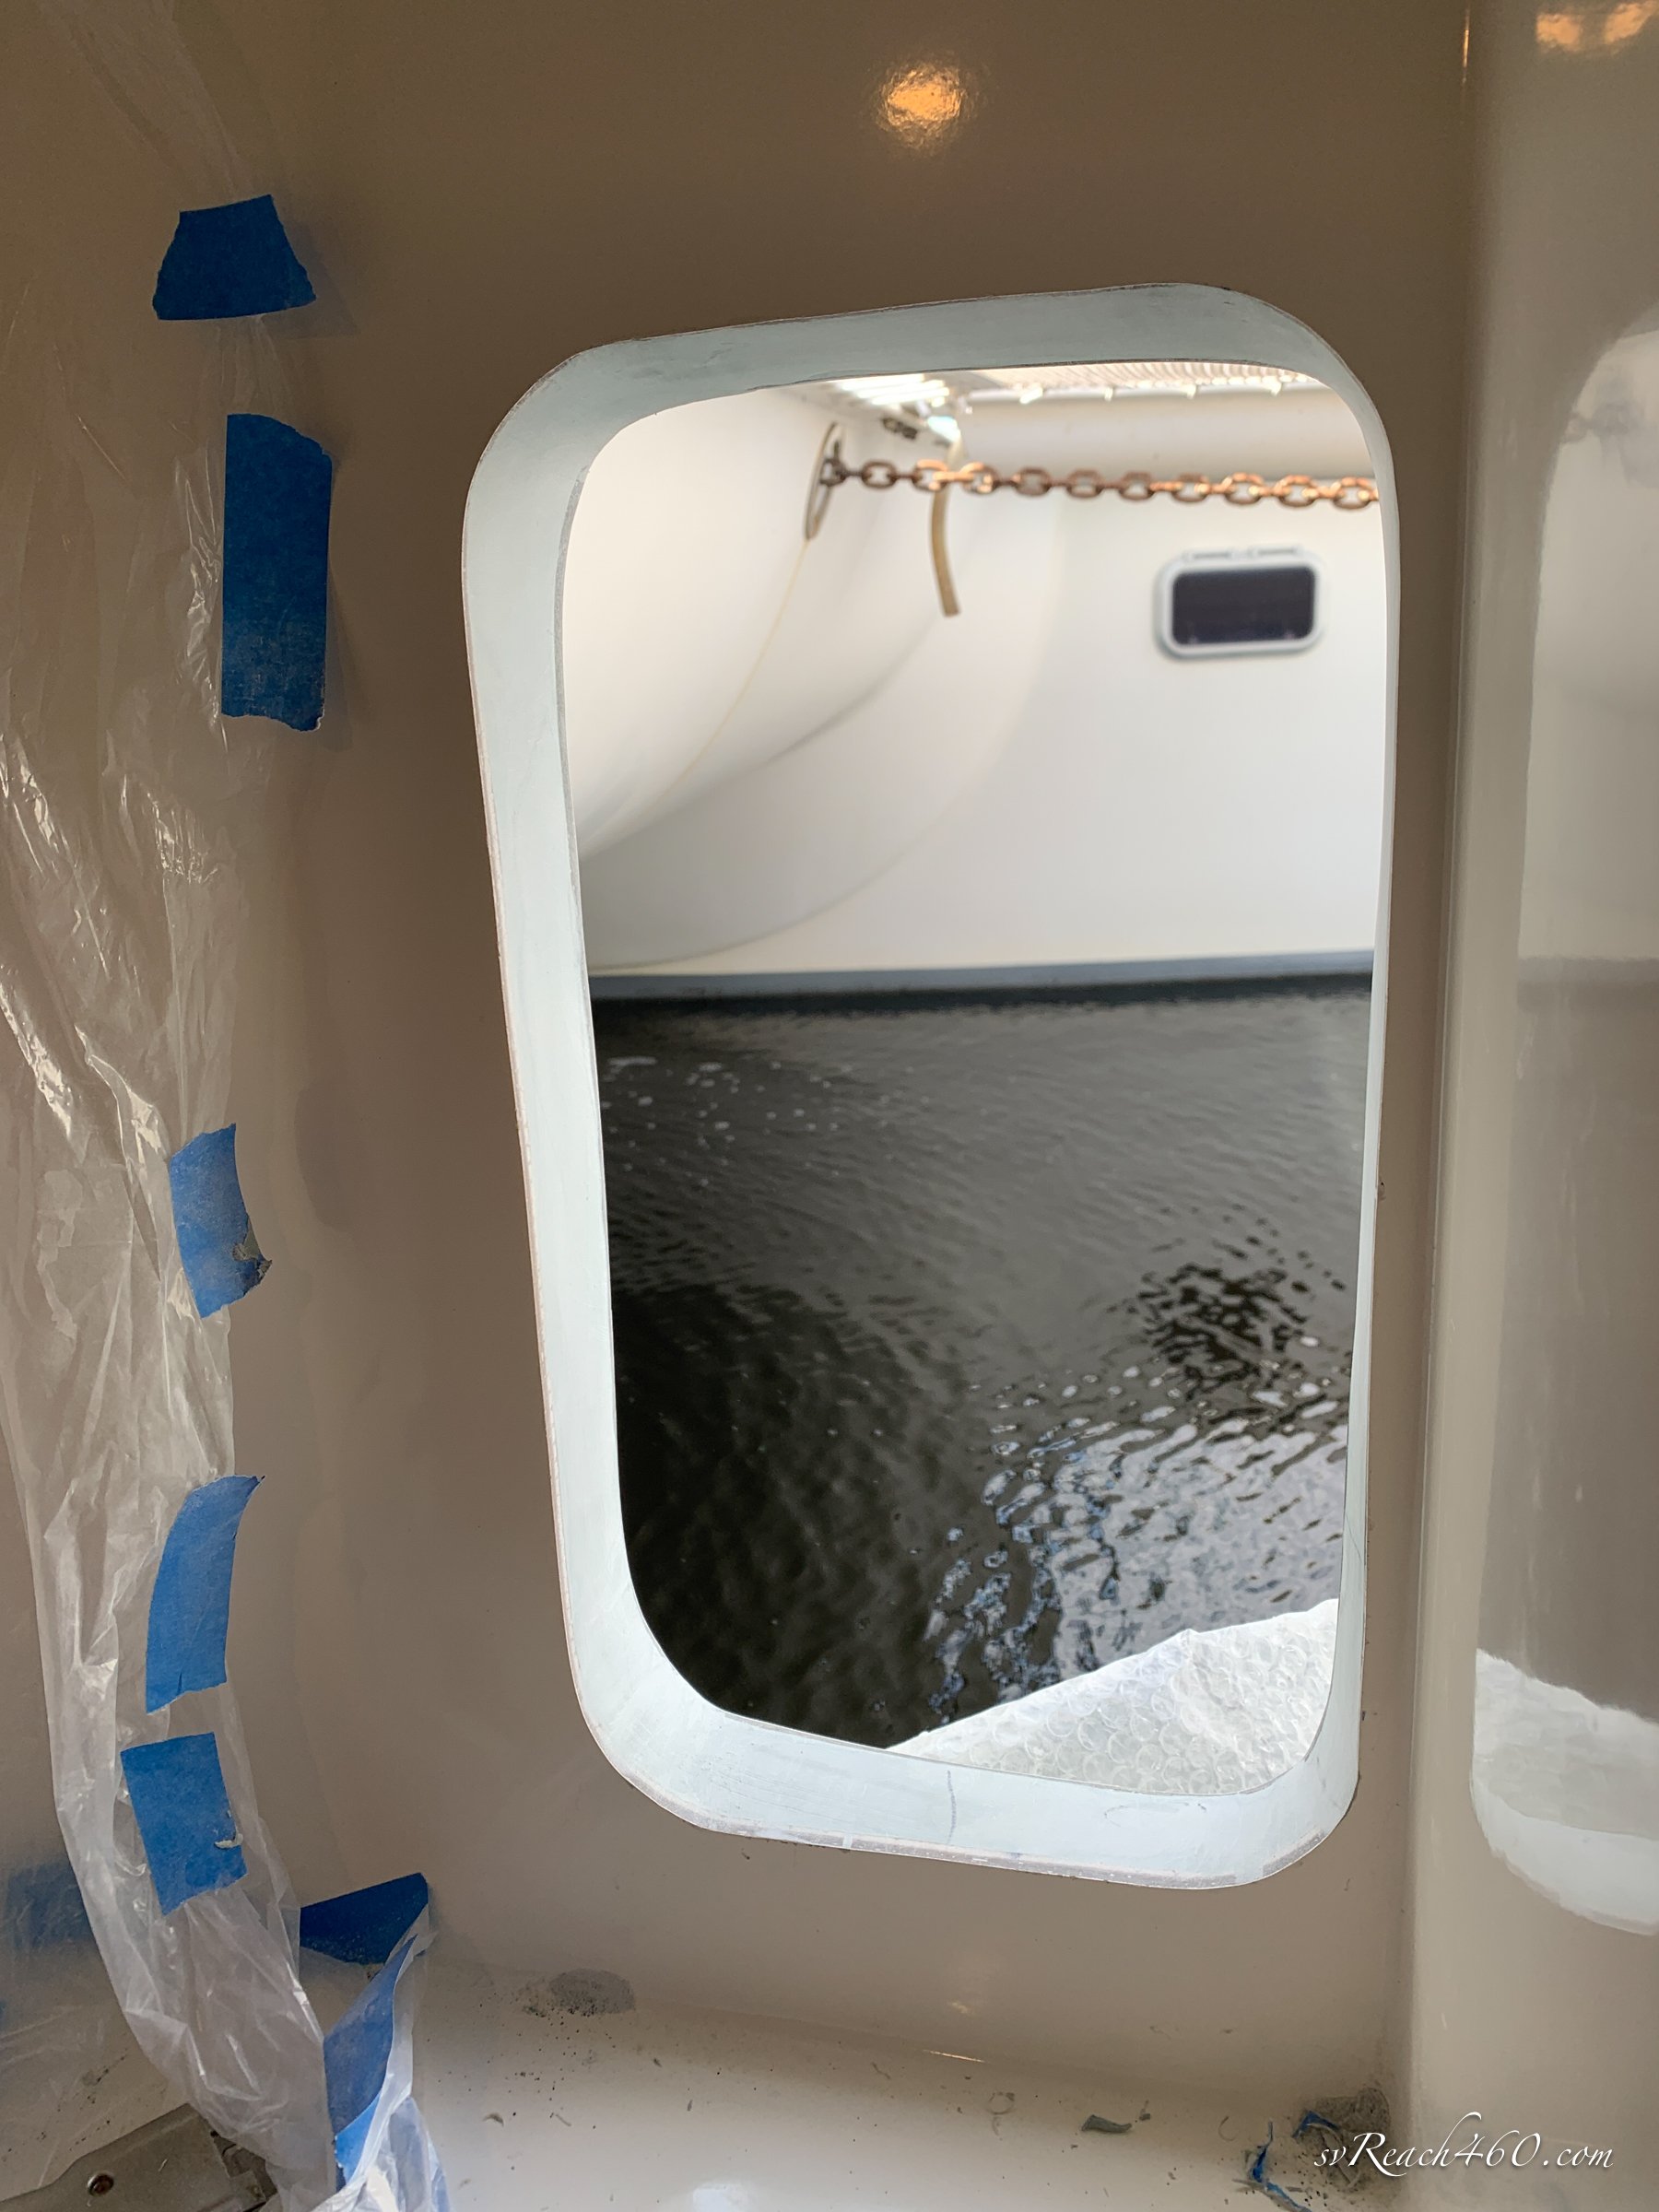
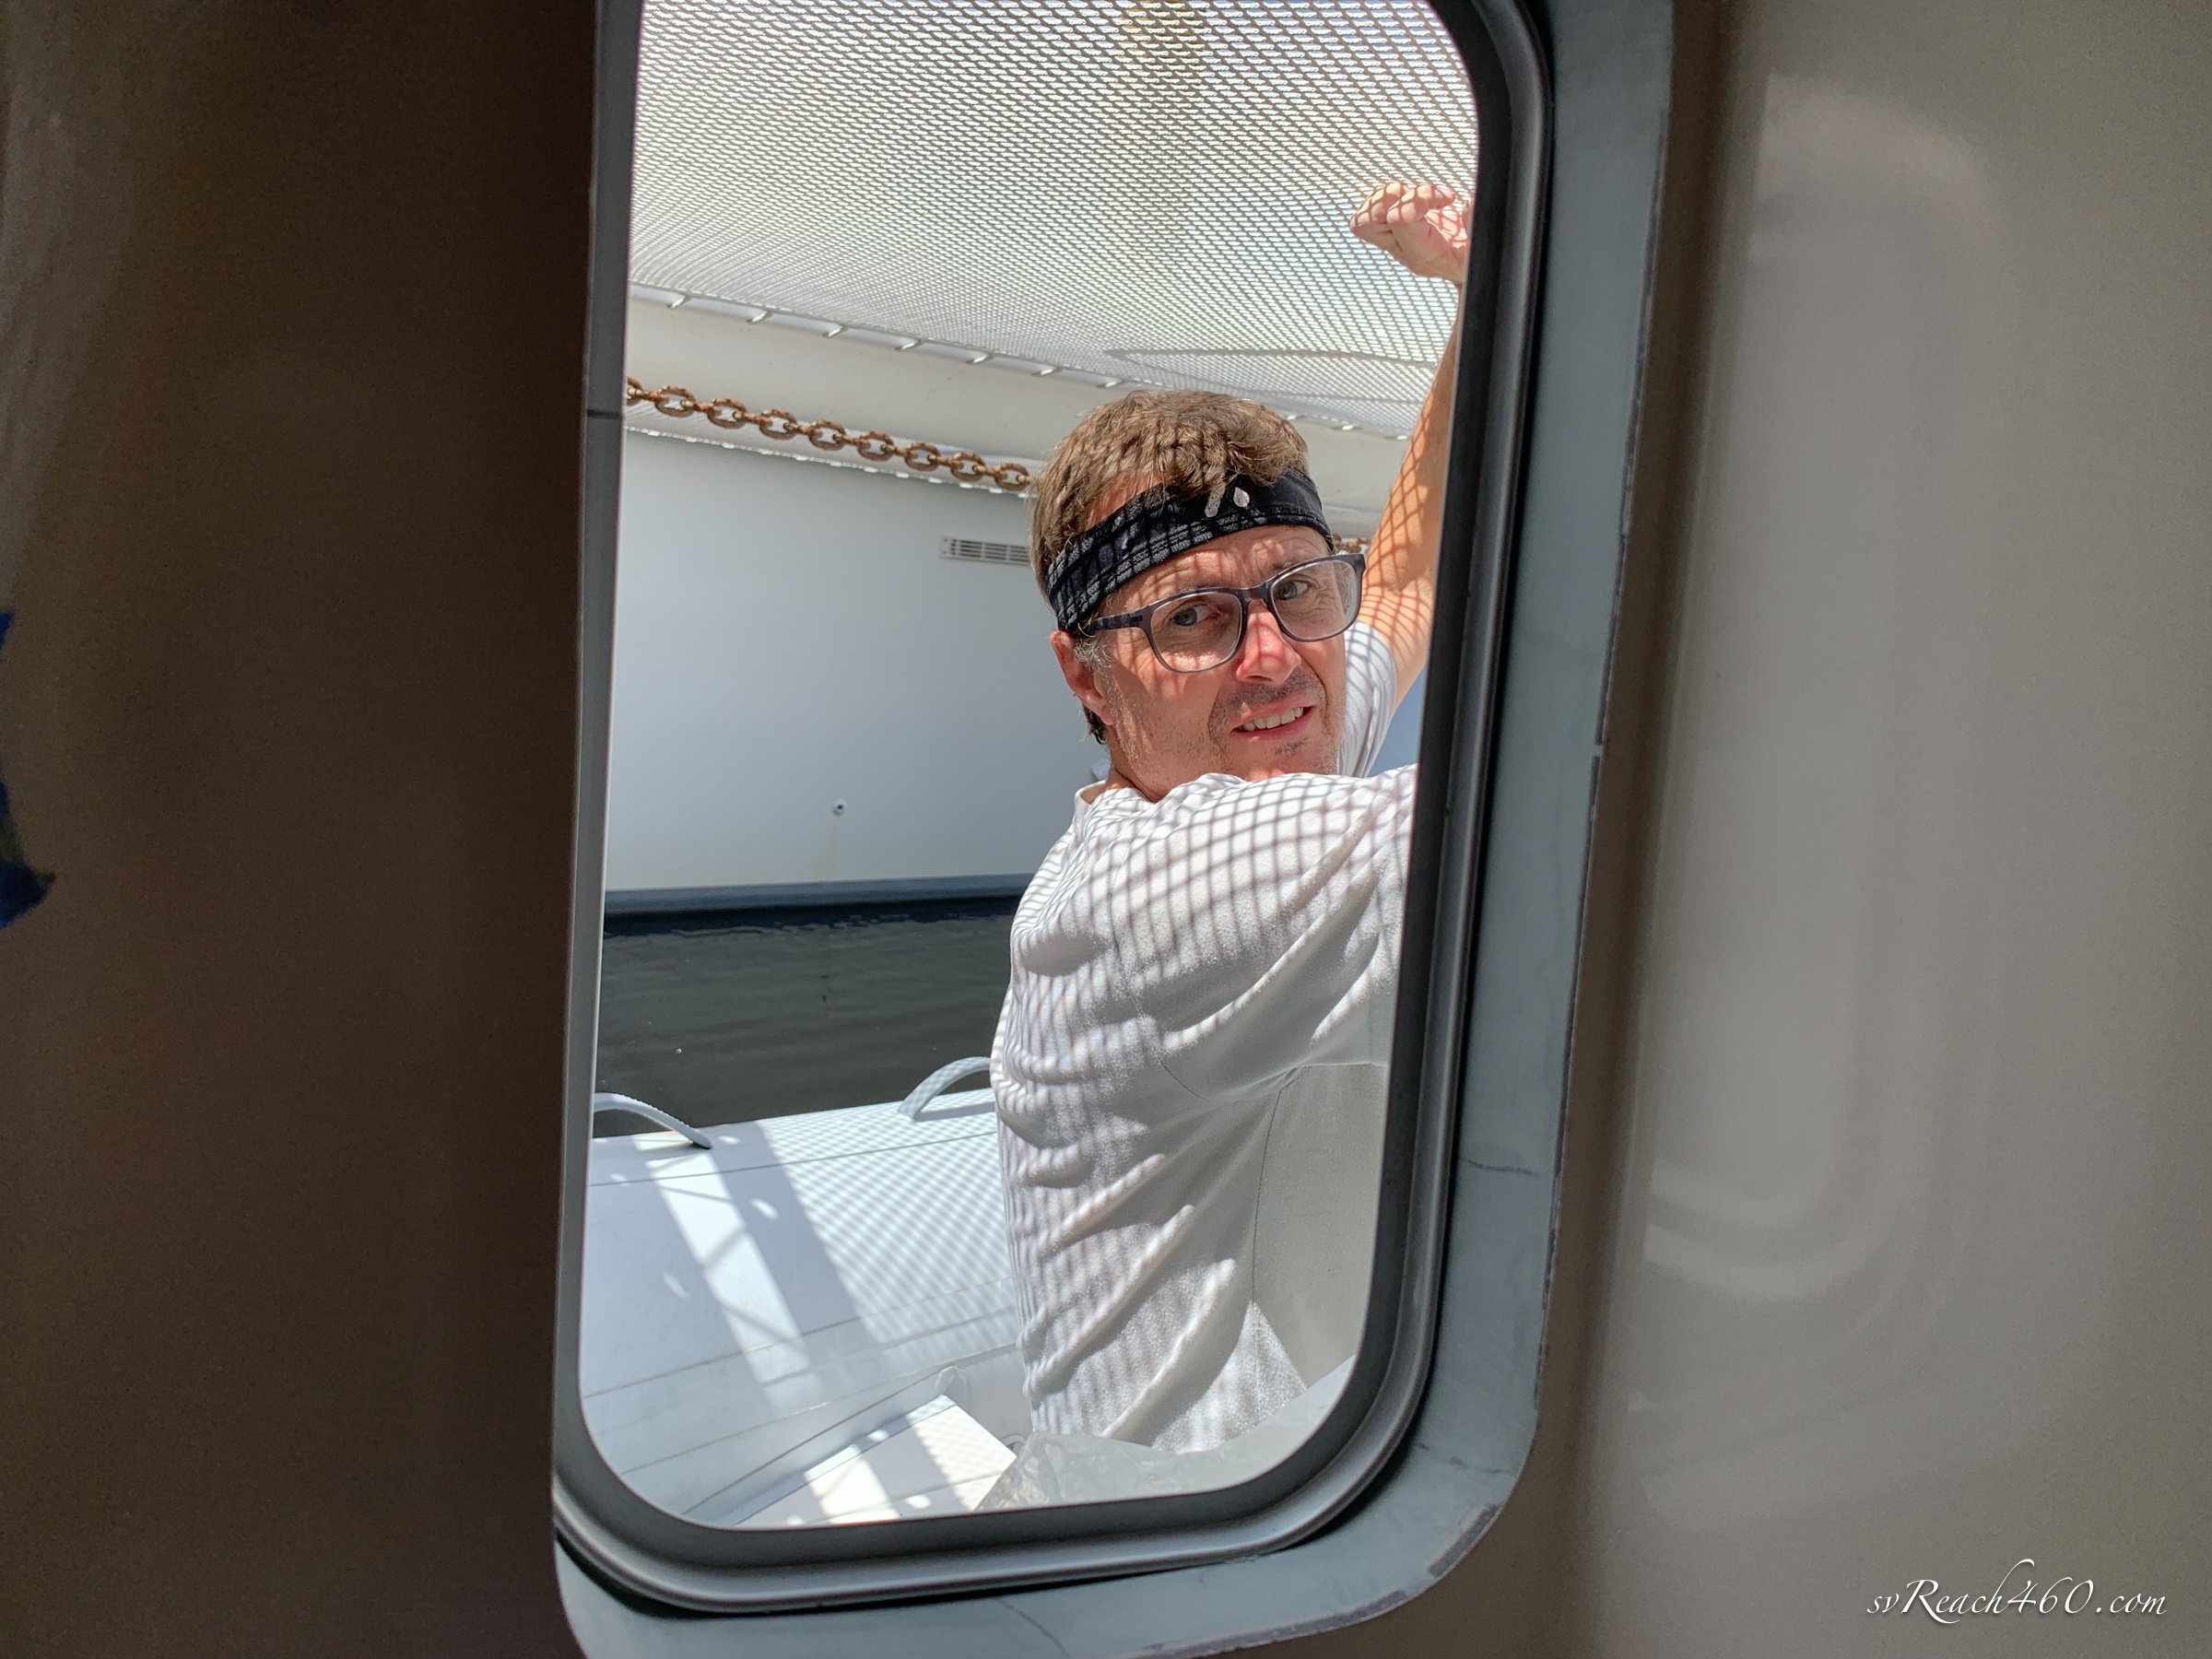
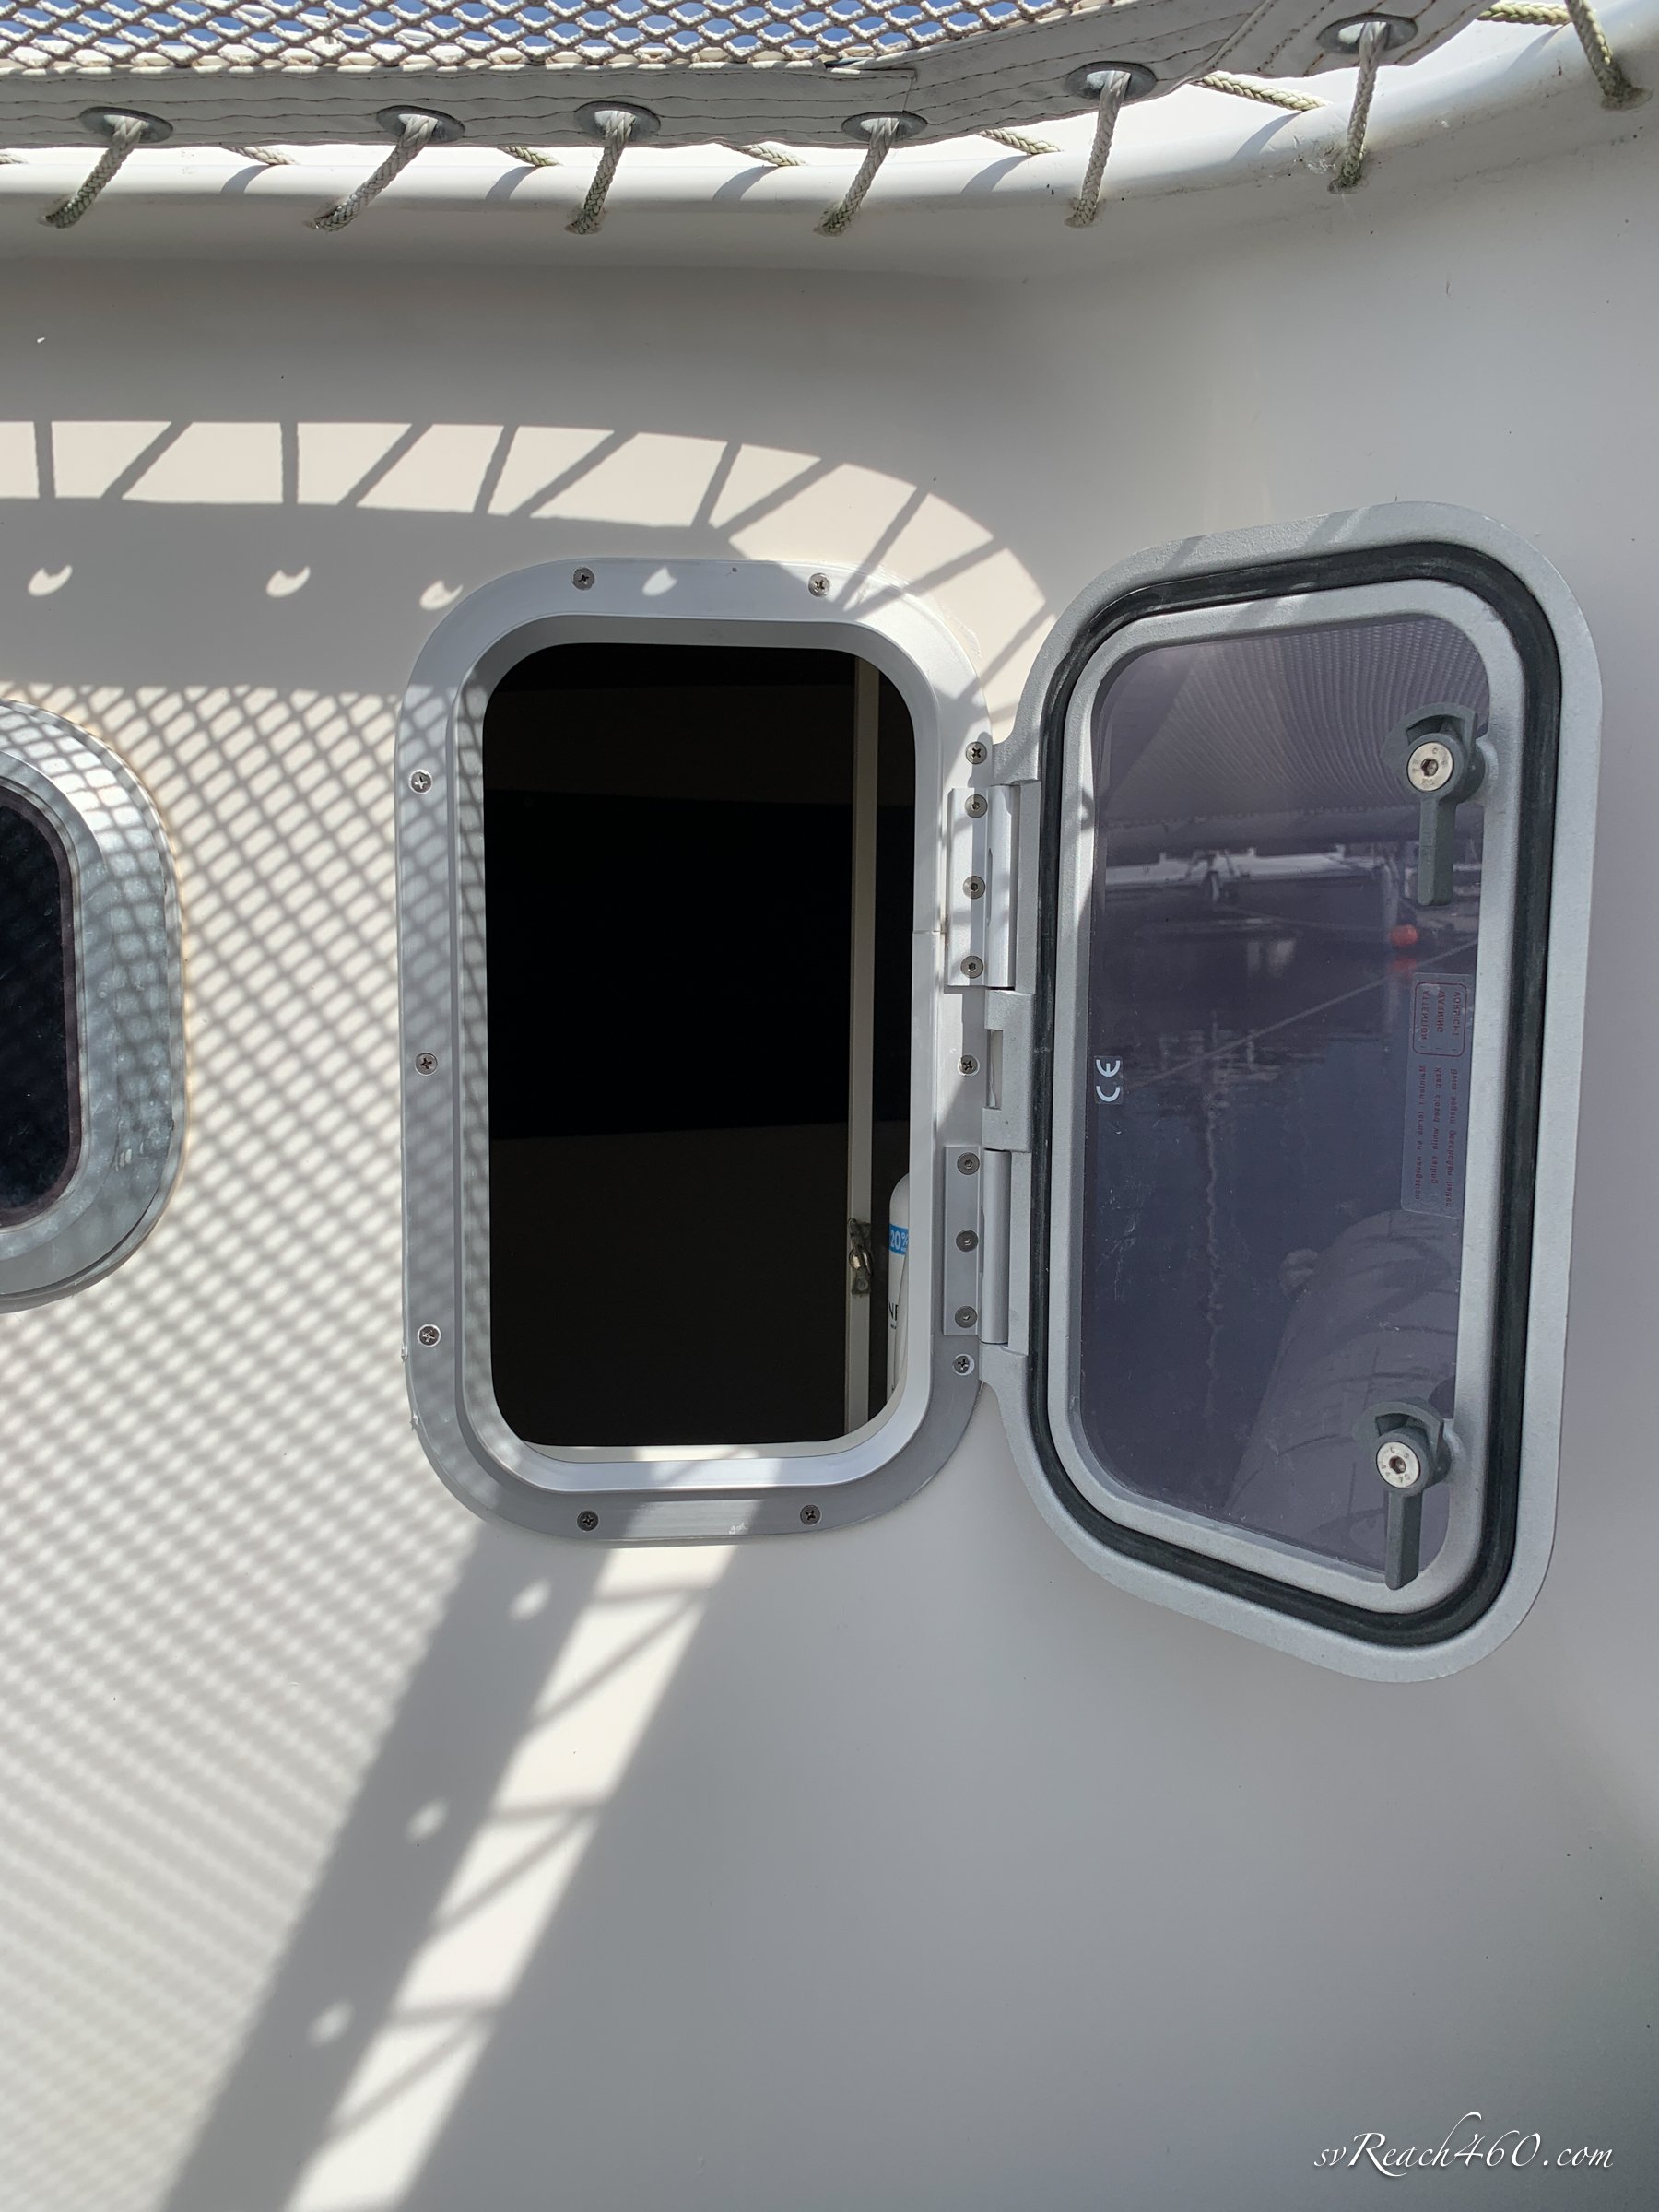
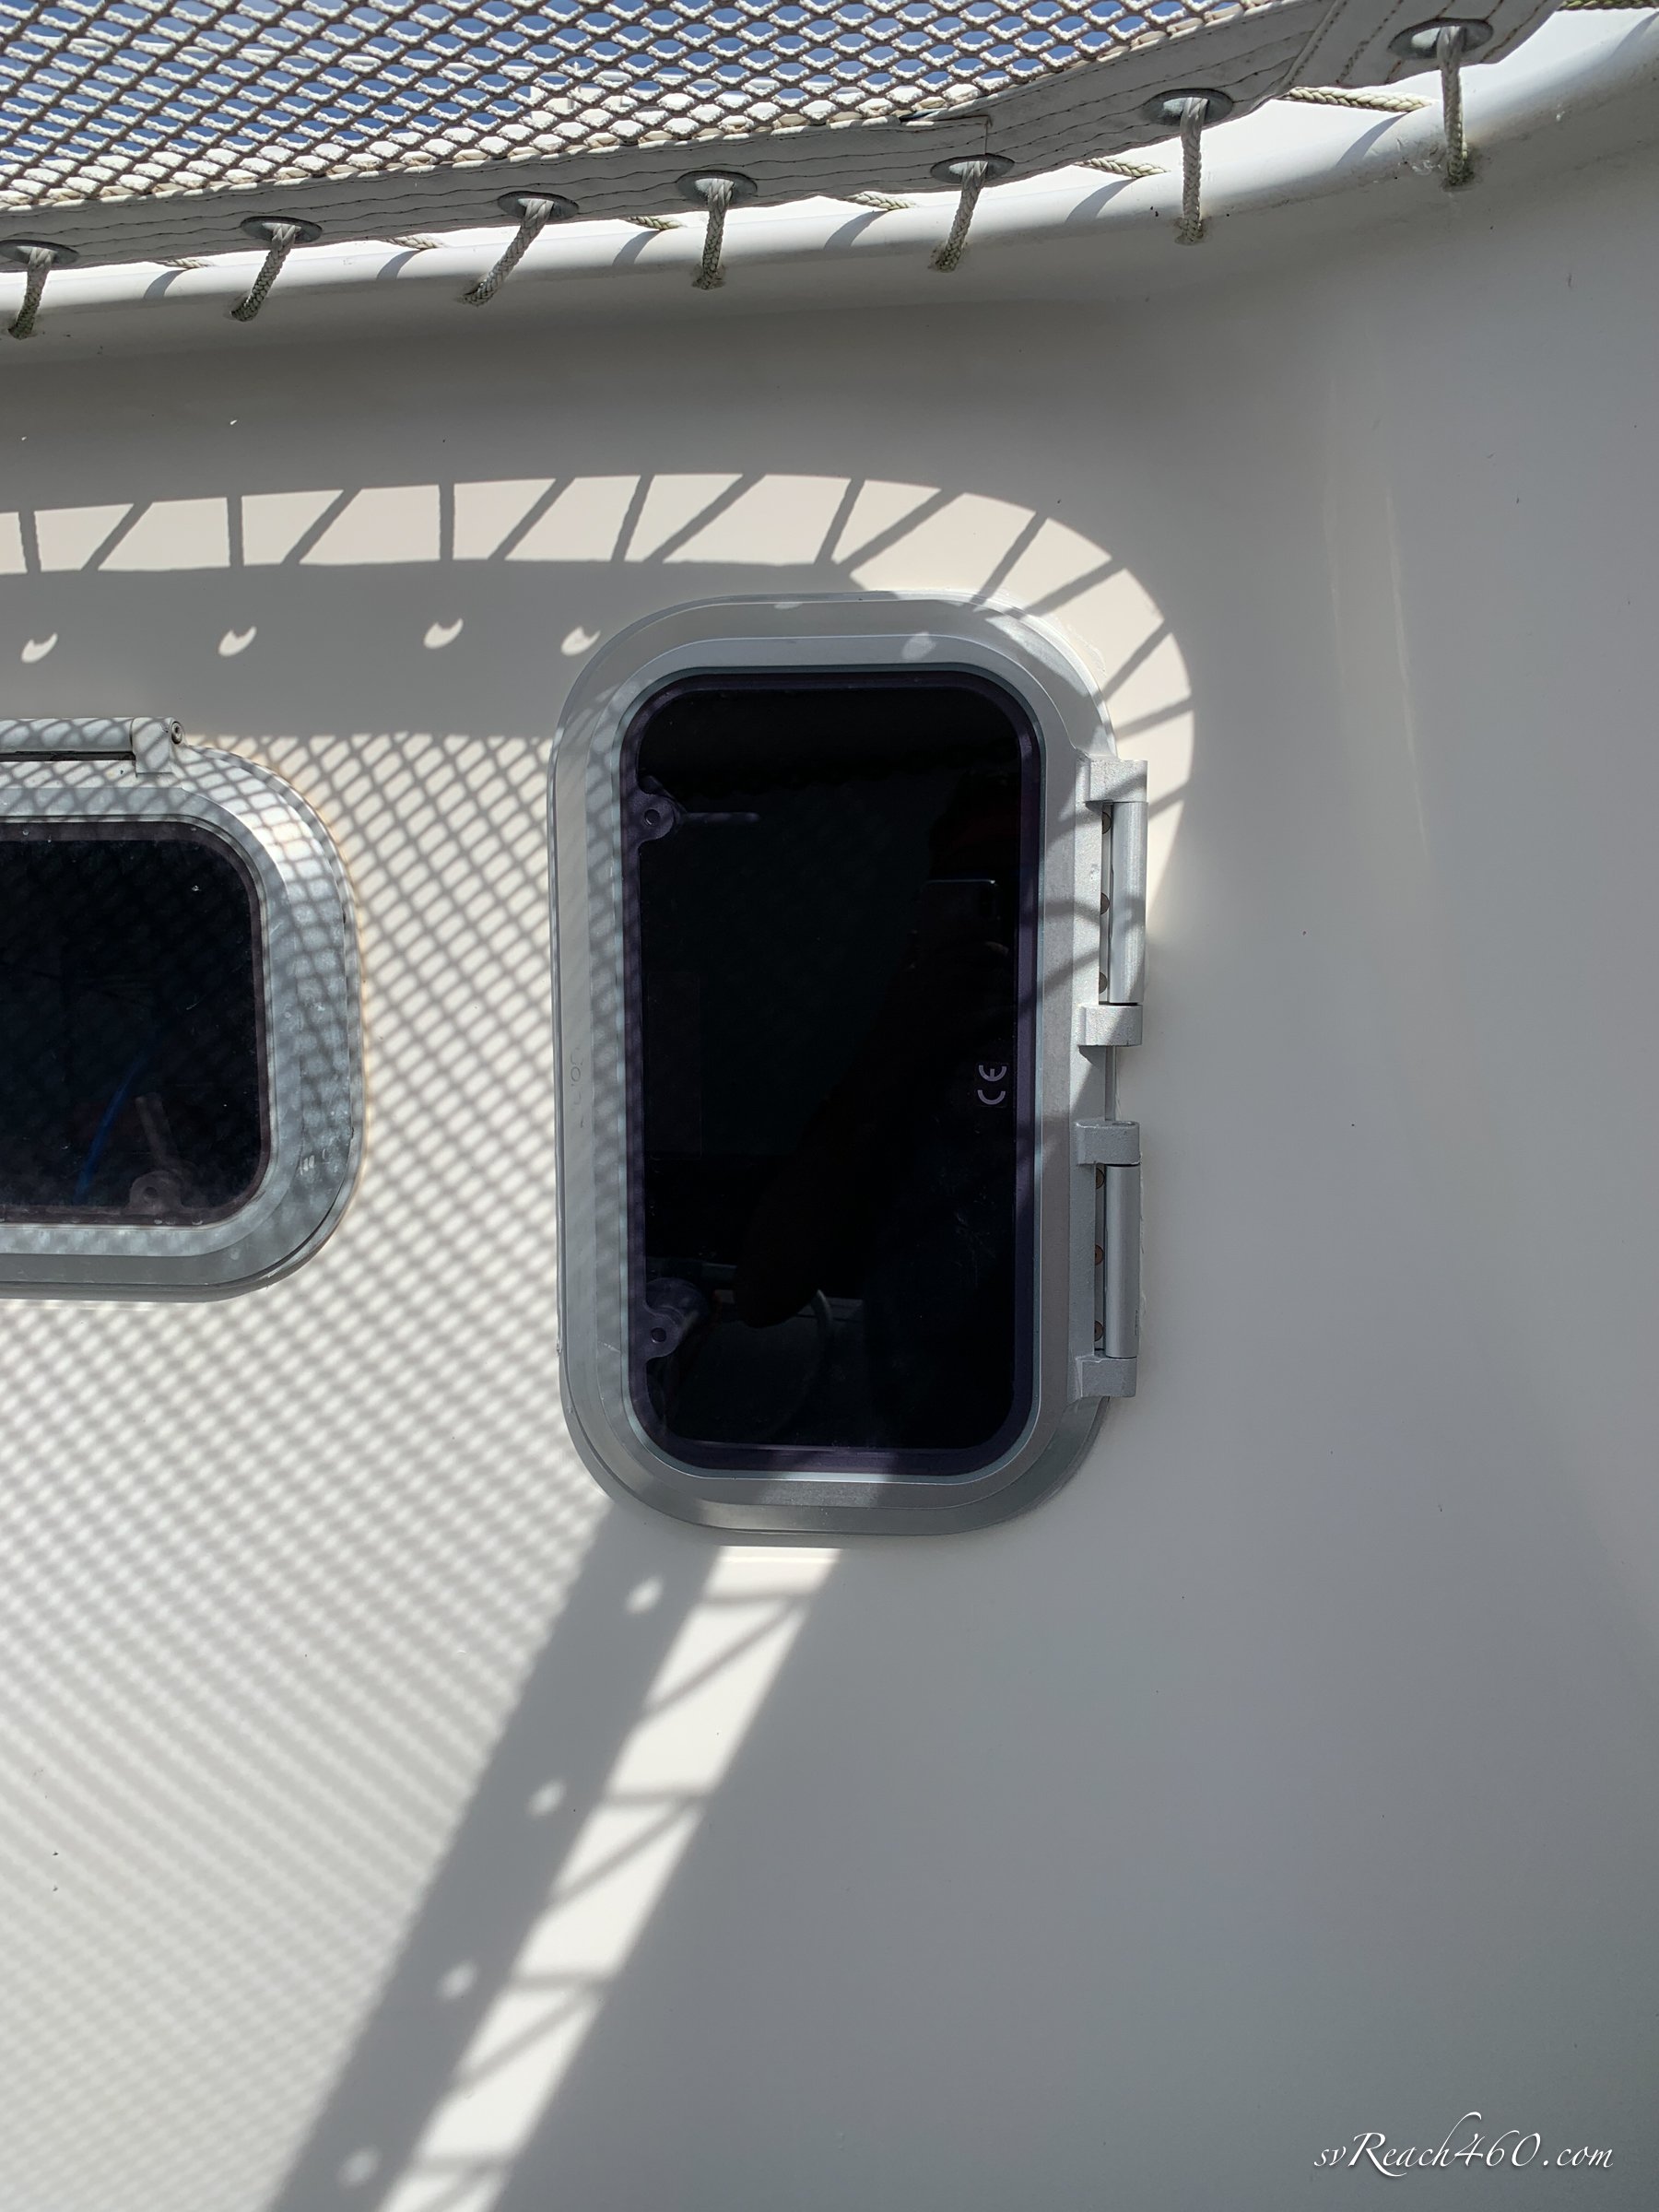
Replace tension rings on all hatches/ports
Make hatch/port screens
Replace Balmar battery monitor with Victron
Re-cut mainsail luff curve
Replace outboard engine
Add surge protection to all circuits
Update eyebrow shades
Replace grill burner and grate
Replace defective material saloon cushions
Fabricate new tiller arms & aluminum clutch base
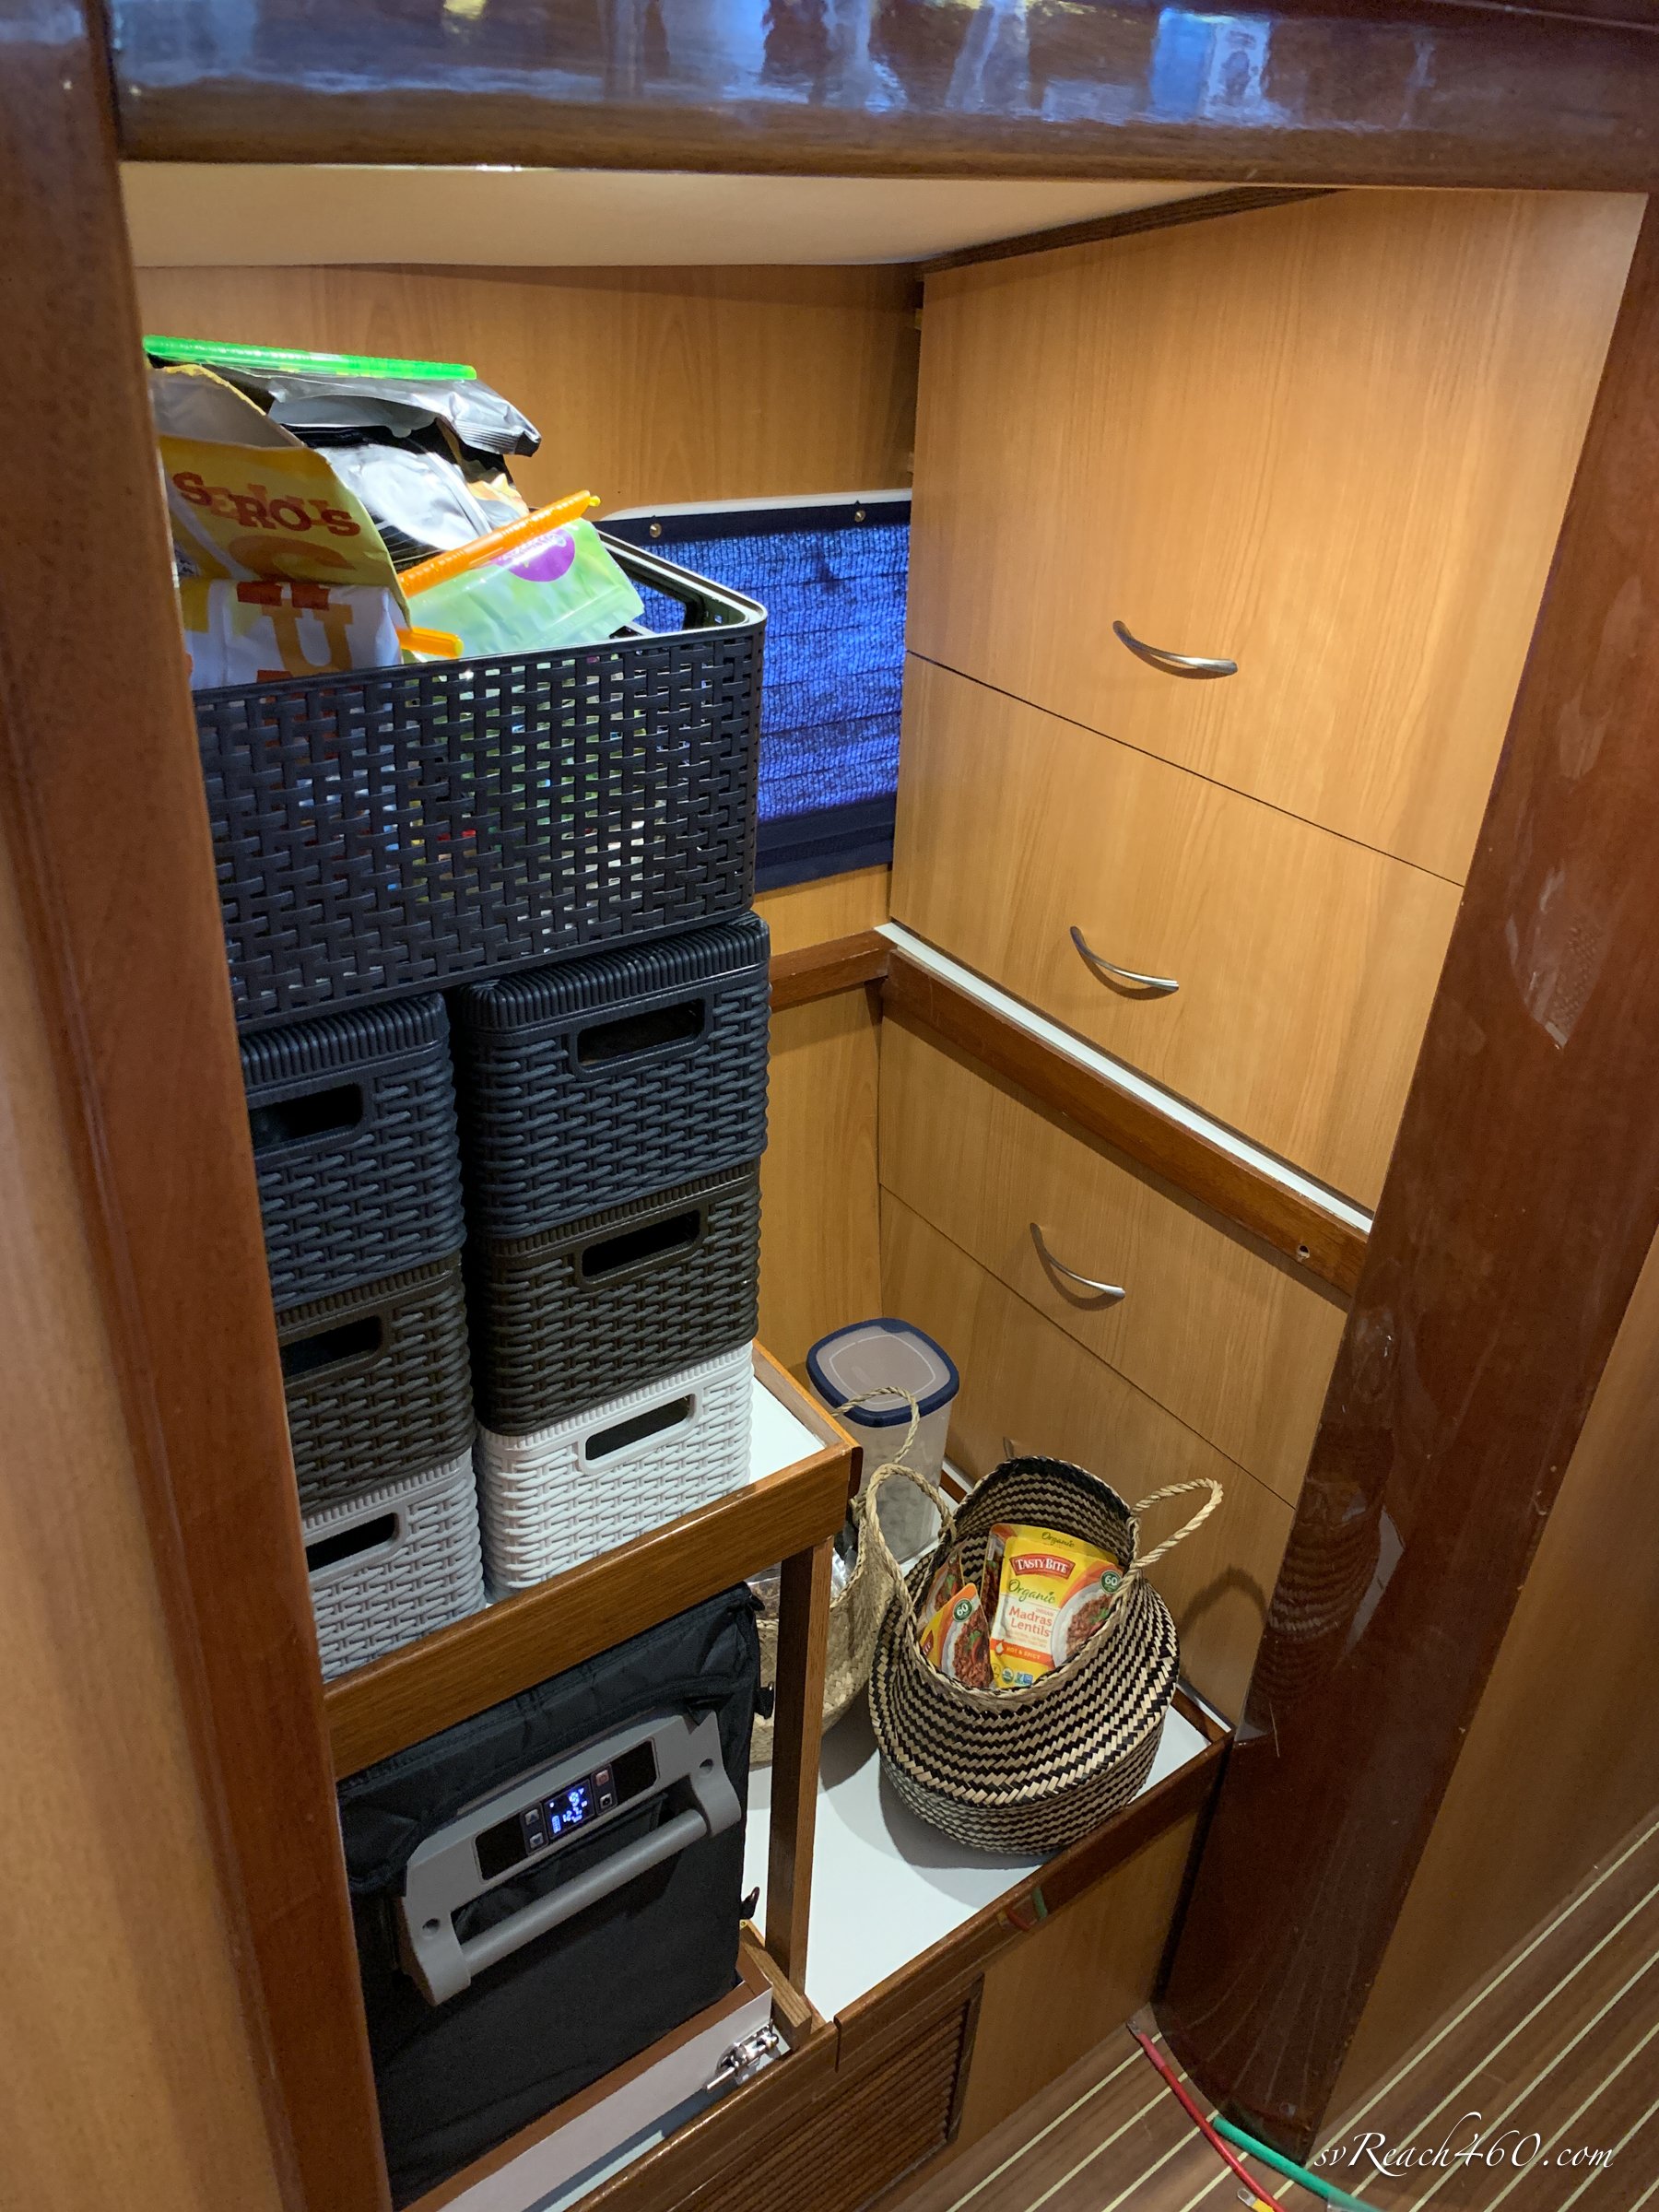
Pantry
For several years, we have been using the port side crew berths as a make-shift pantry. There is plenty of space, yet we never intend to use these as beds and the storage in and under the bunks wasn’t great for access.
Pantry “After”
Mark conceived and built a perfect pantry with easy access to tools and equipment under the bench, a pull-out freezer and super strong pull-out drawers (you can sit in them!). Being in a curved hull, the angles were tricky all-around.
The result is super functional and gorgeous to boot. Mark was even able to source paneling from Europe that matched our interior. This project was one of two game changers for life aboard Reach.
The process from start to finish:


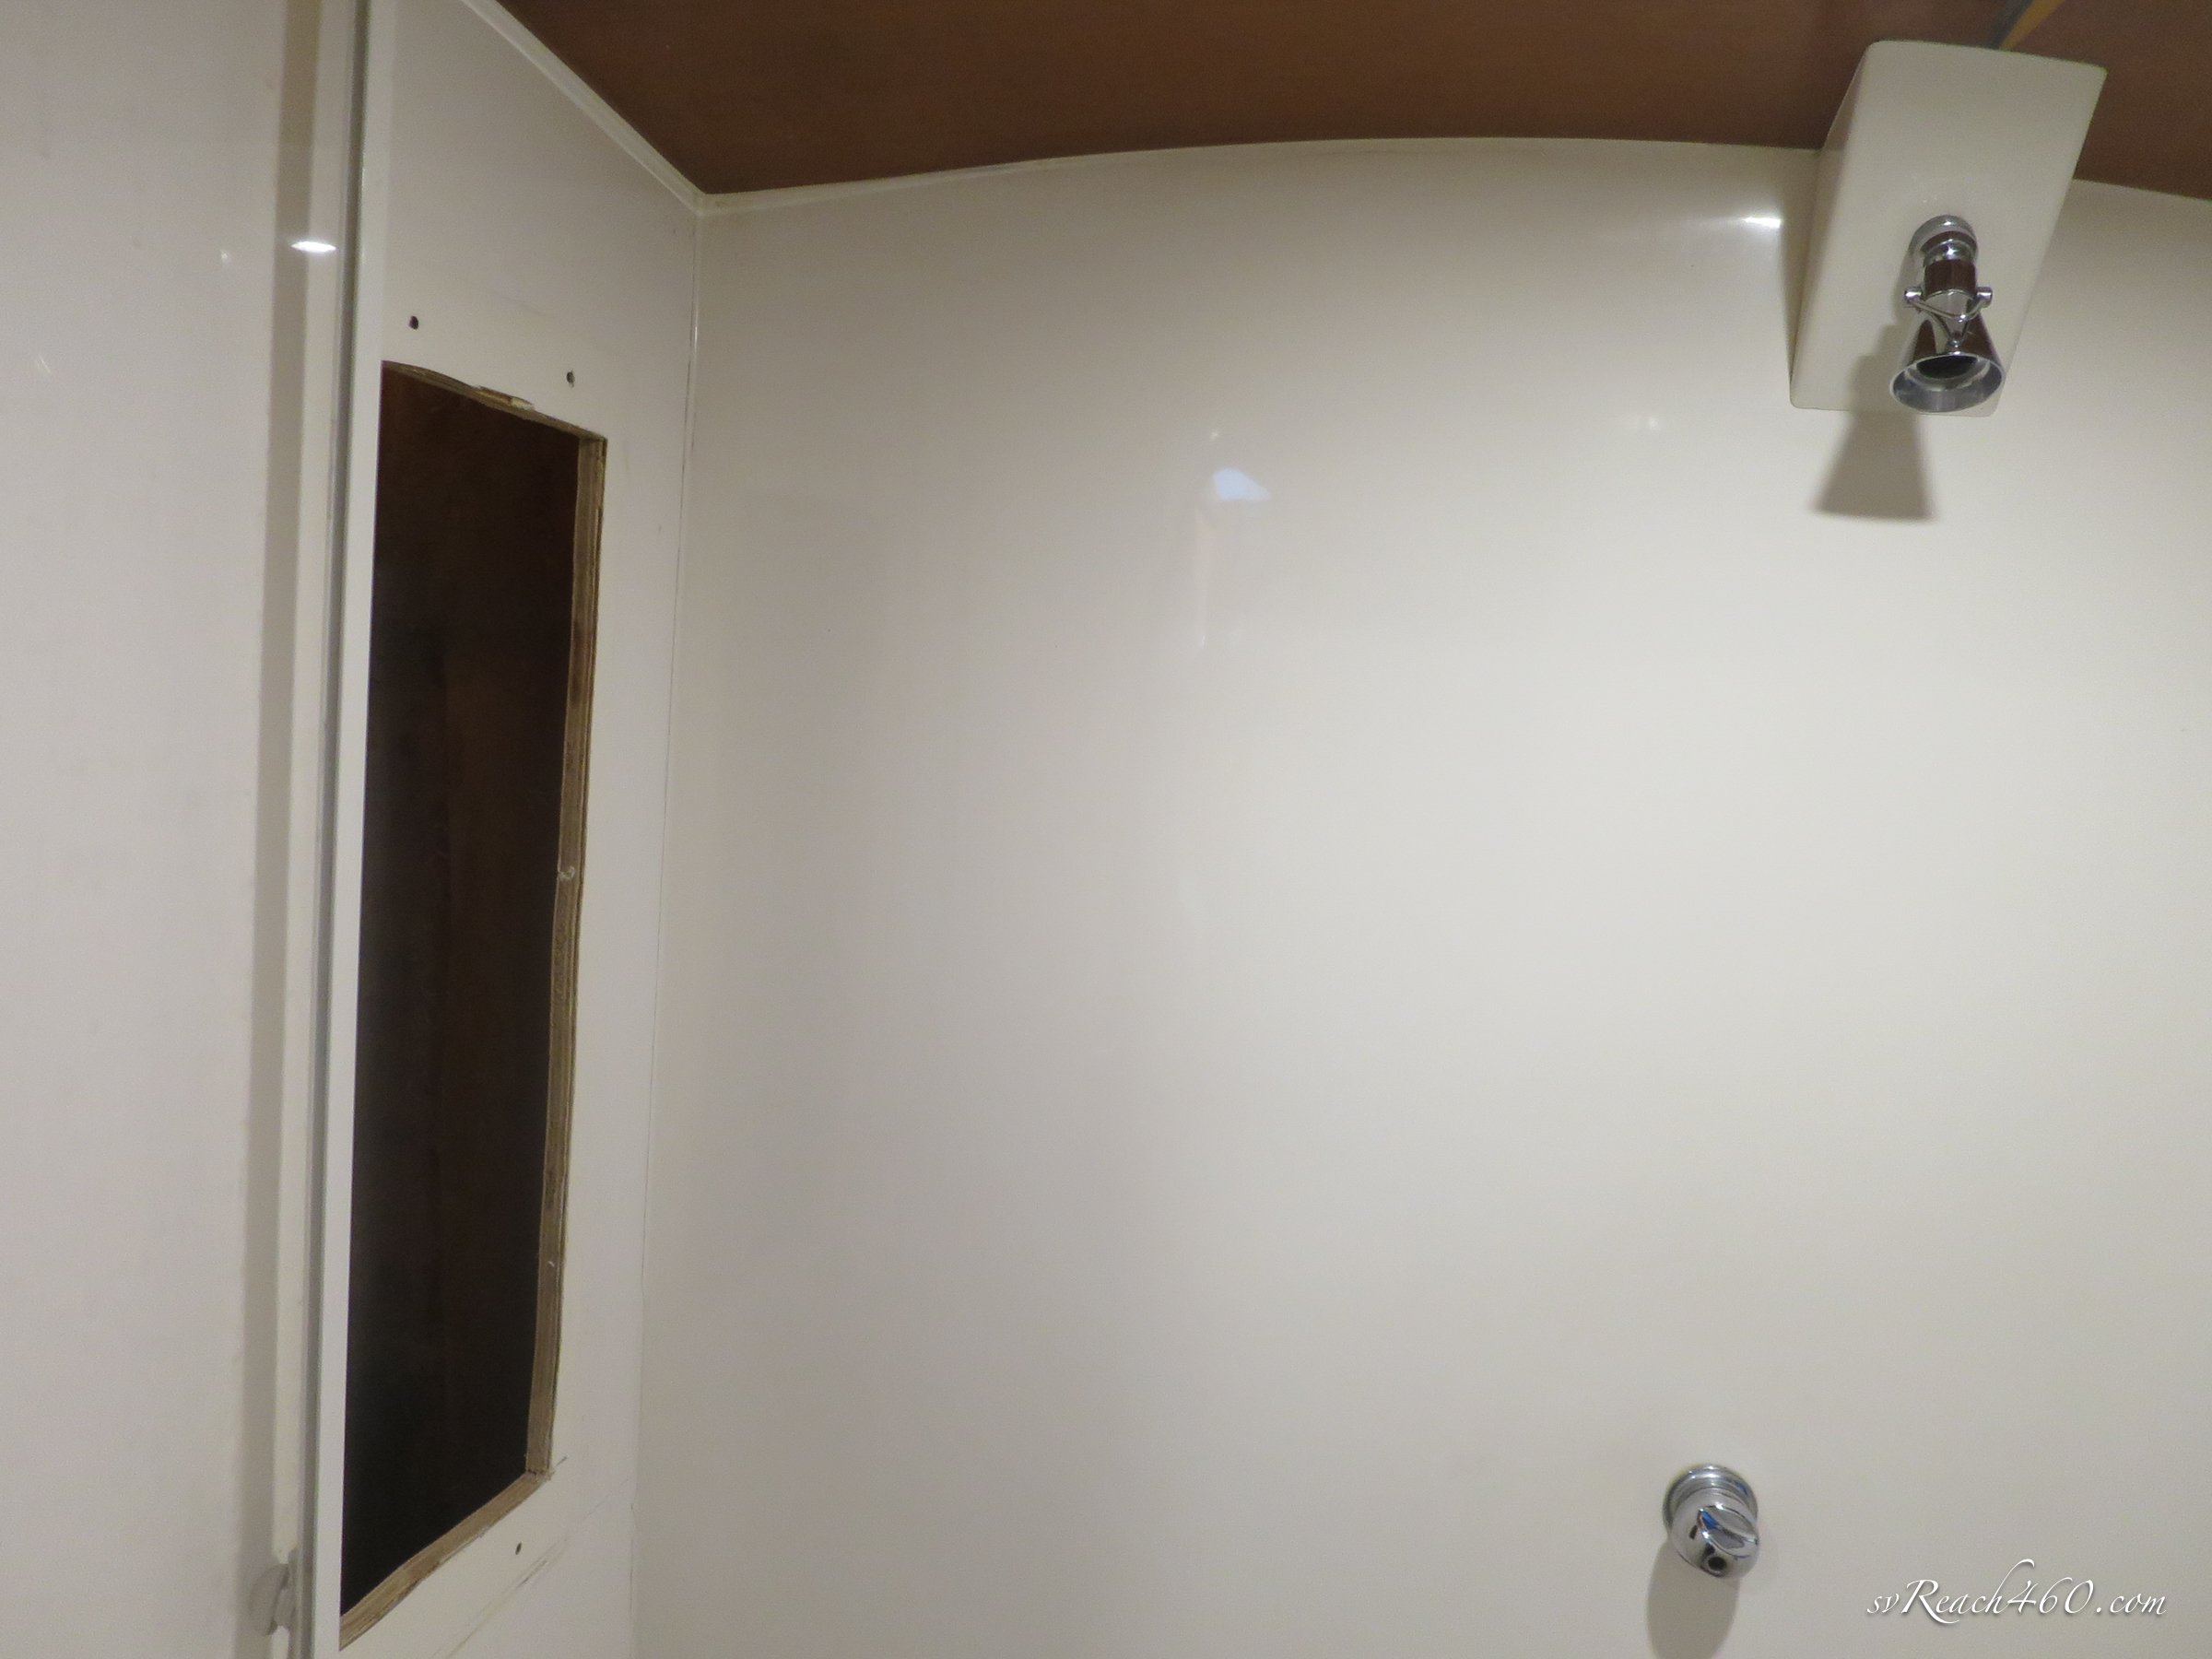
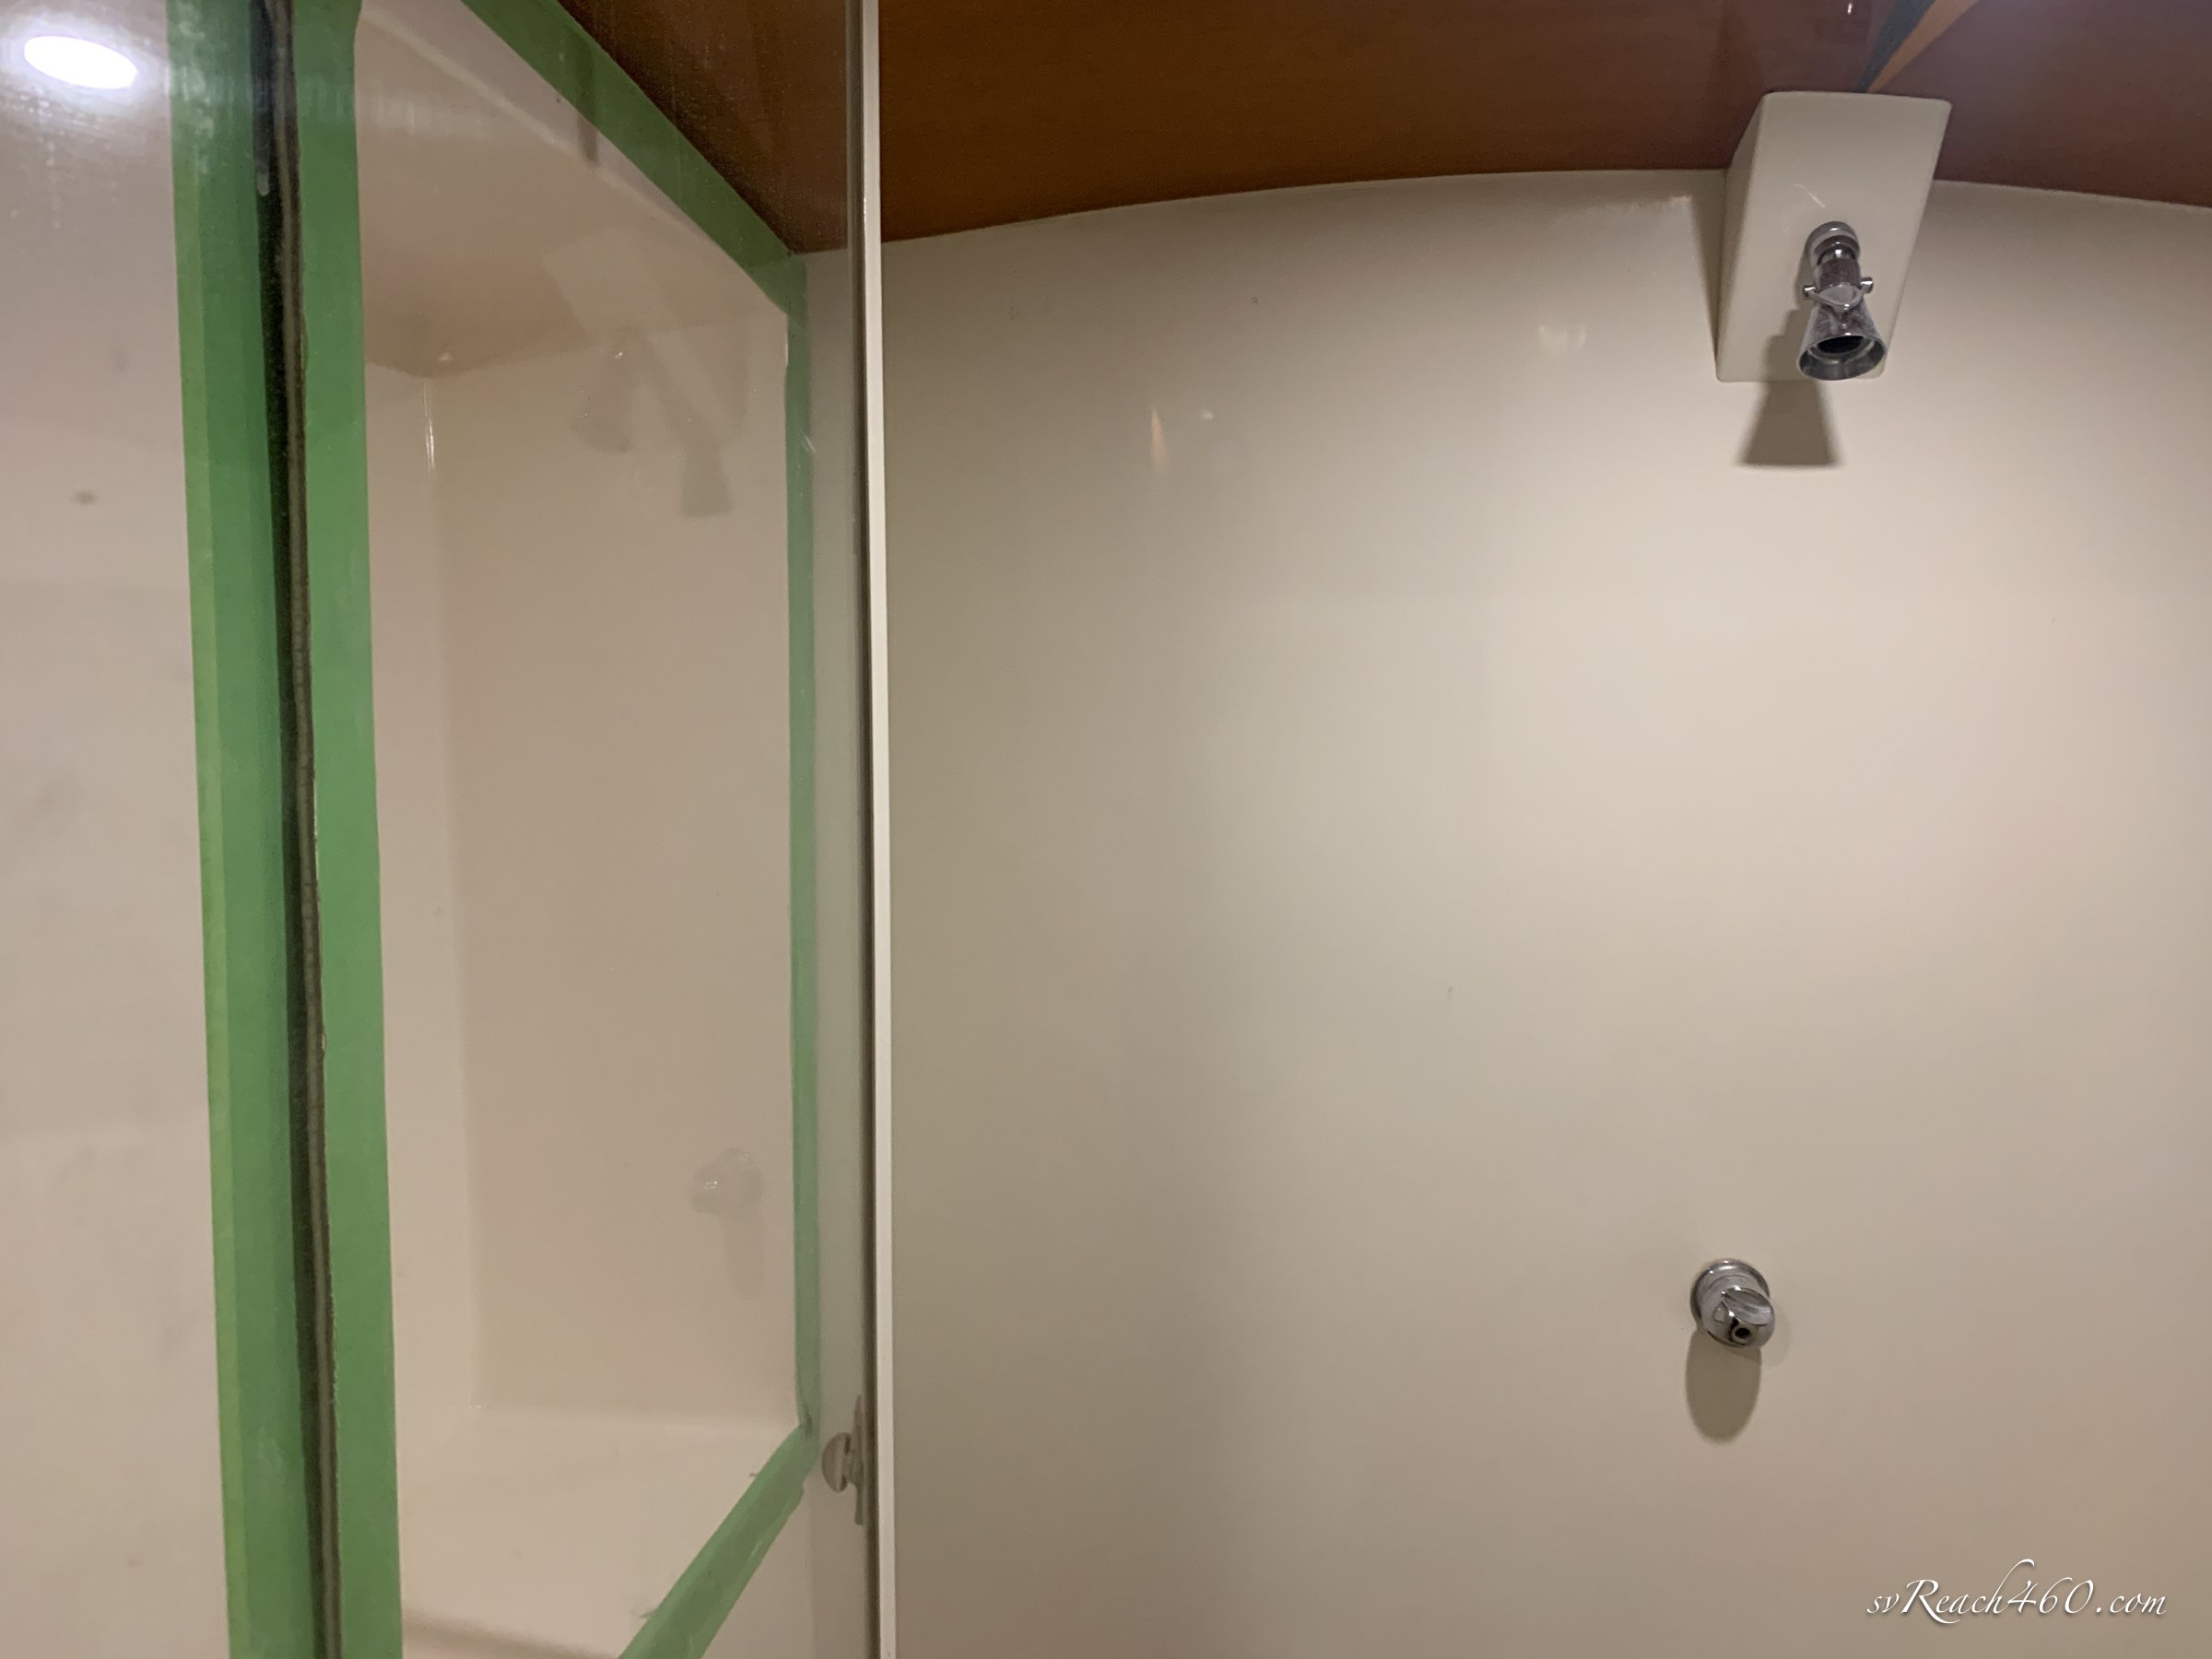
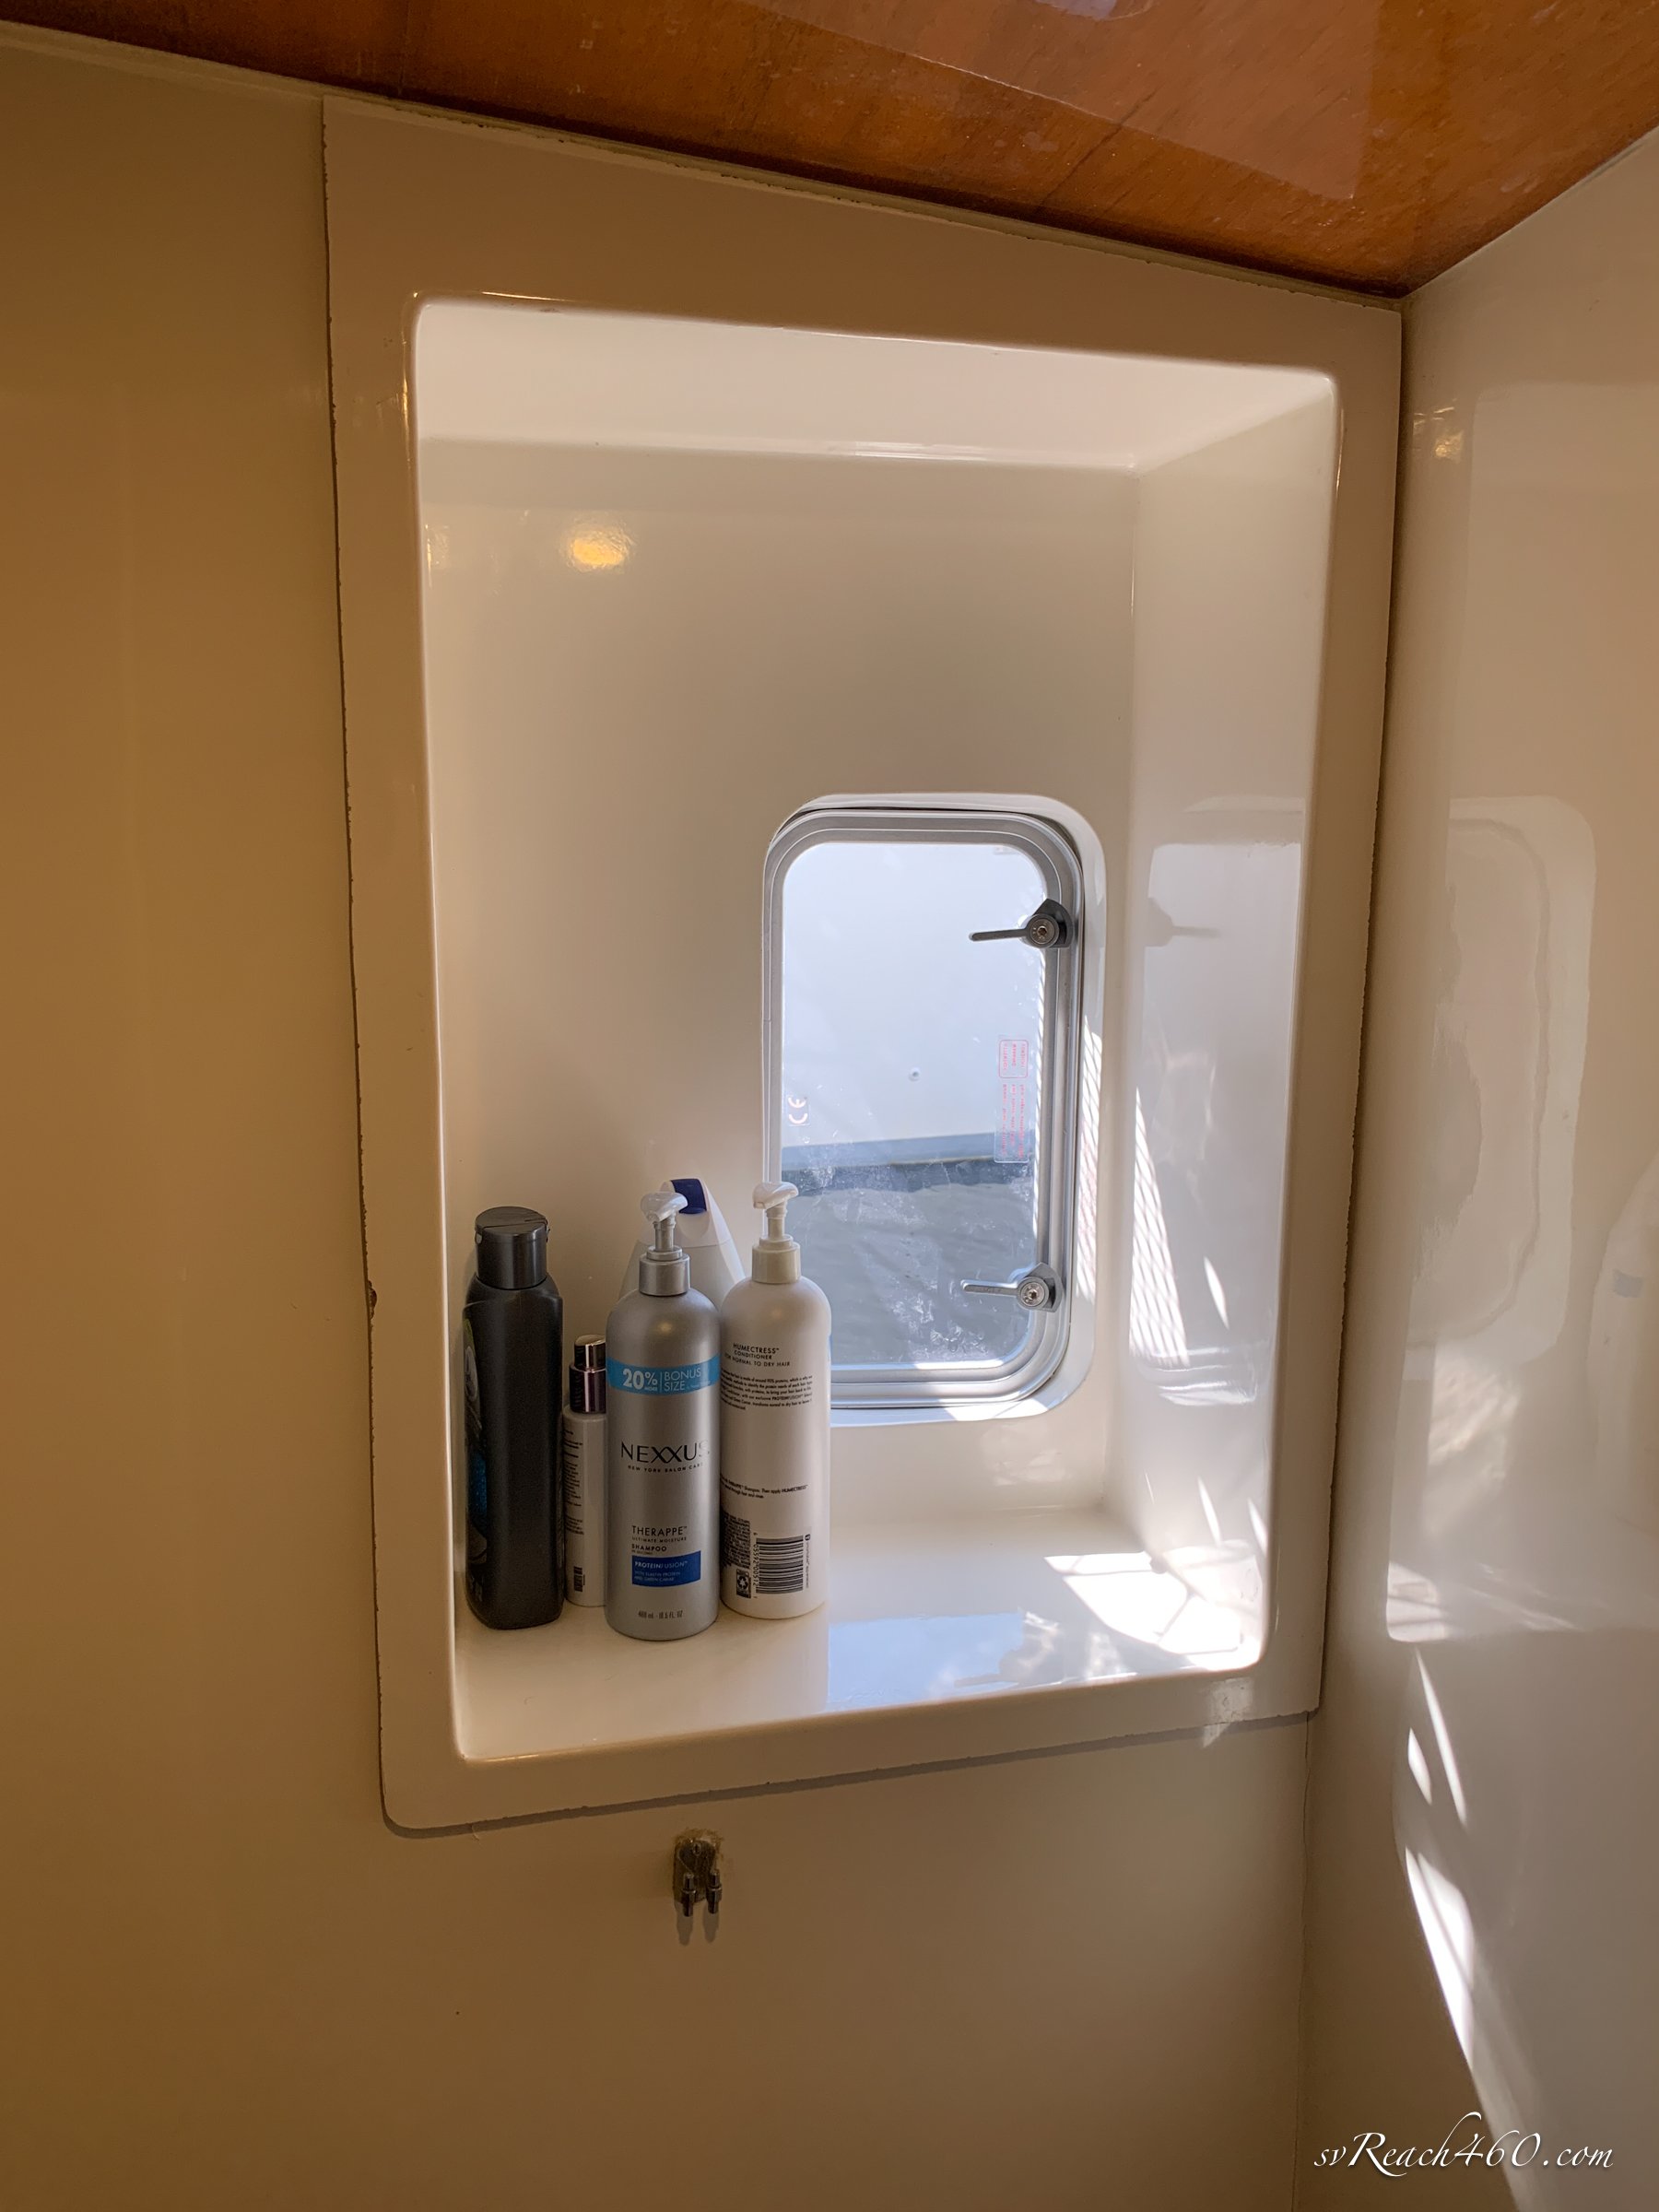
Shower Hatch
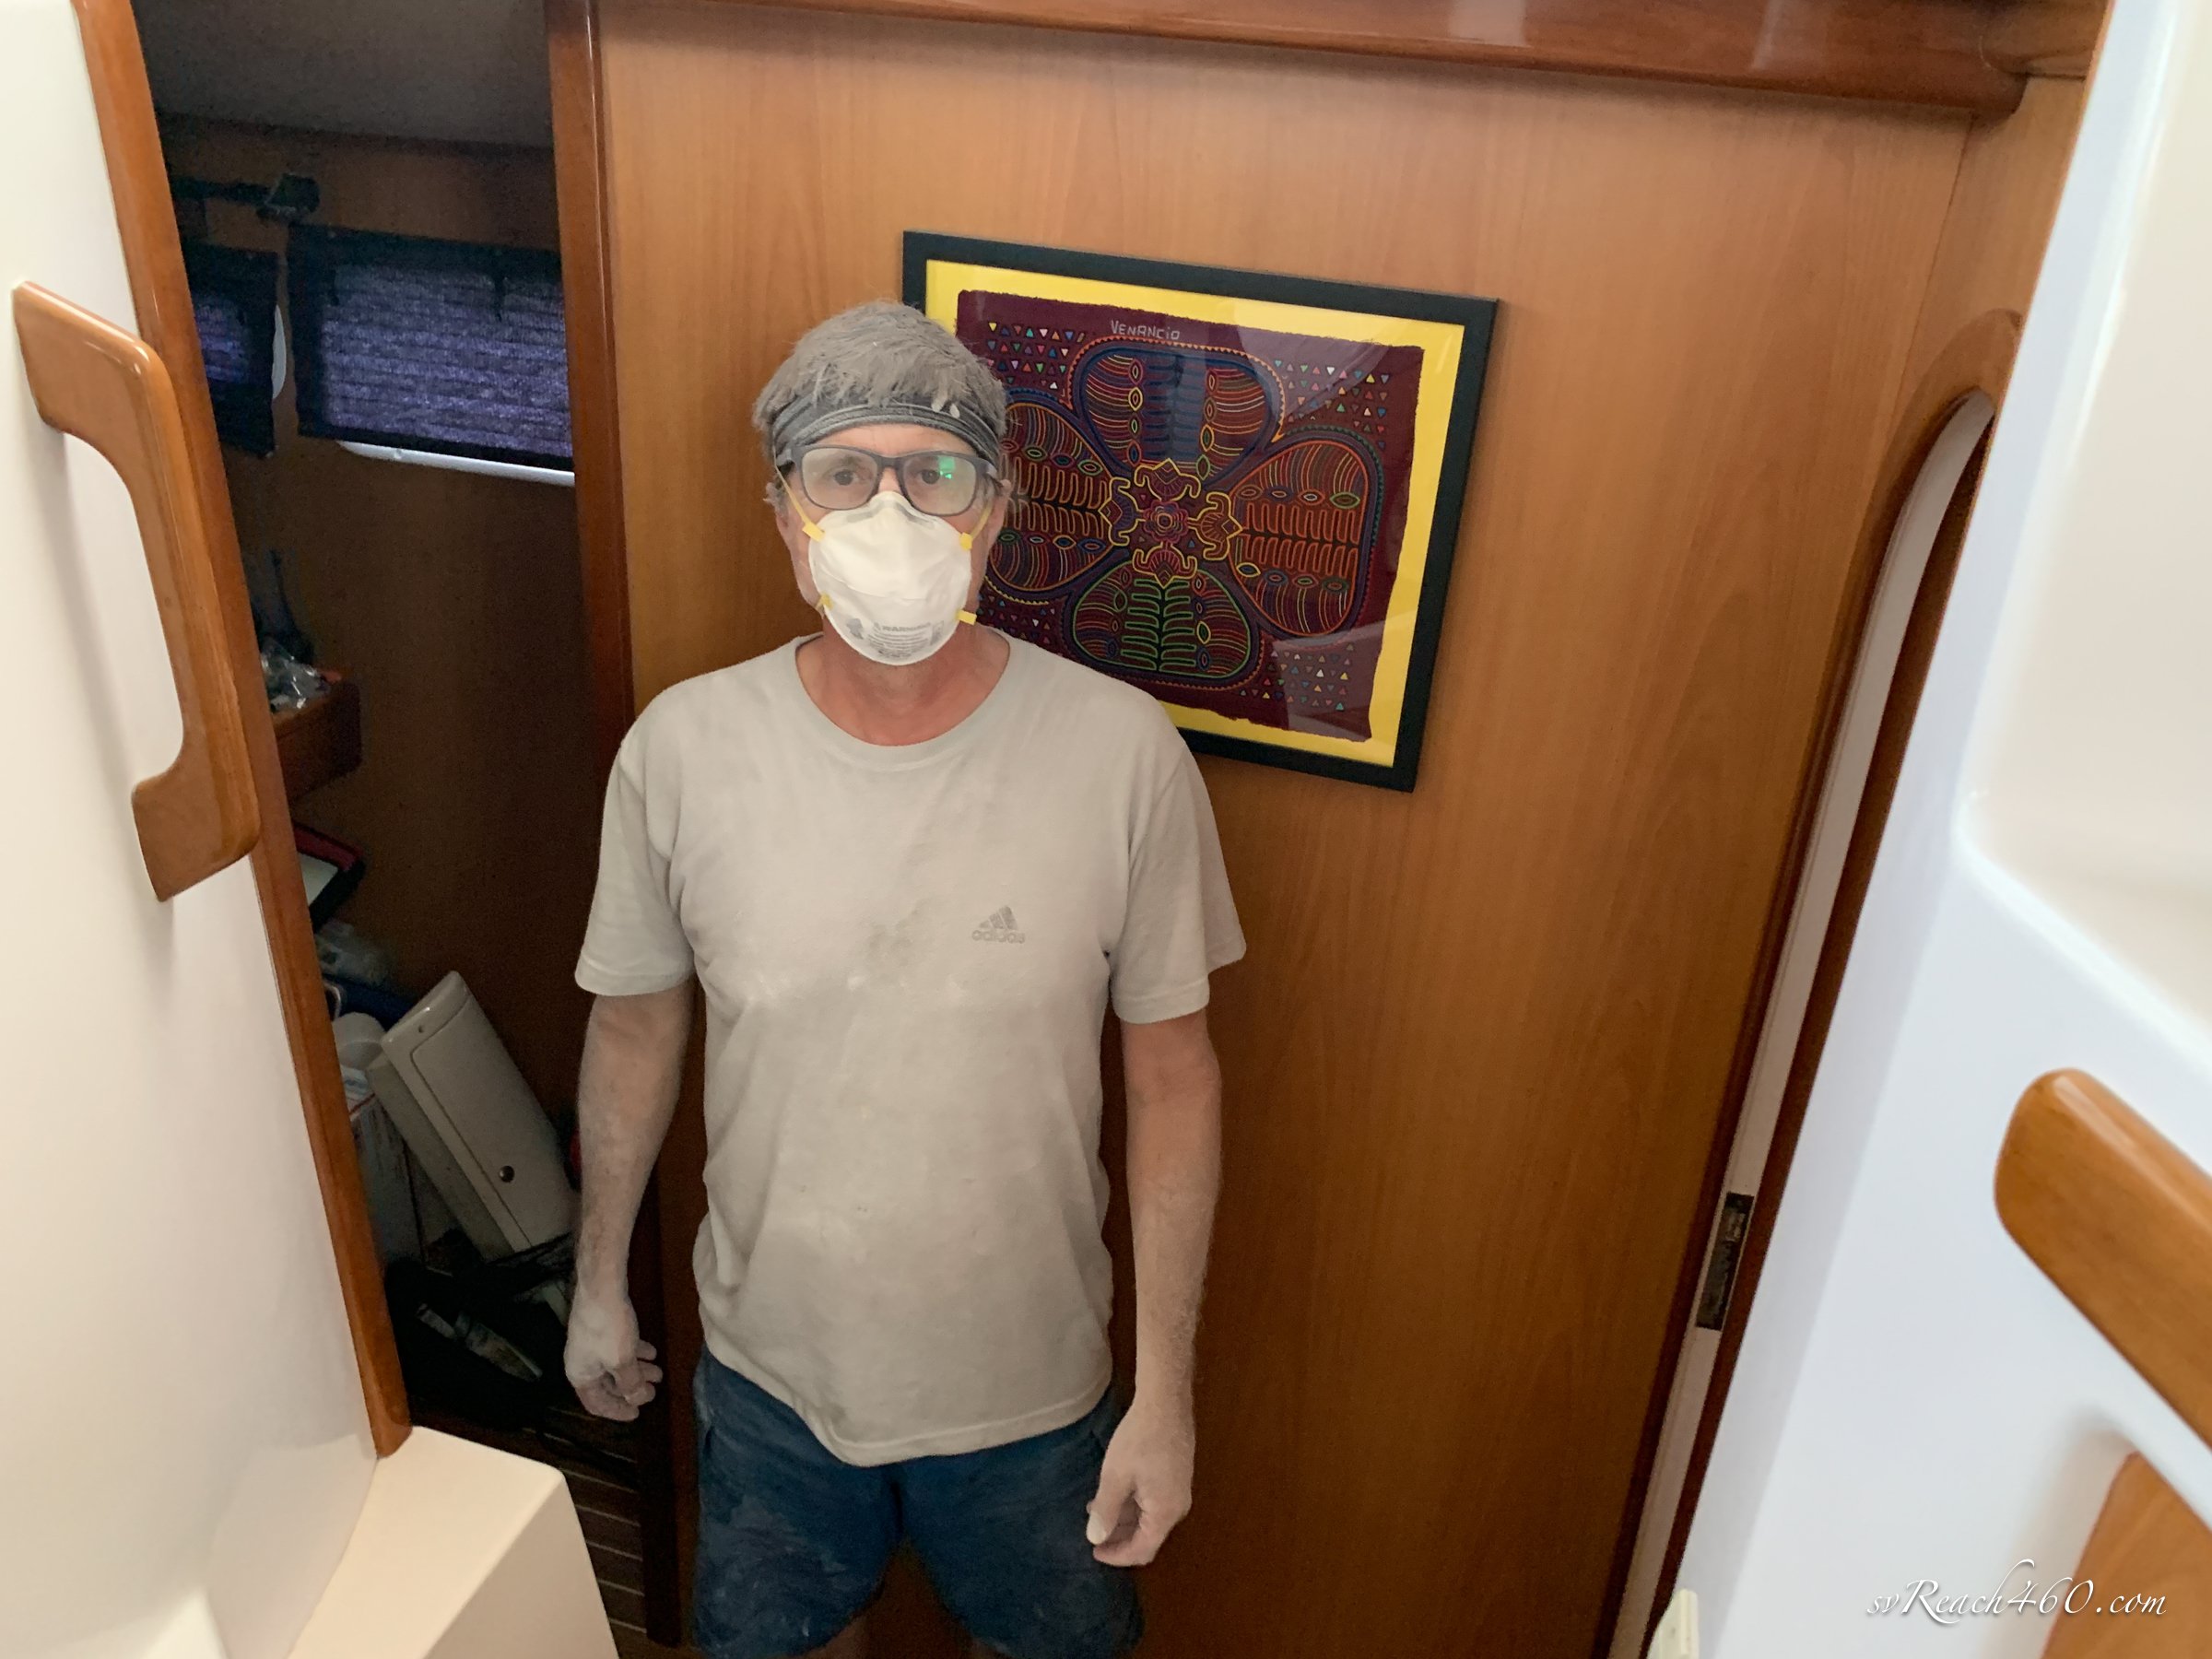
My favorite project!
This project wins the prize for the best of the year!
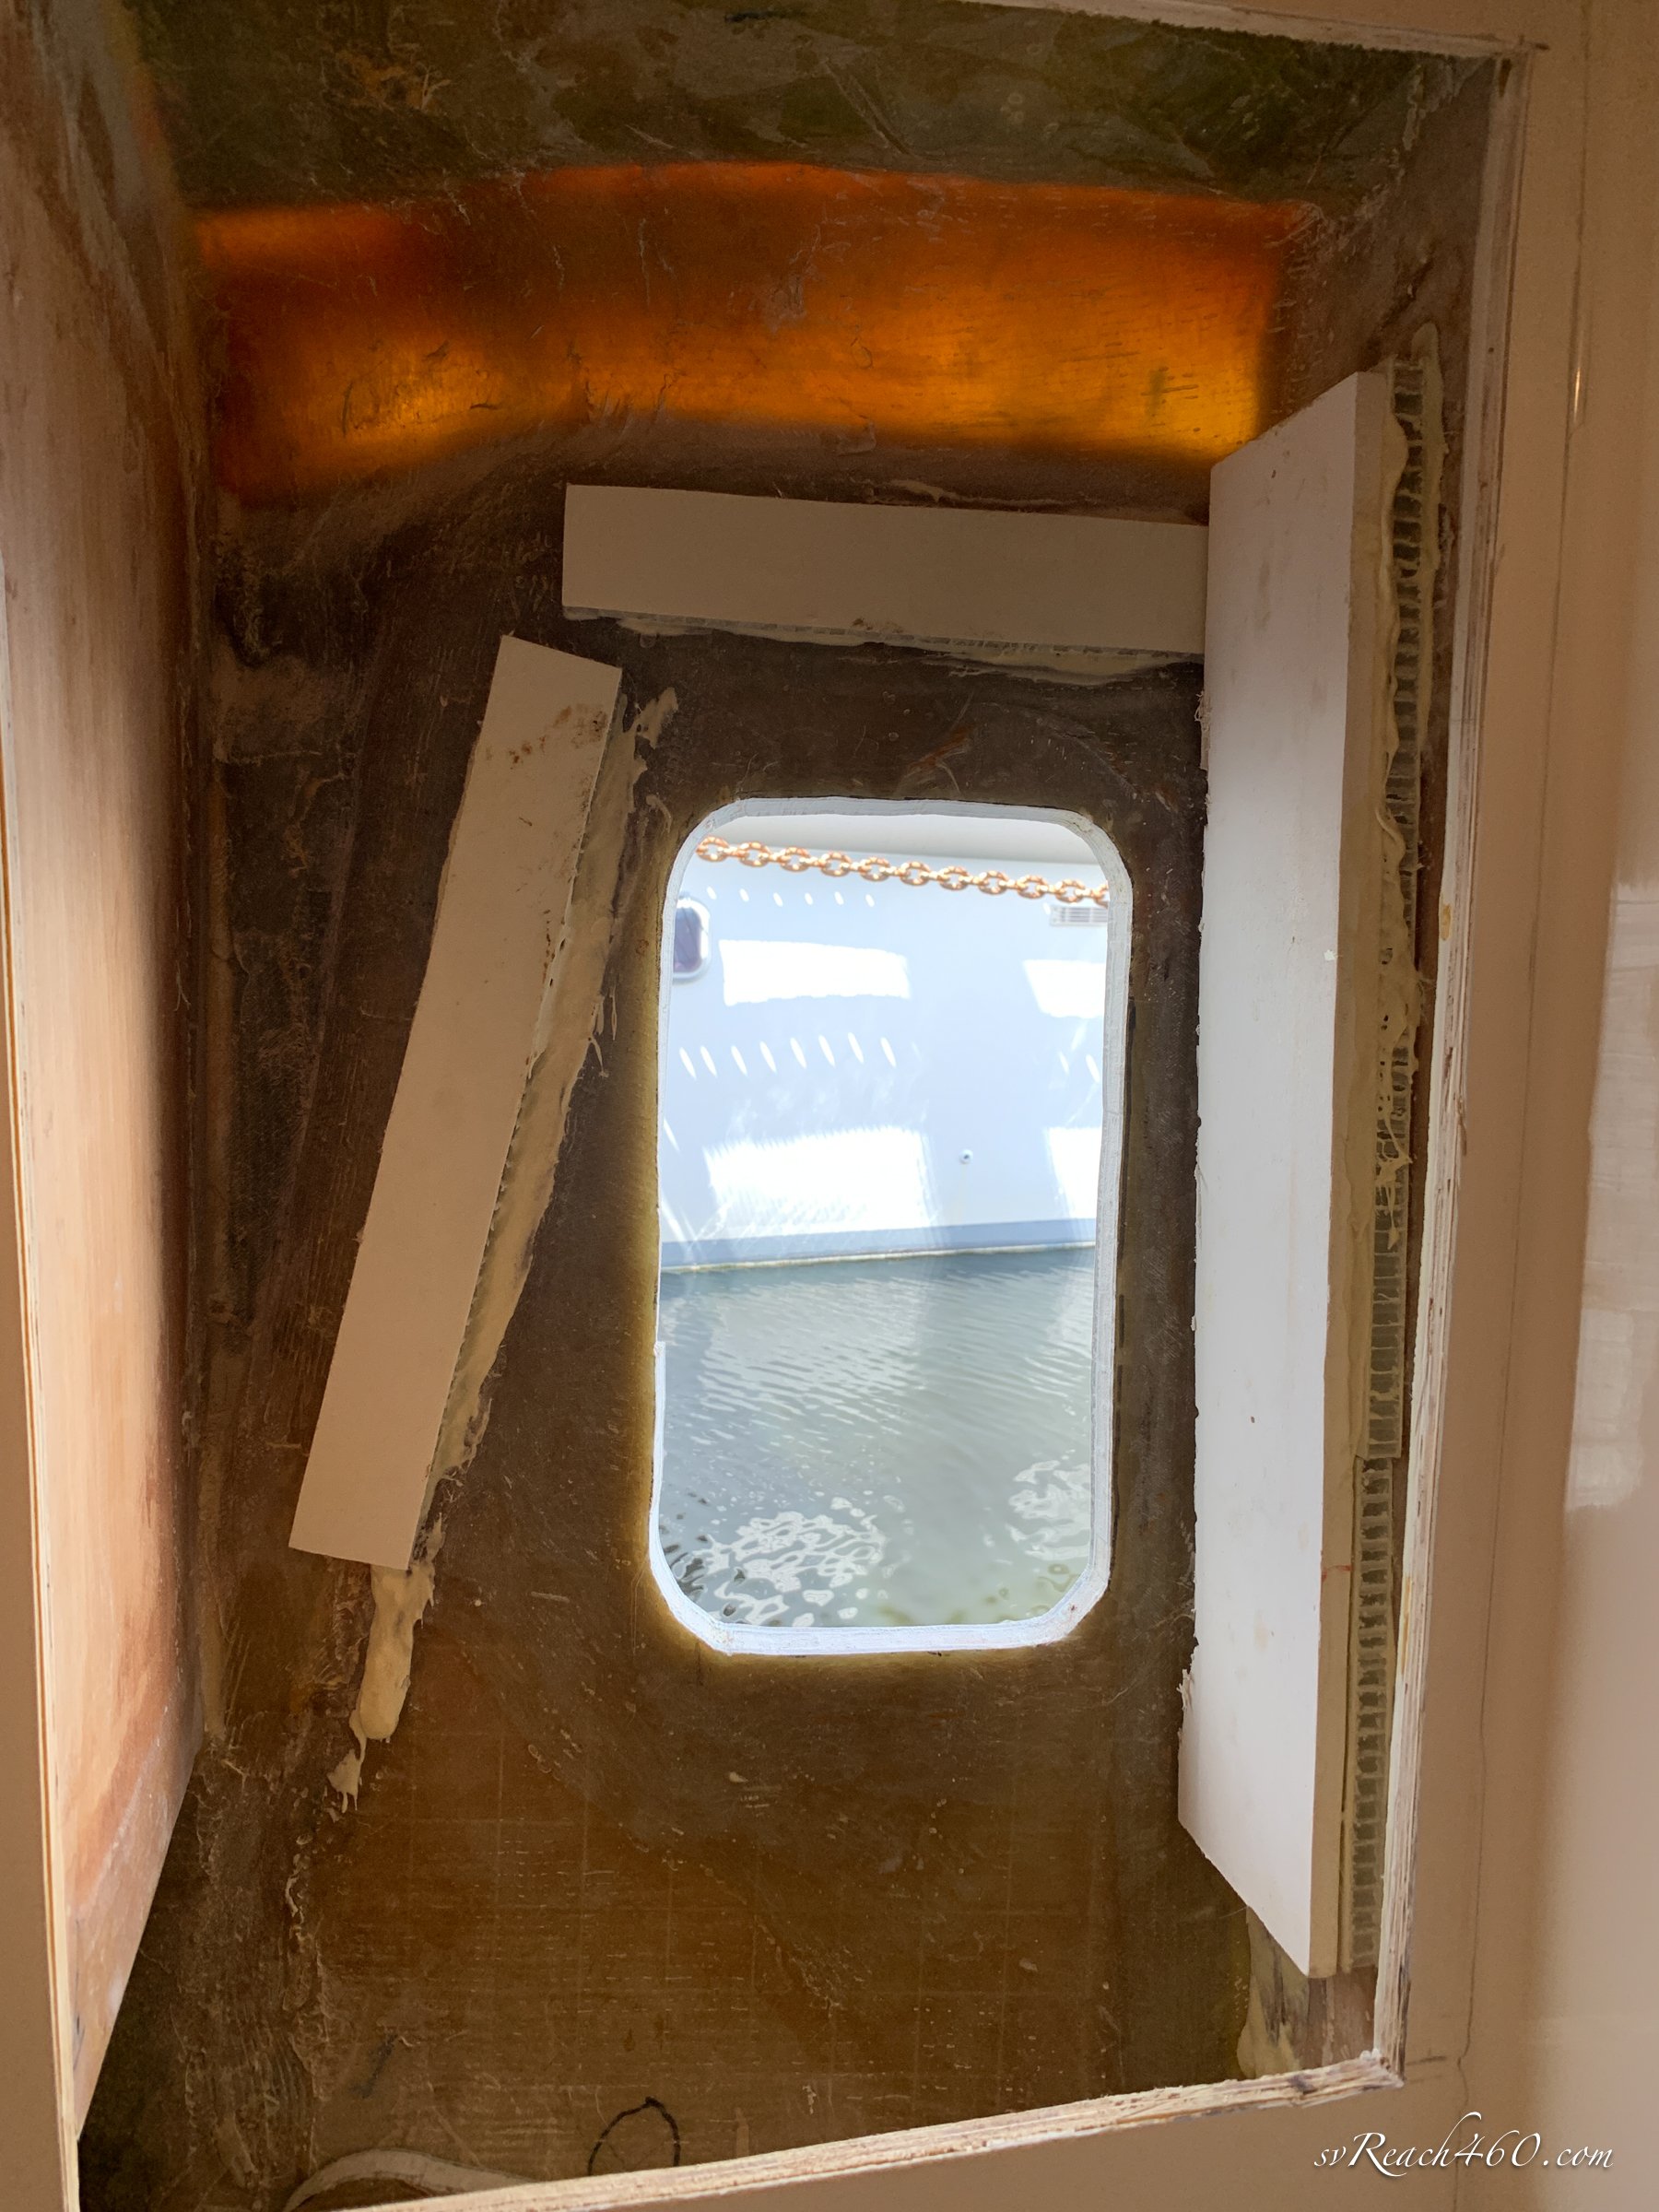
I absolutely love this hatch and it makes a huge difference in comfort when showering in the tropics.
A bonus is that we can leave it open for airflow when it’s raining… since the shower is meant to get wet anyway!
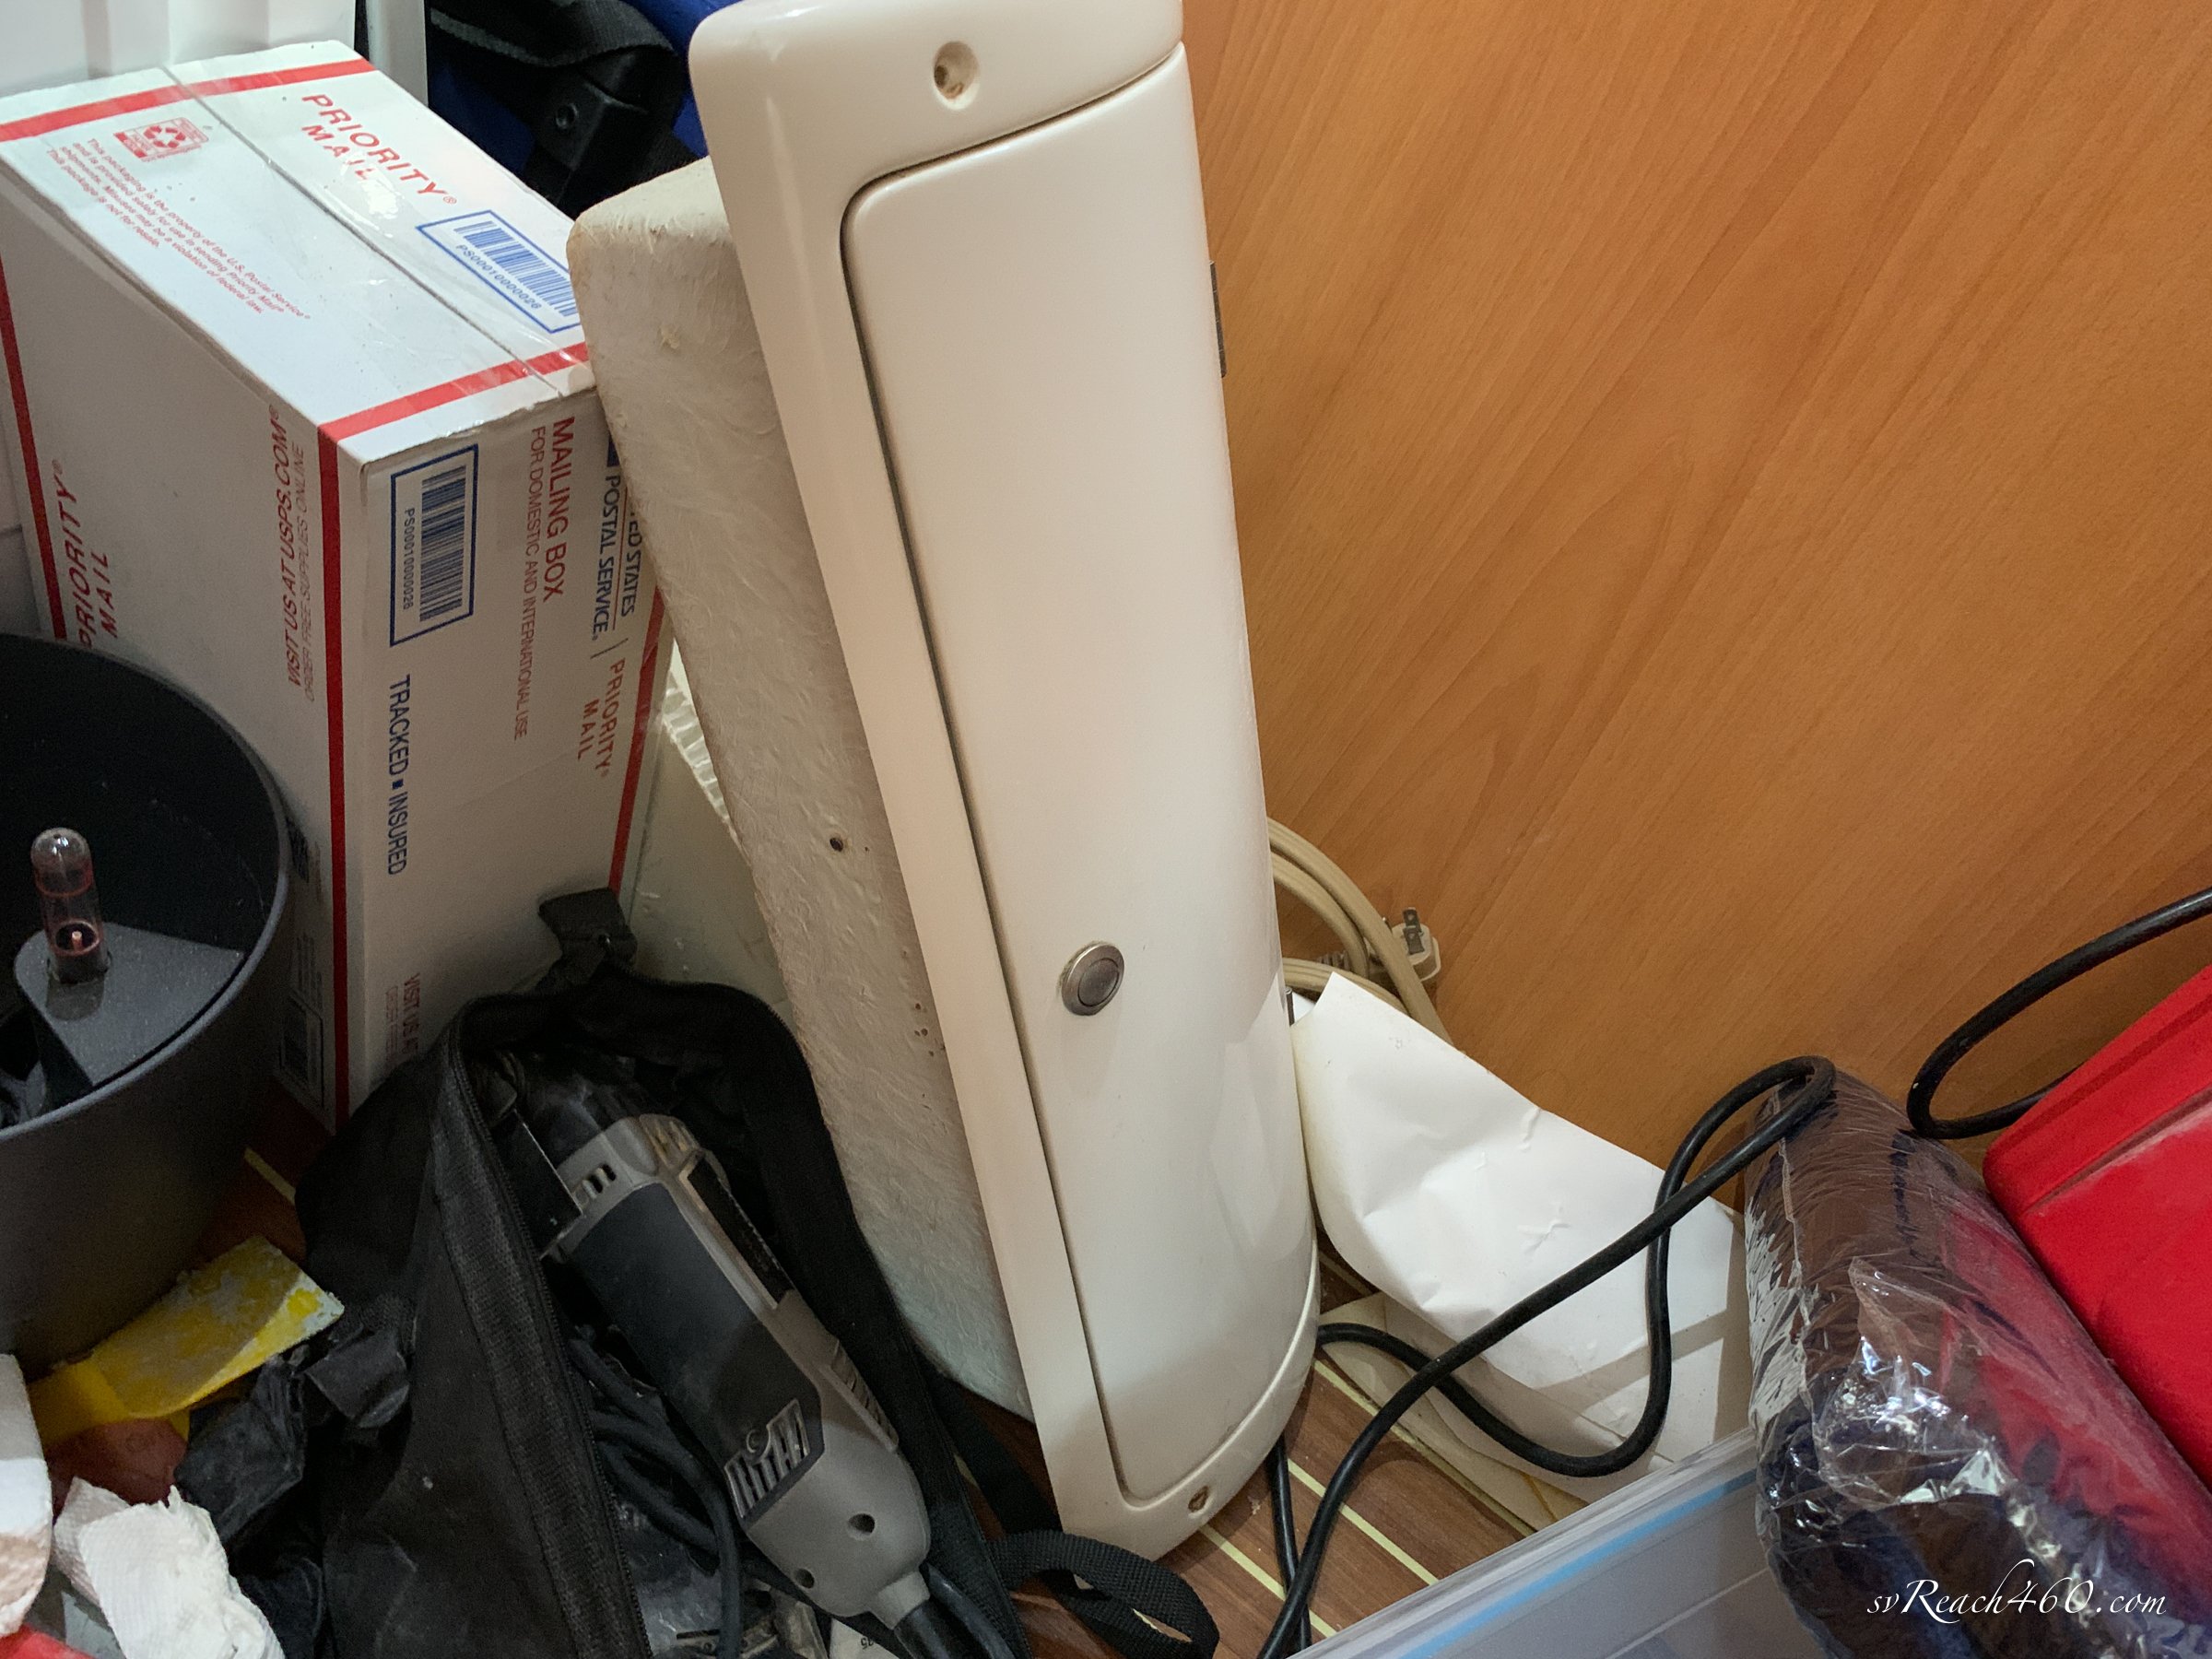
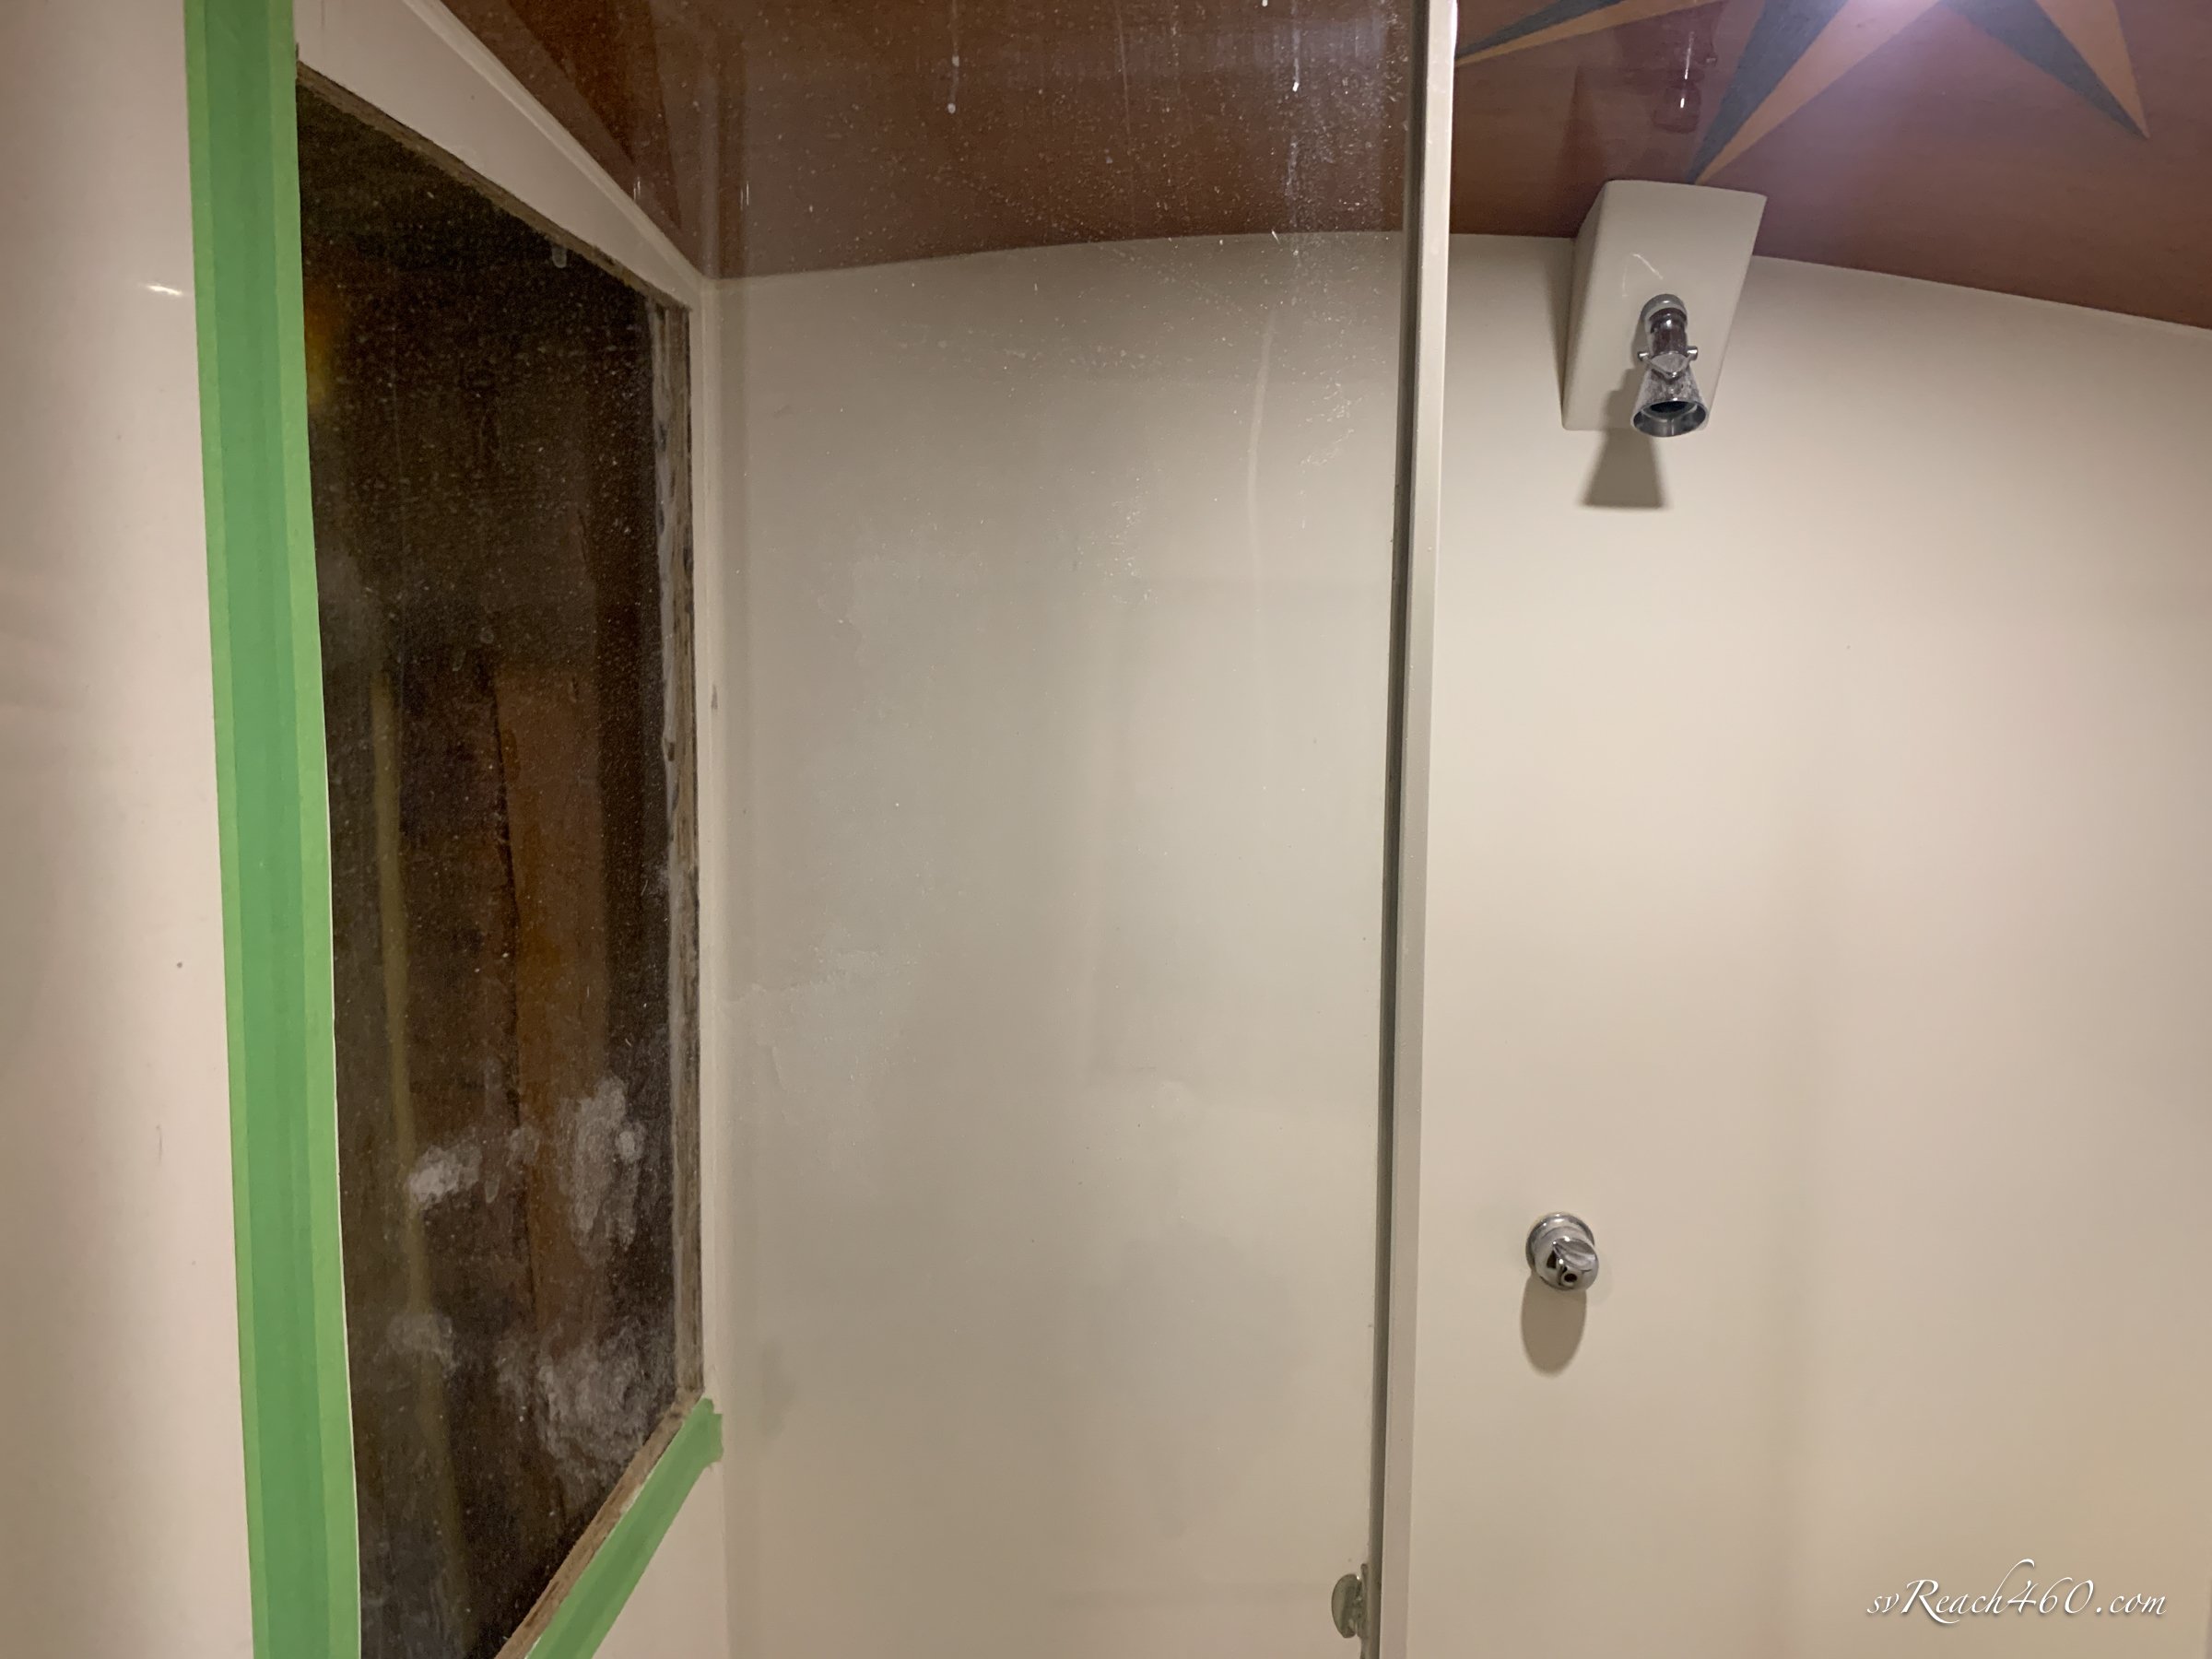
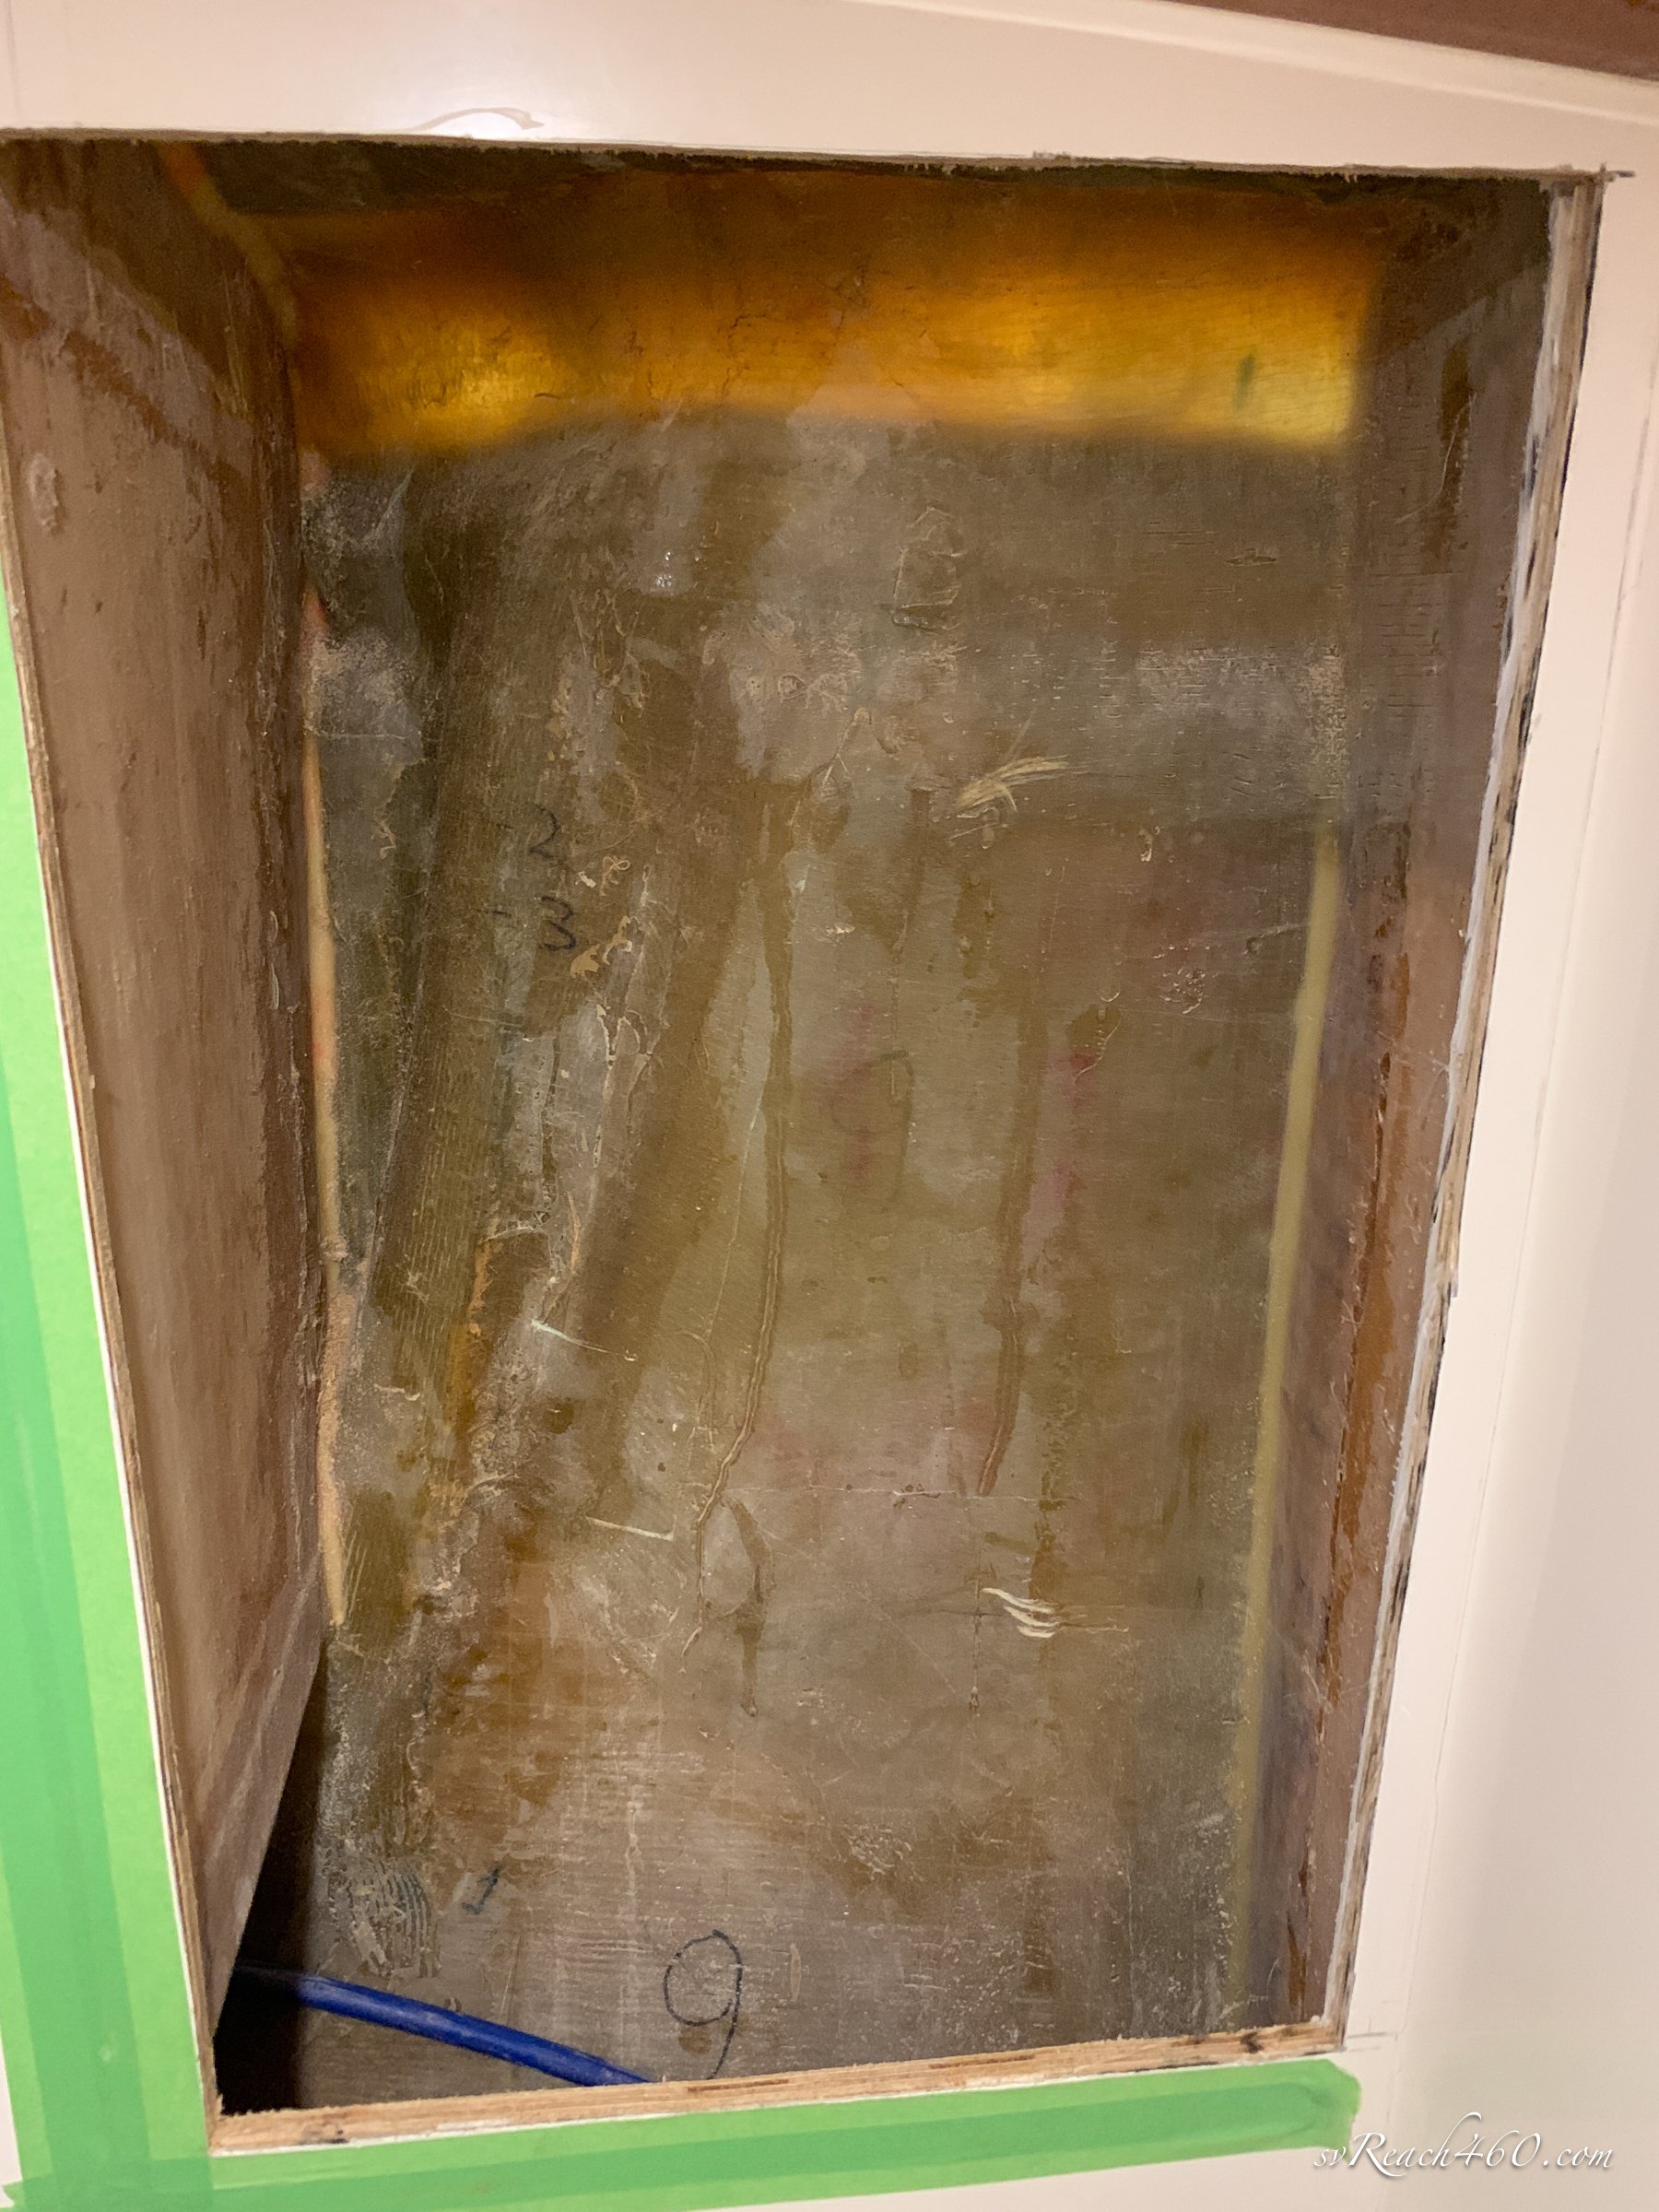
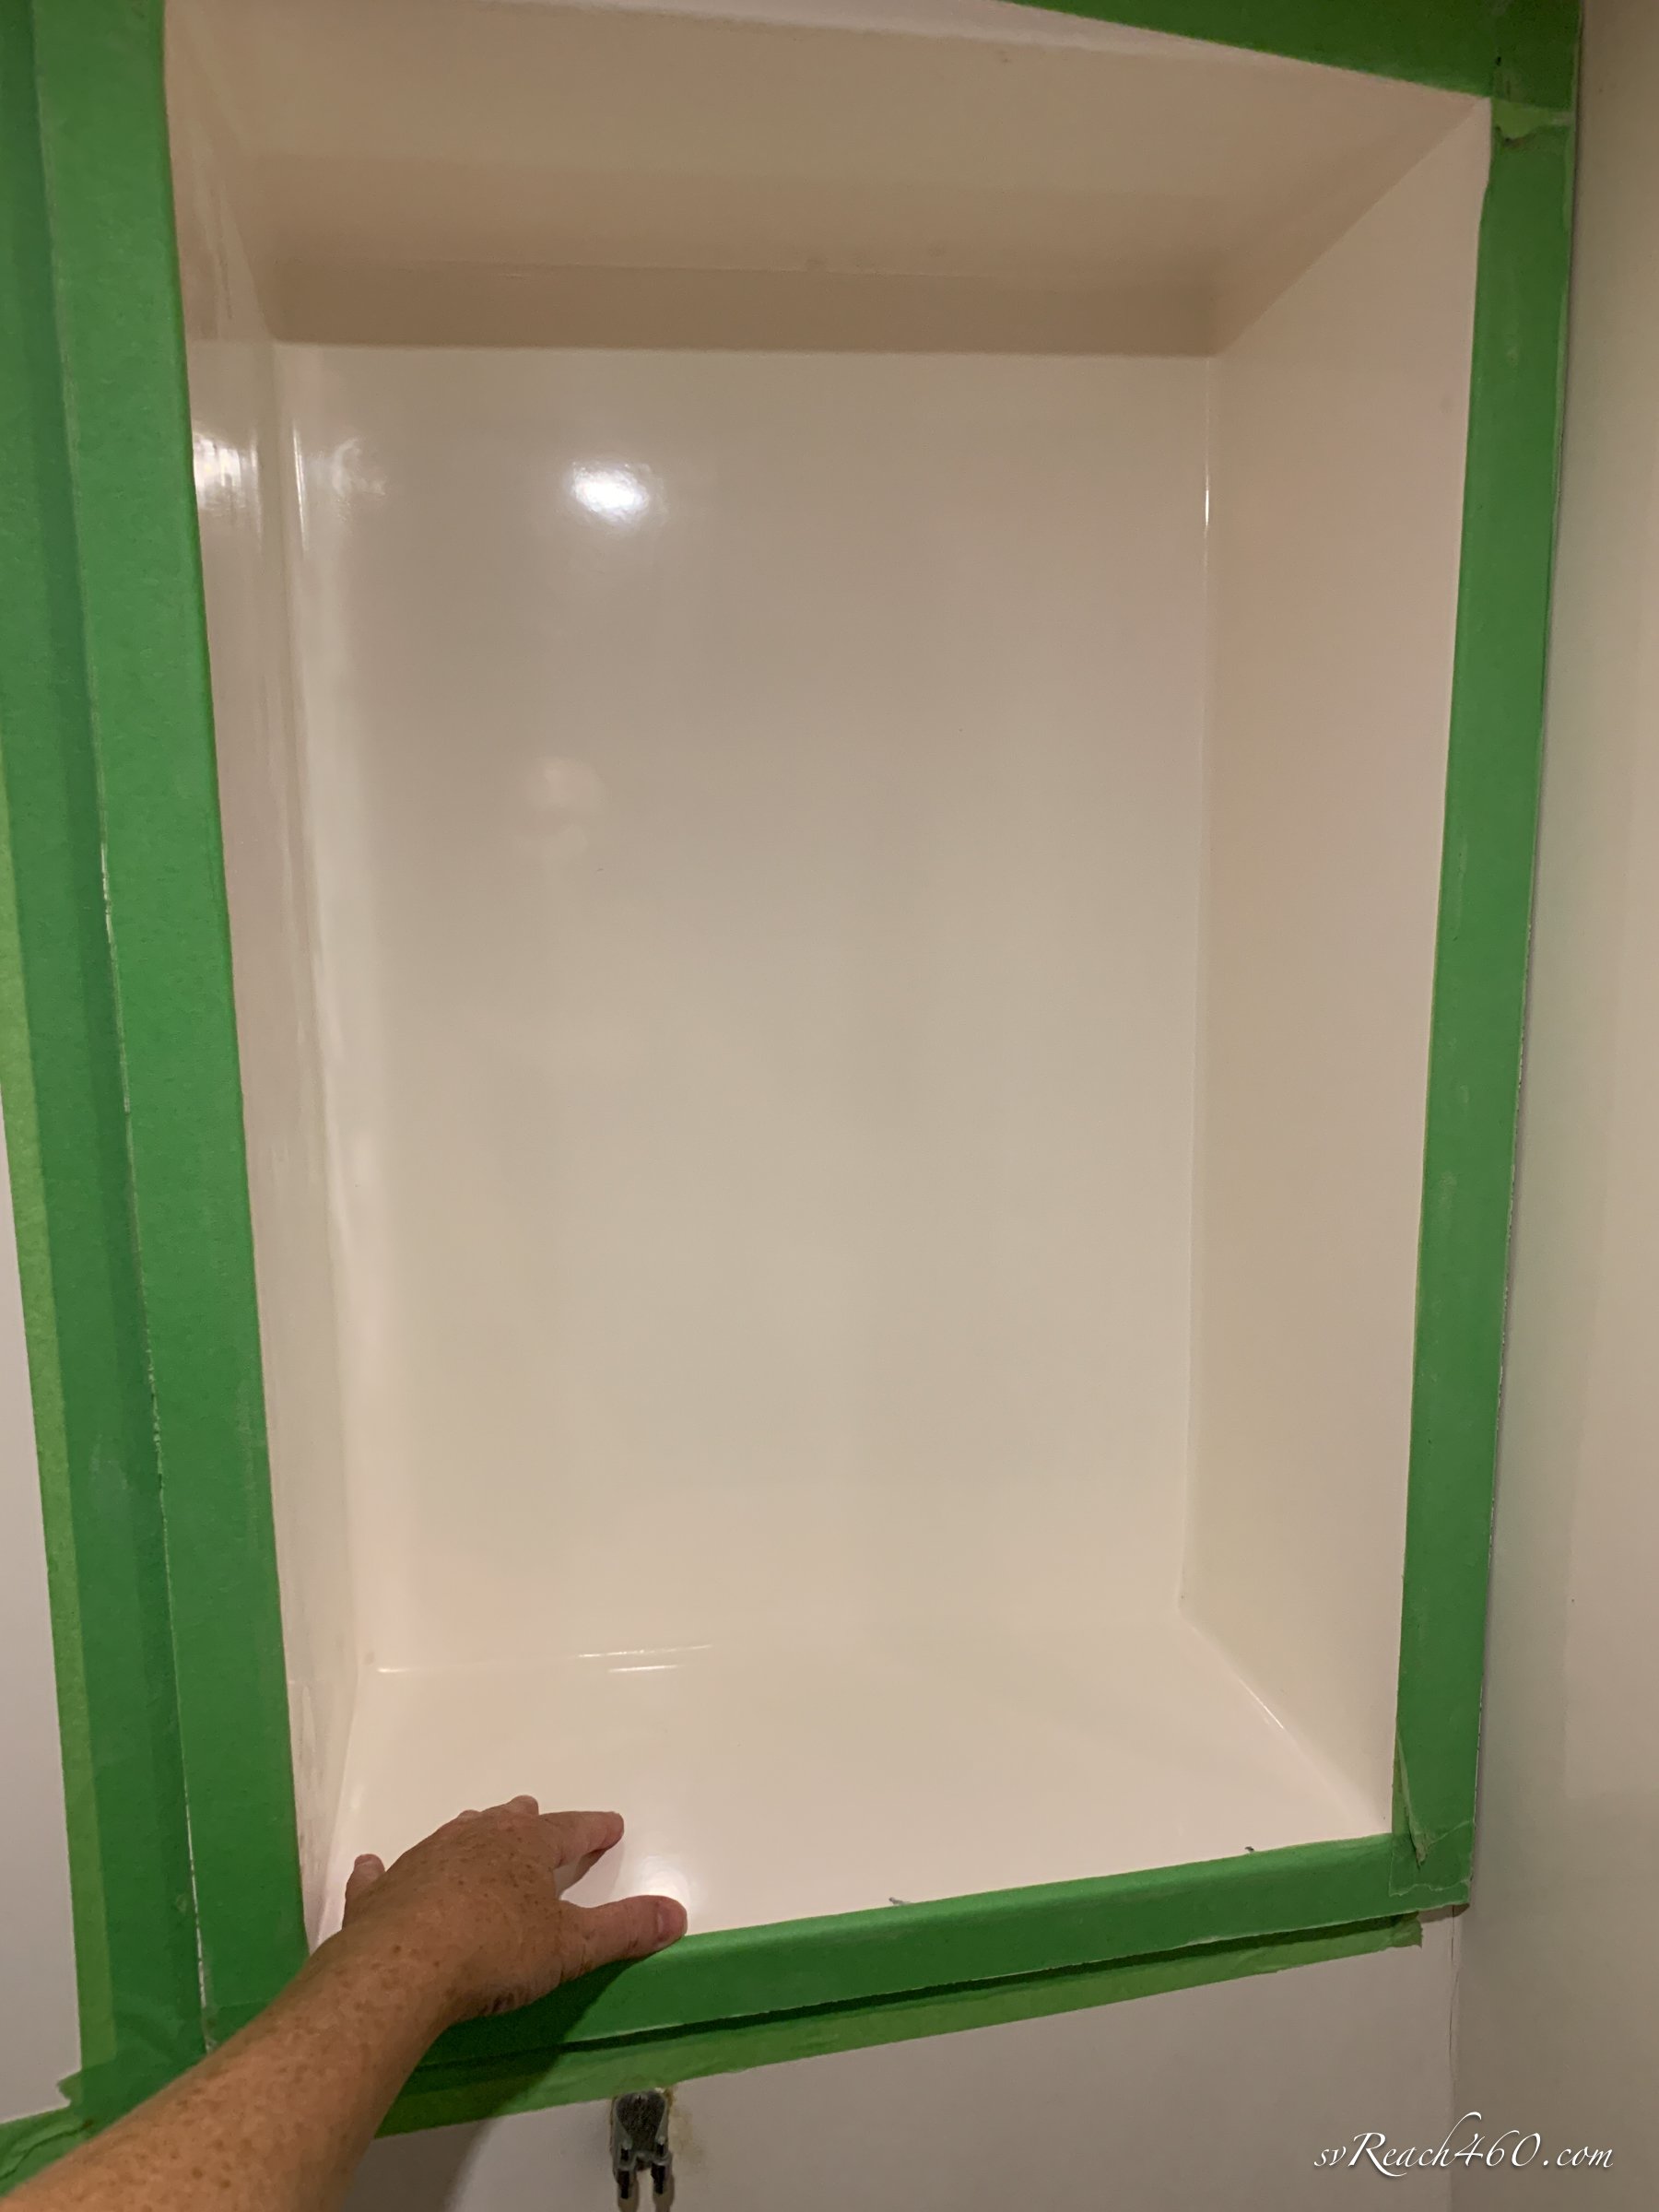
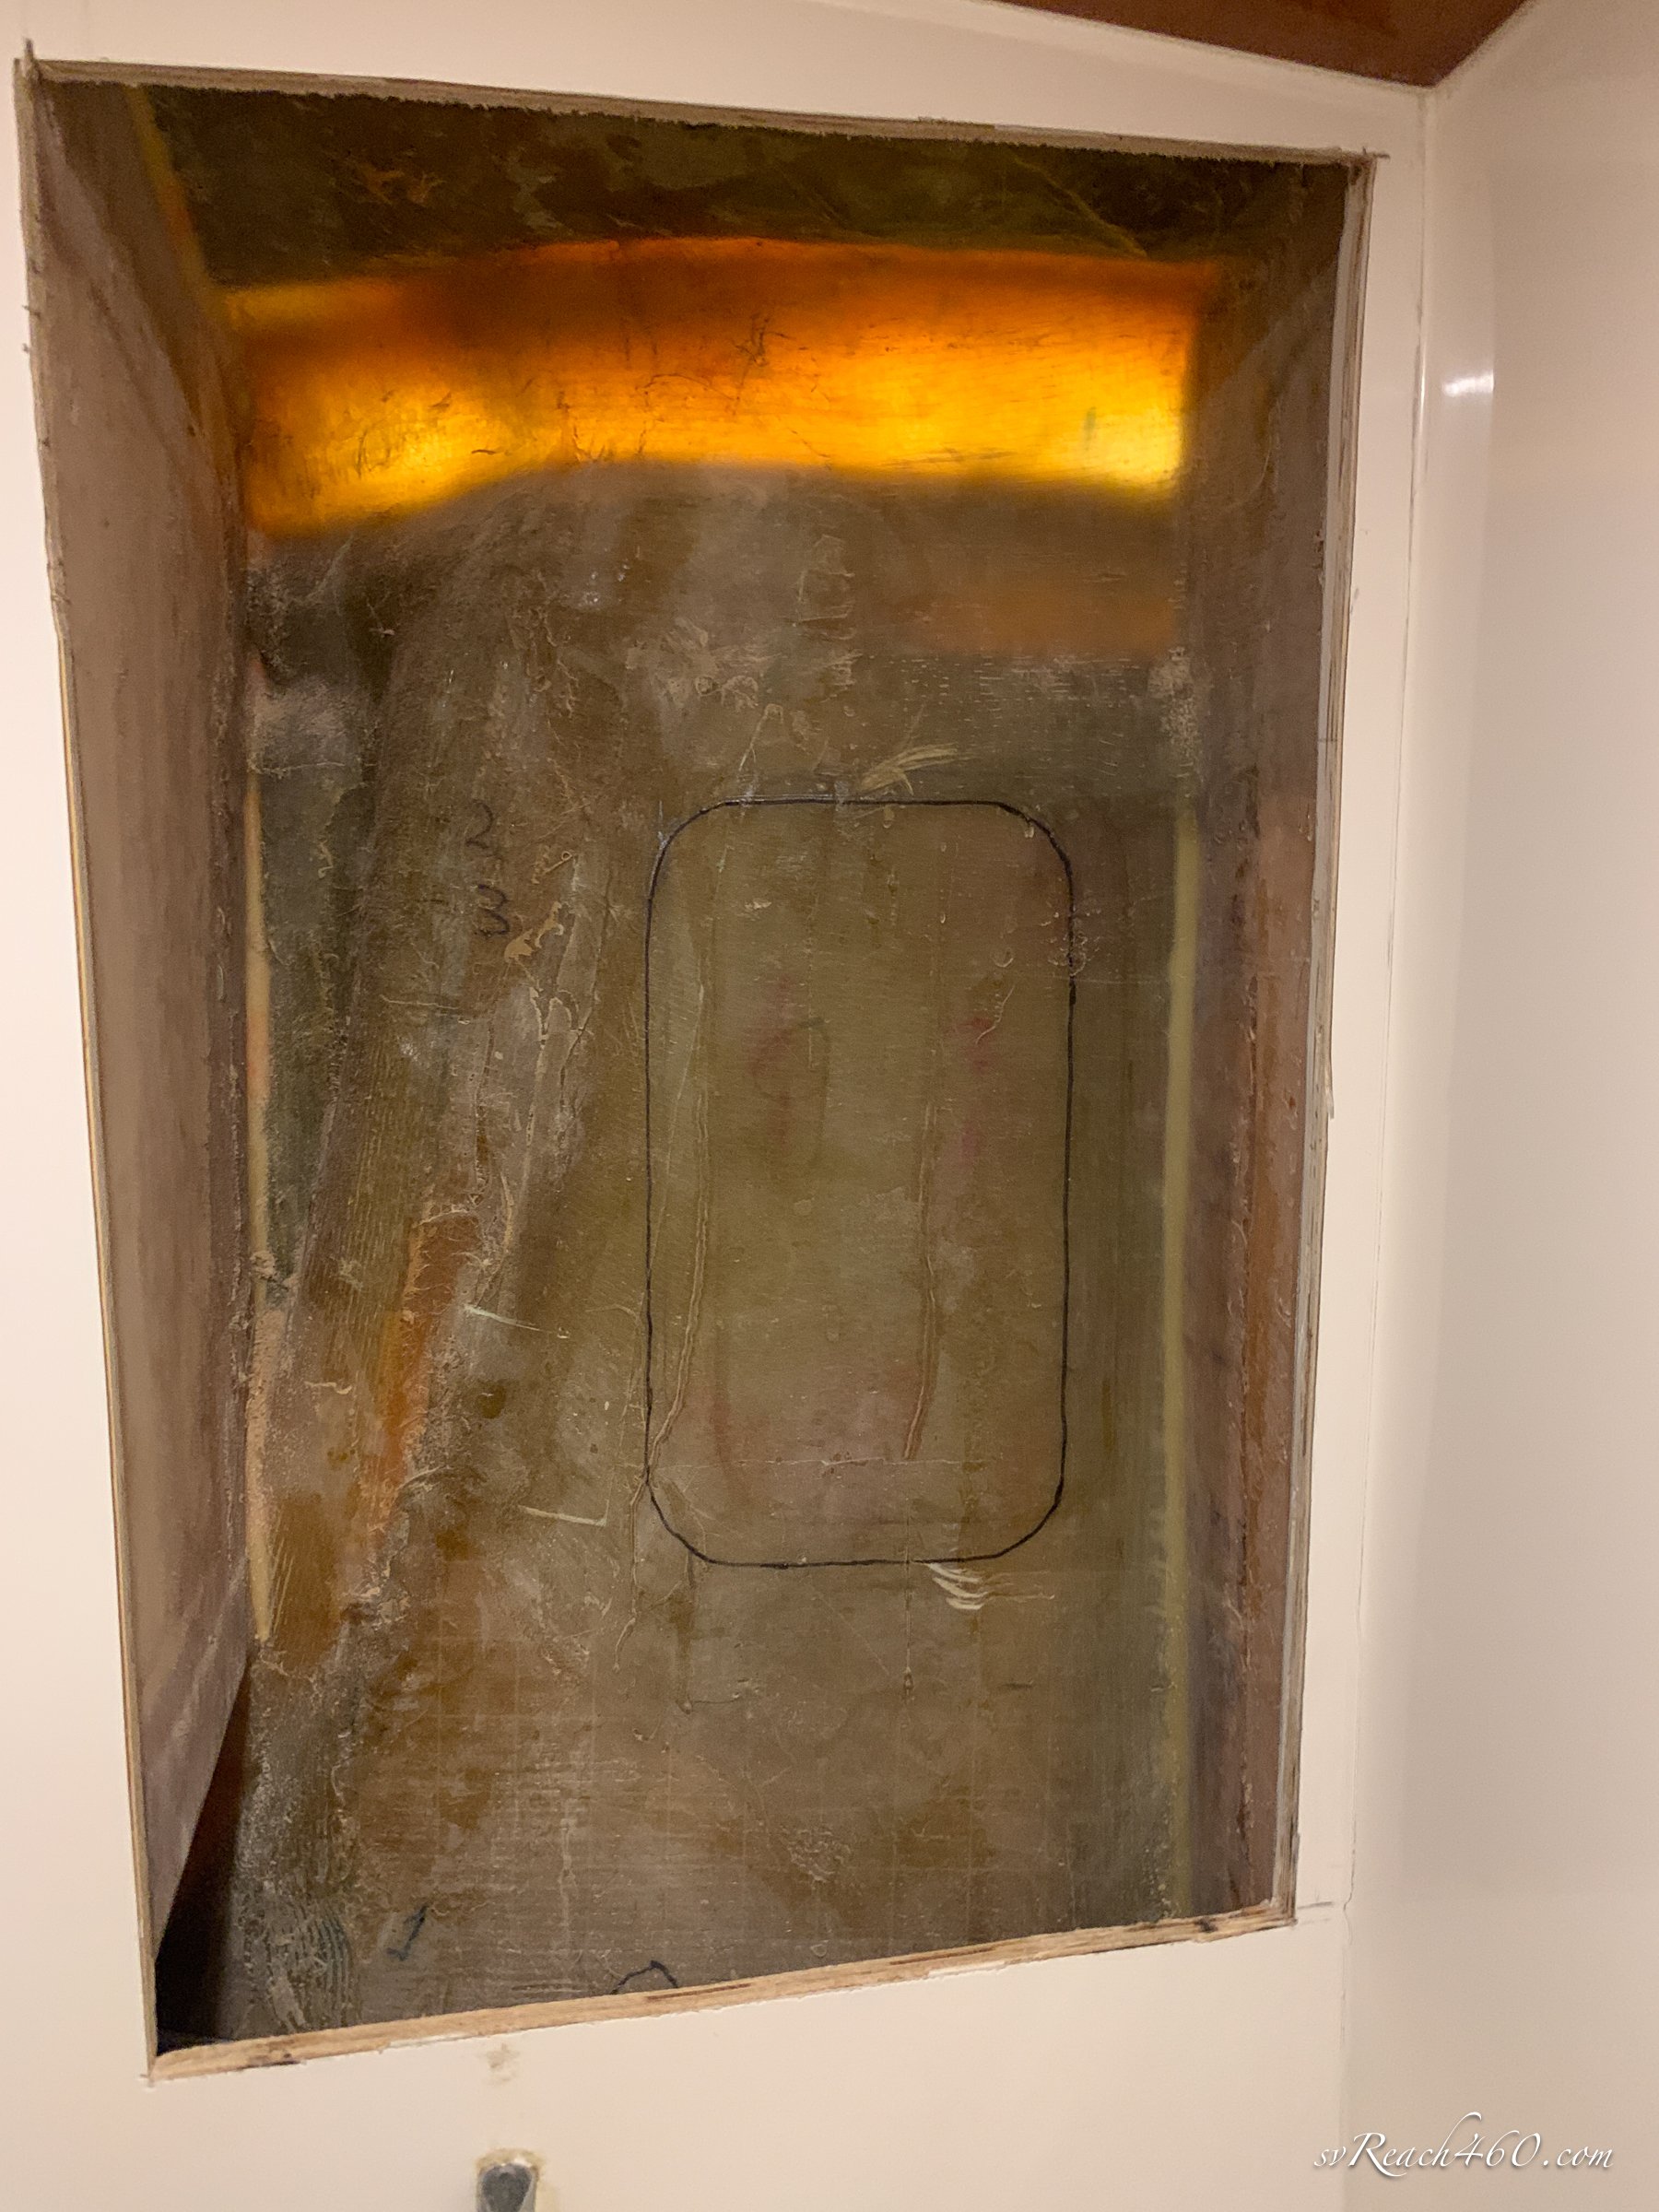
Dolphin 460 catamarans were fairly customizable for design, build and rigging. Several boats came with a port hatch in the shower, but our layout has that hatch in the starboard bow locker and instead, had a small utility box in the shower.
The owners head got quite stuffy and hot when using the shower. Since we have a hatch in the port forward guest cabin under the bridge deck, we know just how much these inner hatches funnel a lot of wind and make for great airflow in the entire hull.
After contemplating how to approach this project and make it usable and structurally sound, Mark prepared to cut a big hole in our boat!
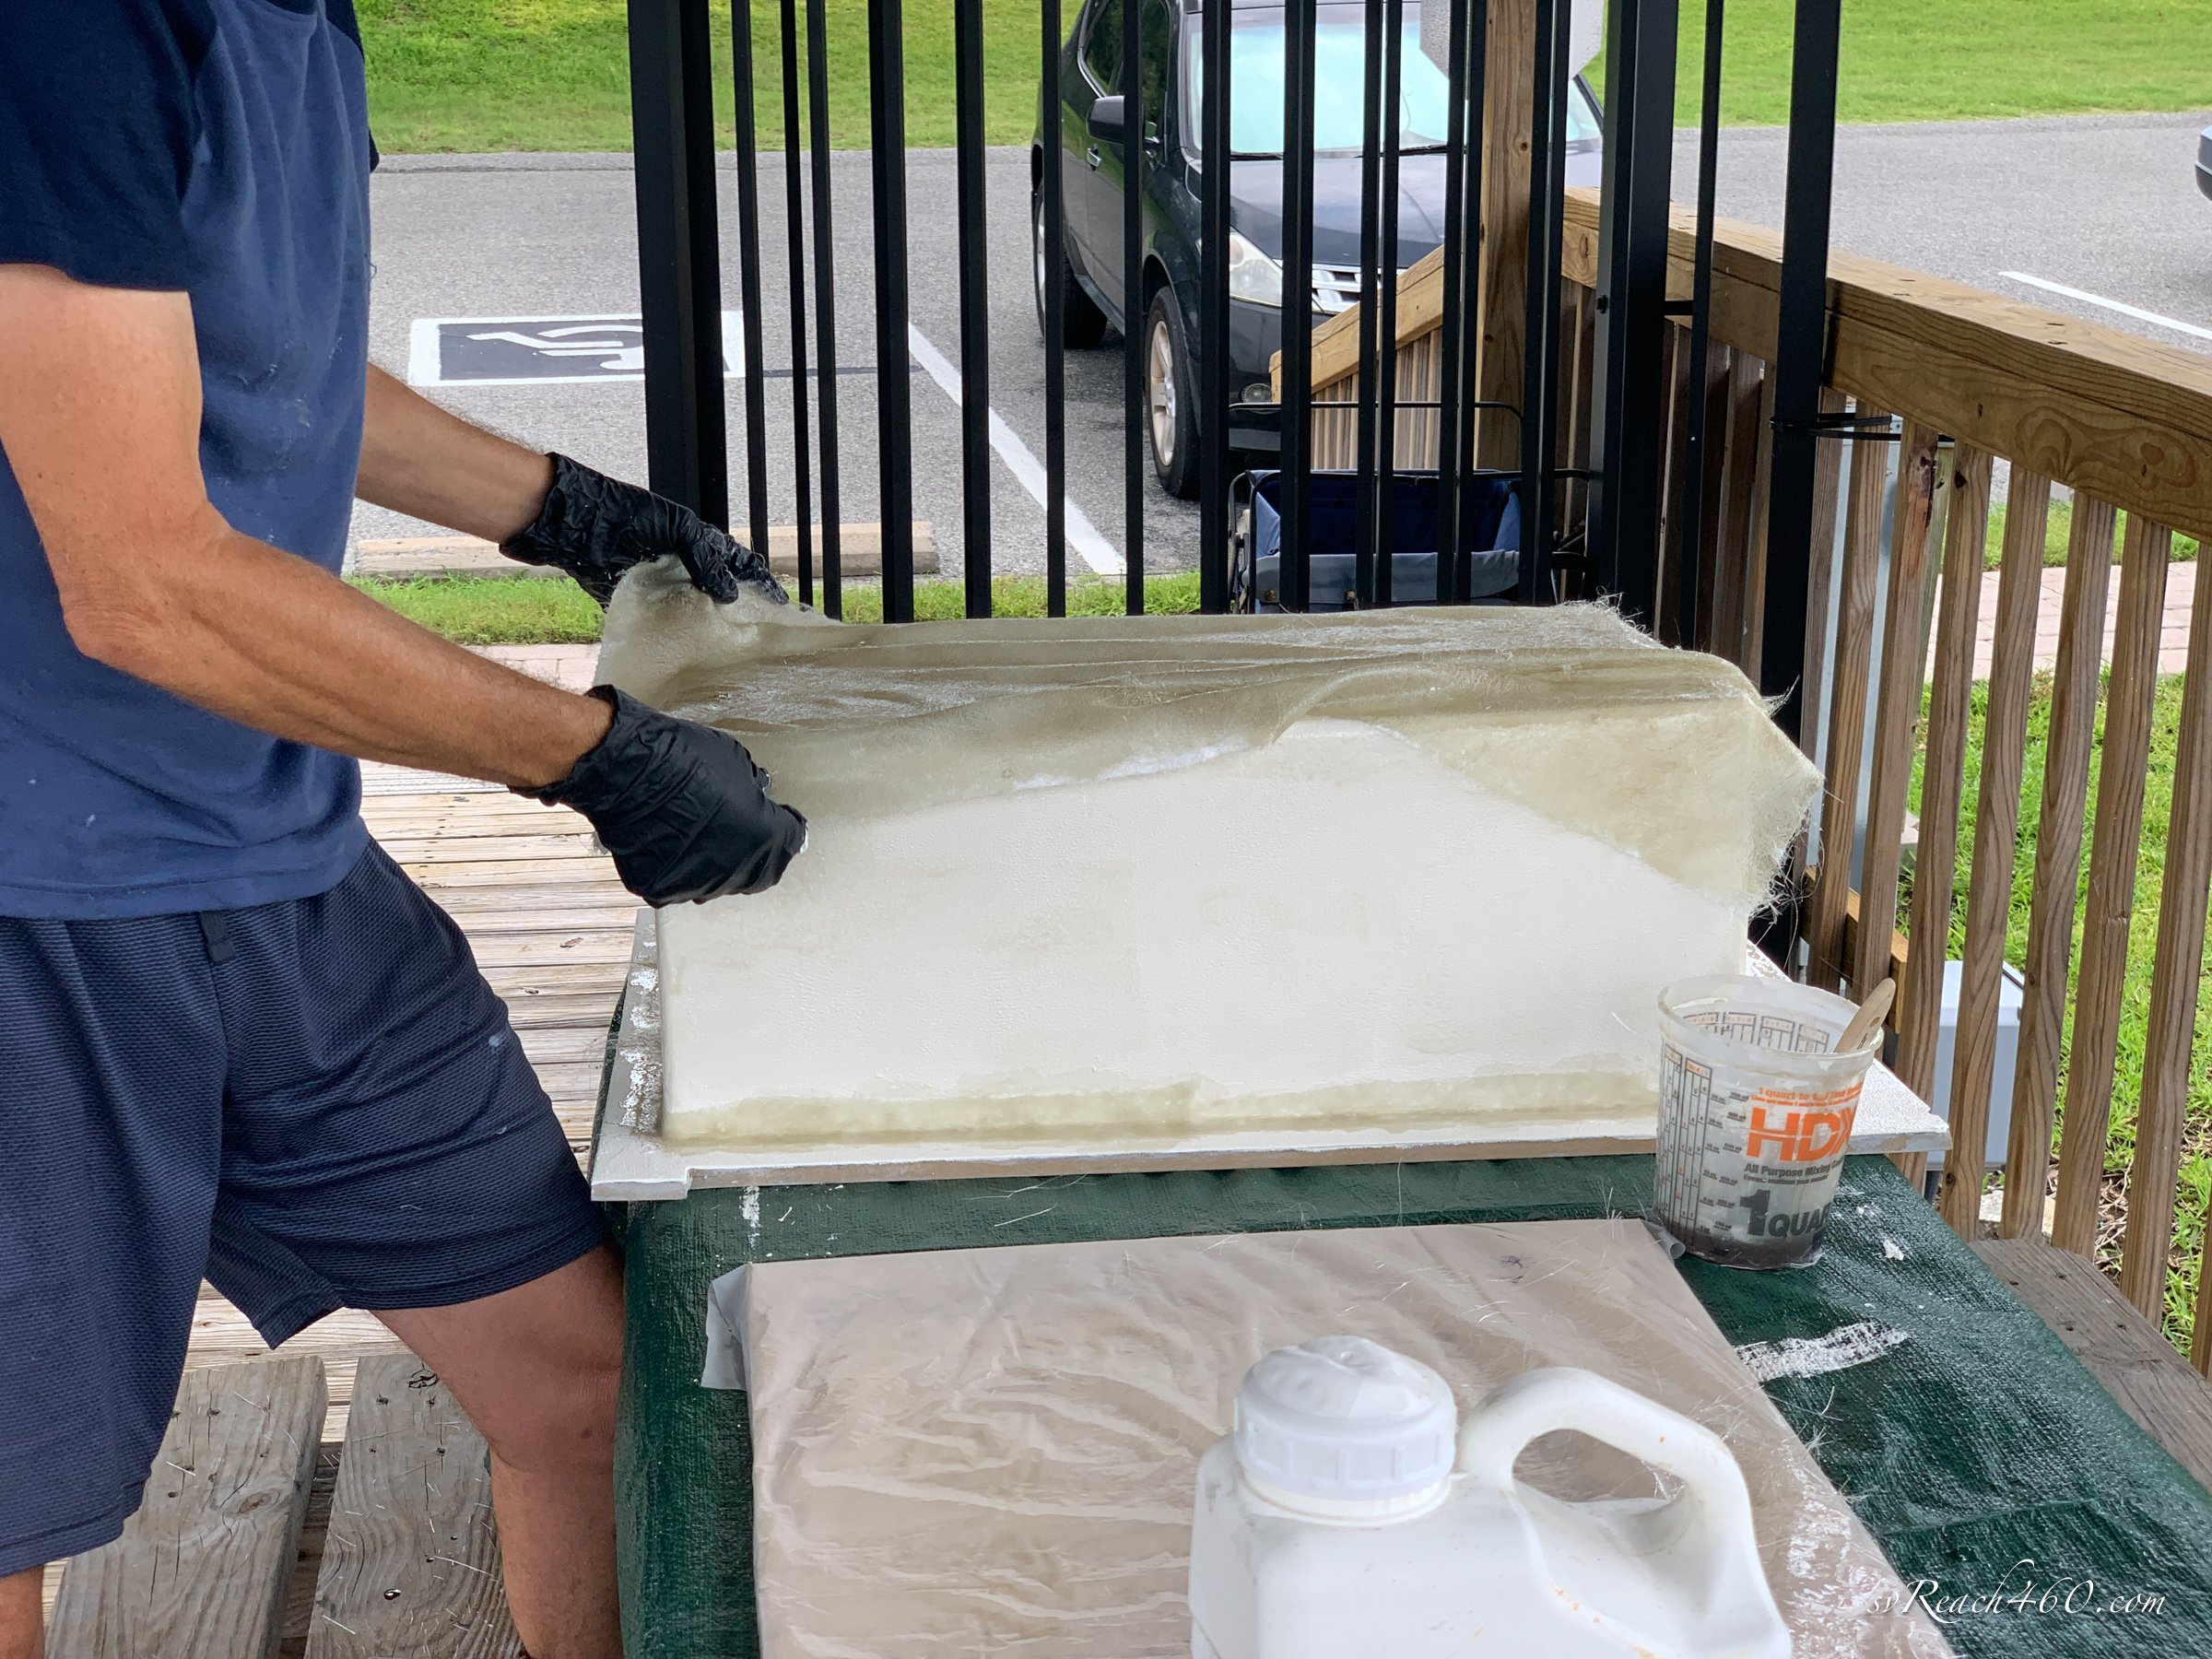
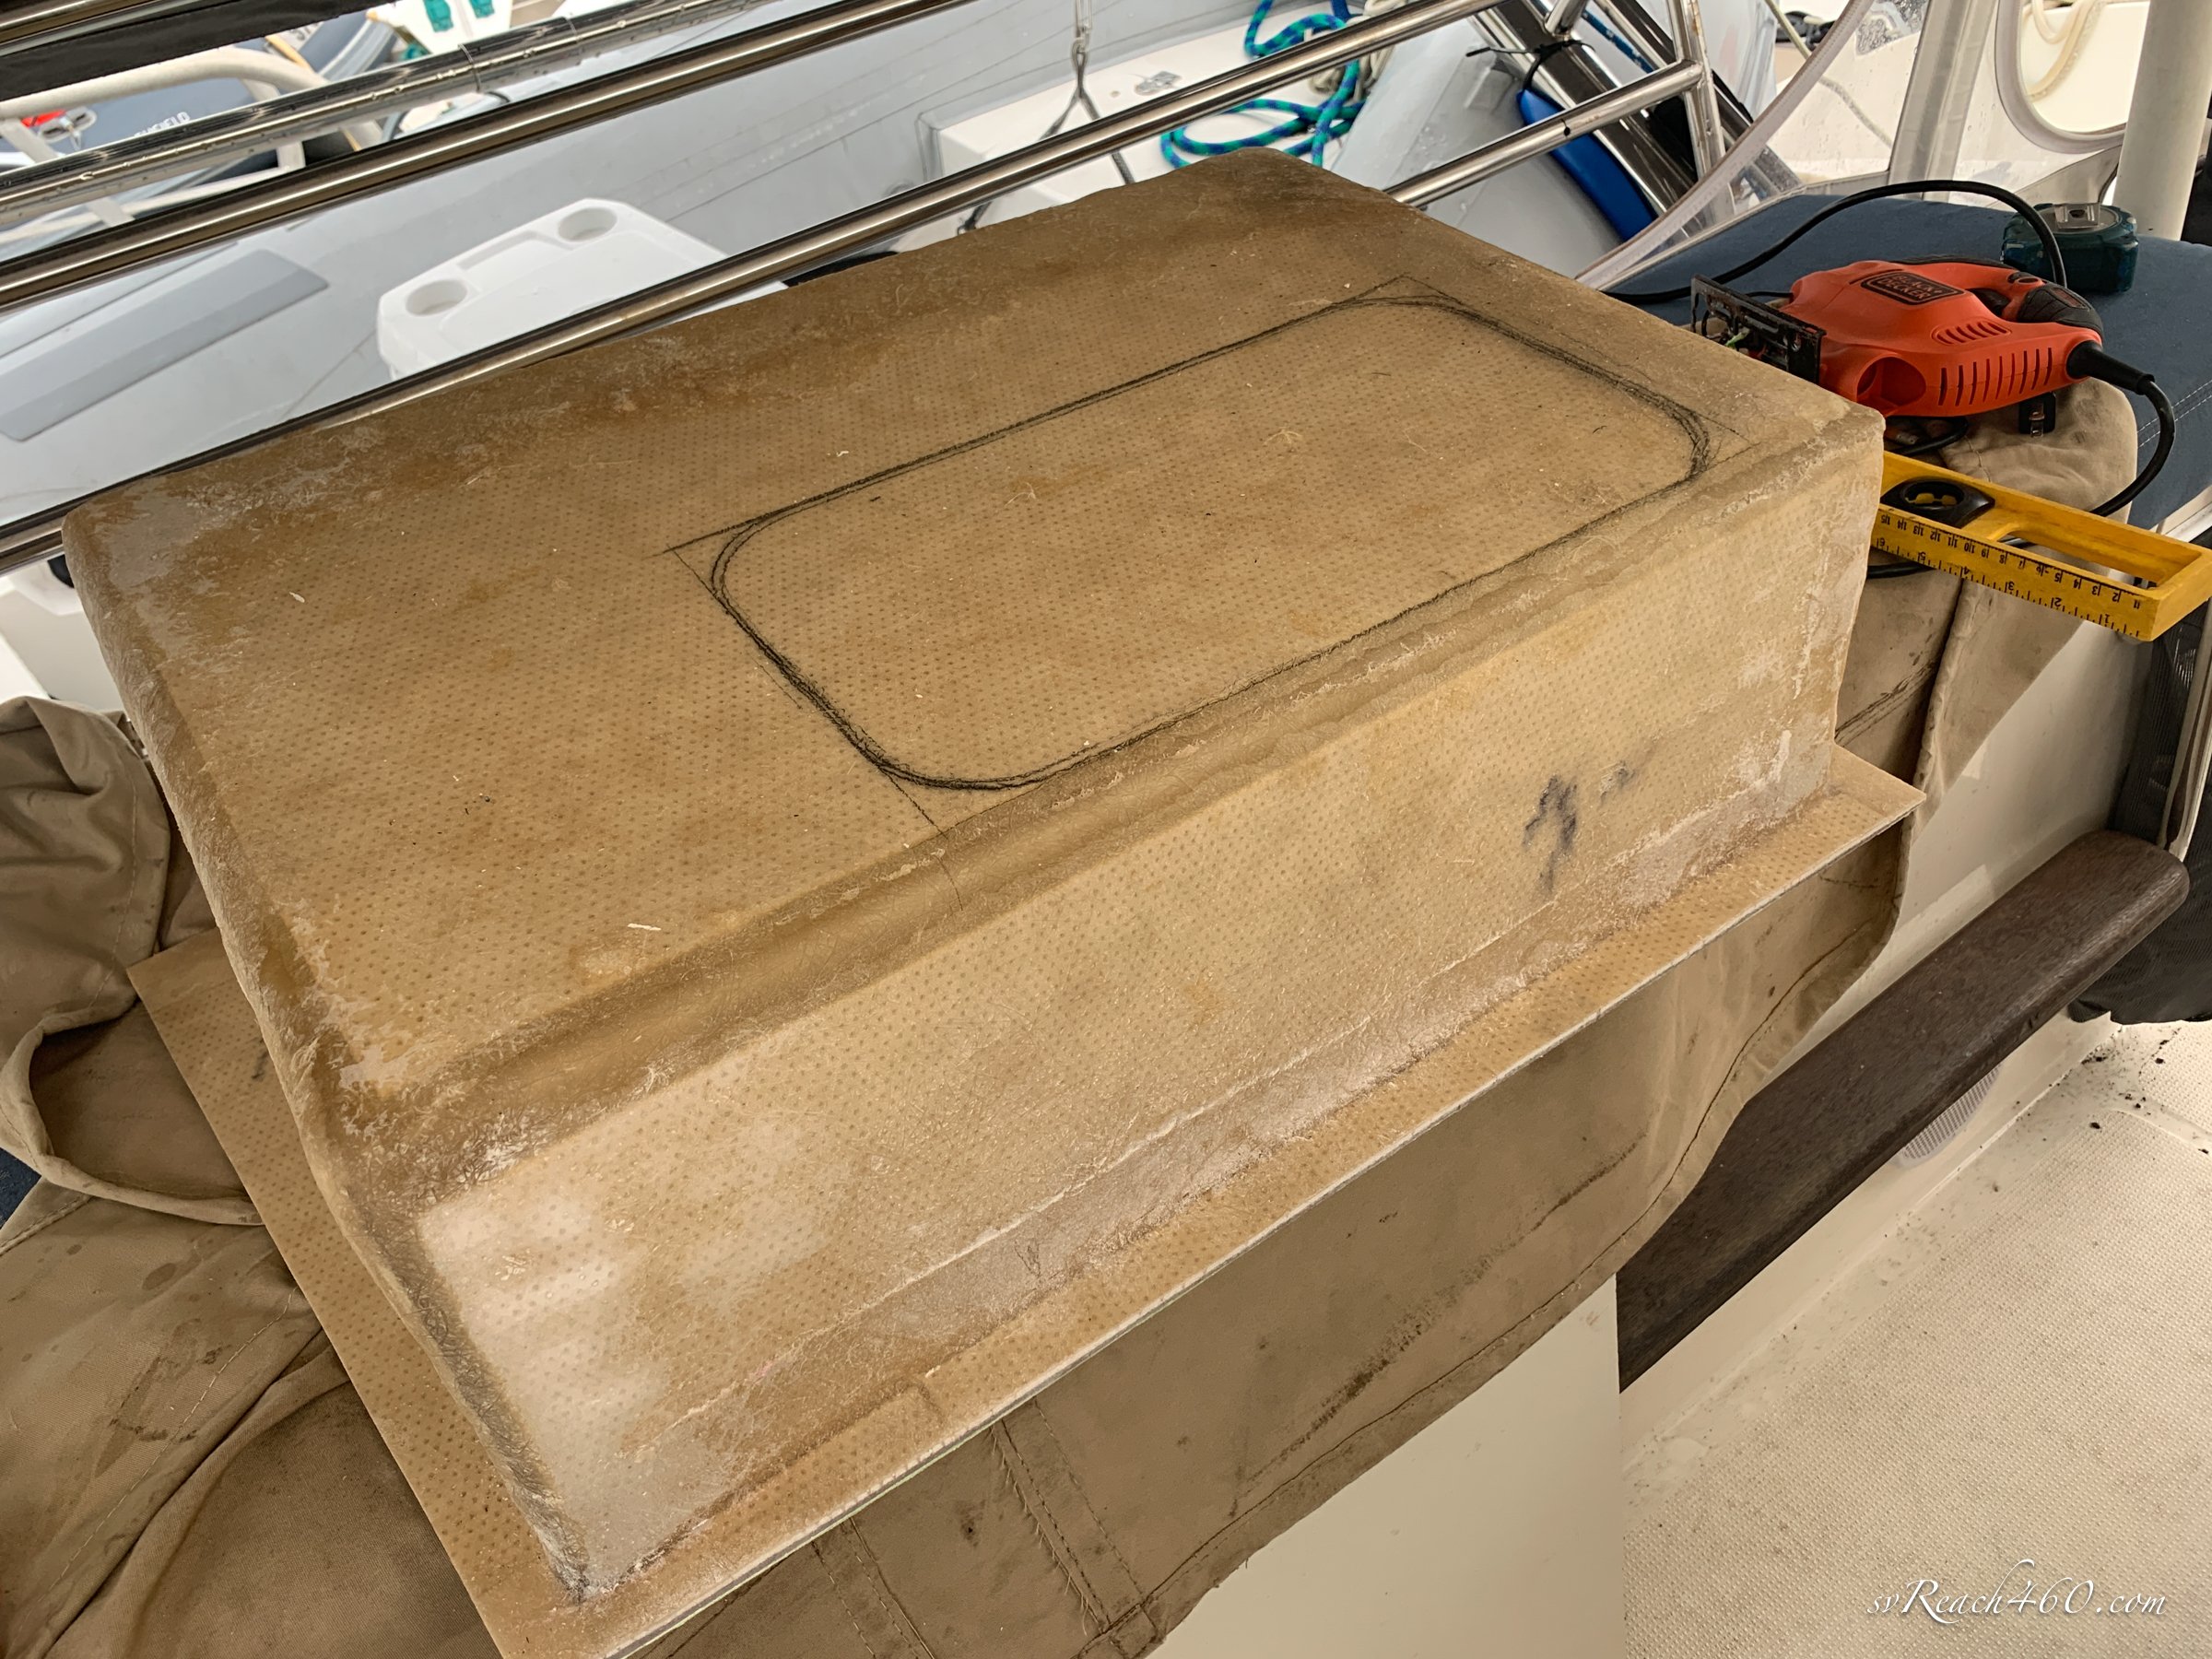
There is a recess between the shower and the hull, so this was used to create a larger, open shower box that the hatch could be installed in. Mark measured & designed a male mold… and then the fiberglassing could begin.
This detailed slide show shows the step-by-step progression of the familiar process:
Measure ~ Make mold ~ Apply primer ~ Wet sand until glossy smooth ~ Coat with wax ~ Apply gelcoat ~ Lay Fiberglass ~ Add core mat ~ Cure ~ Remove from mold ~ More wet sanding & finish work.

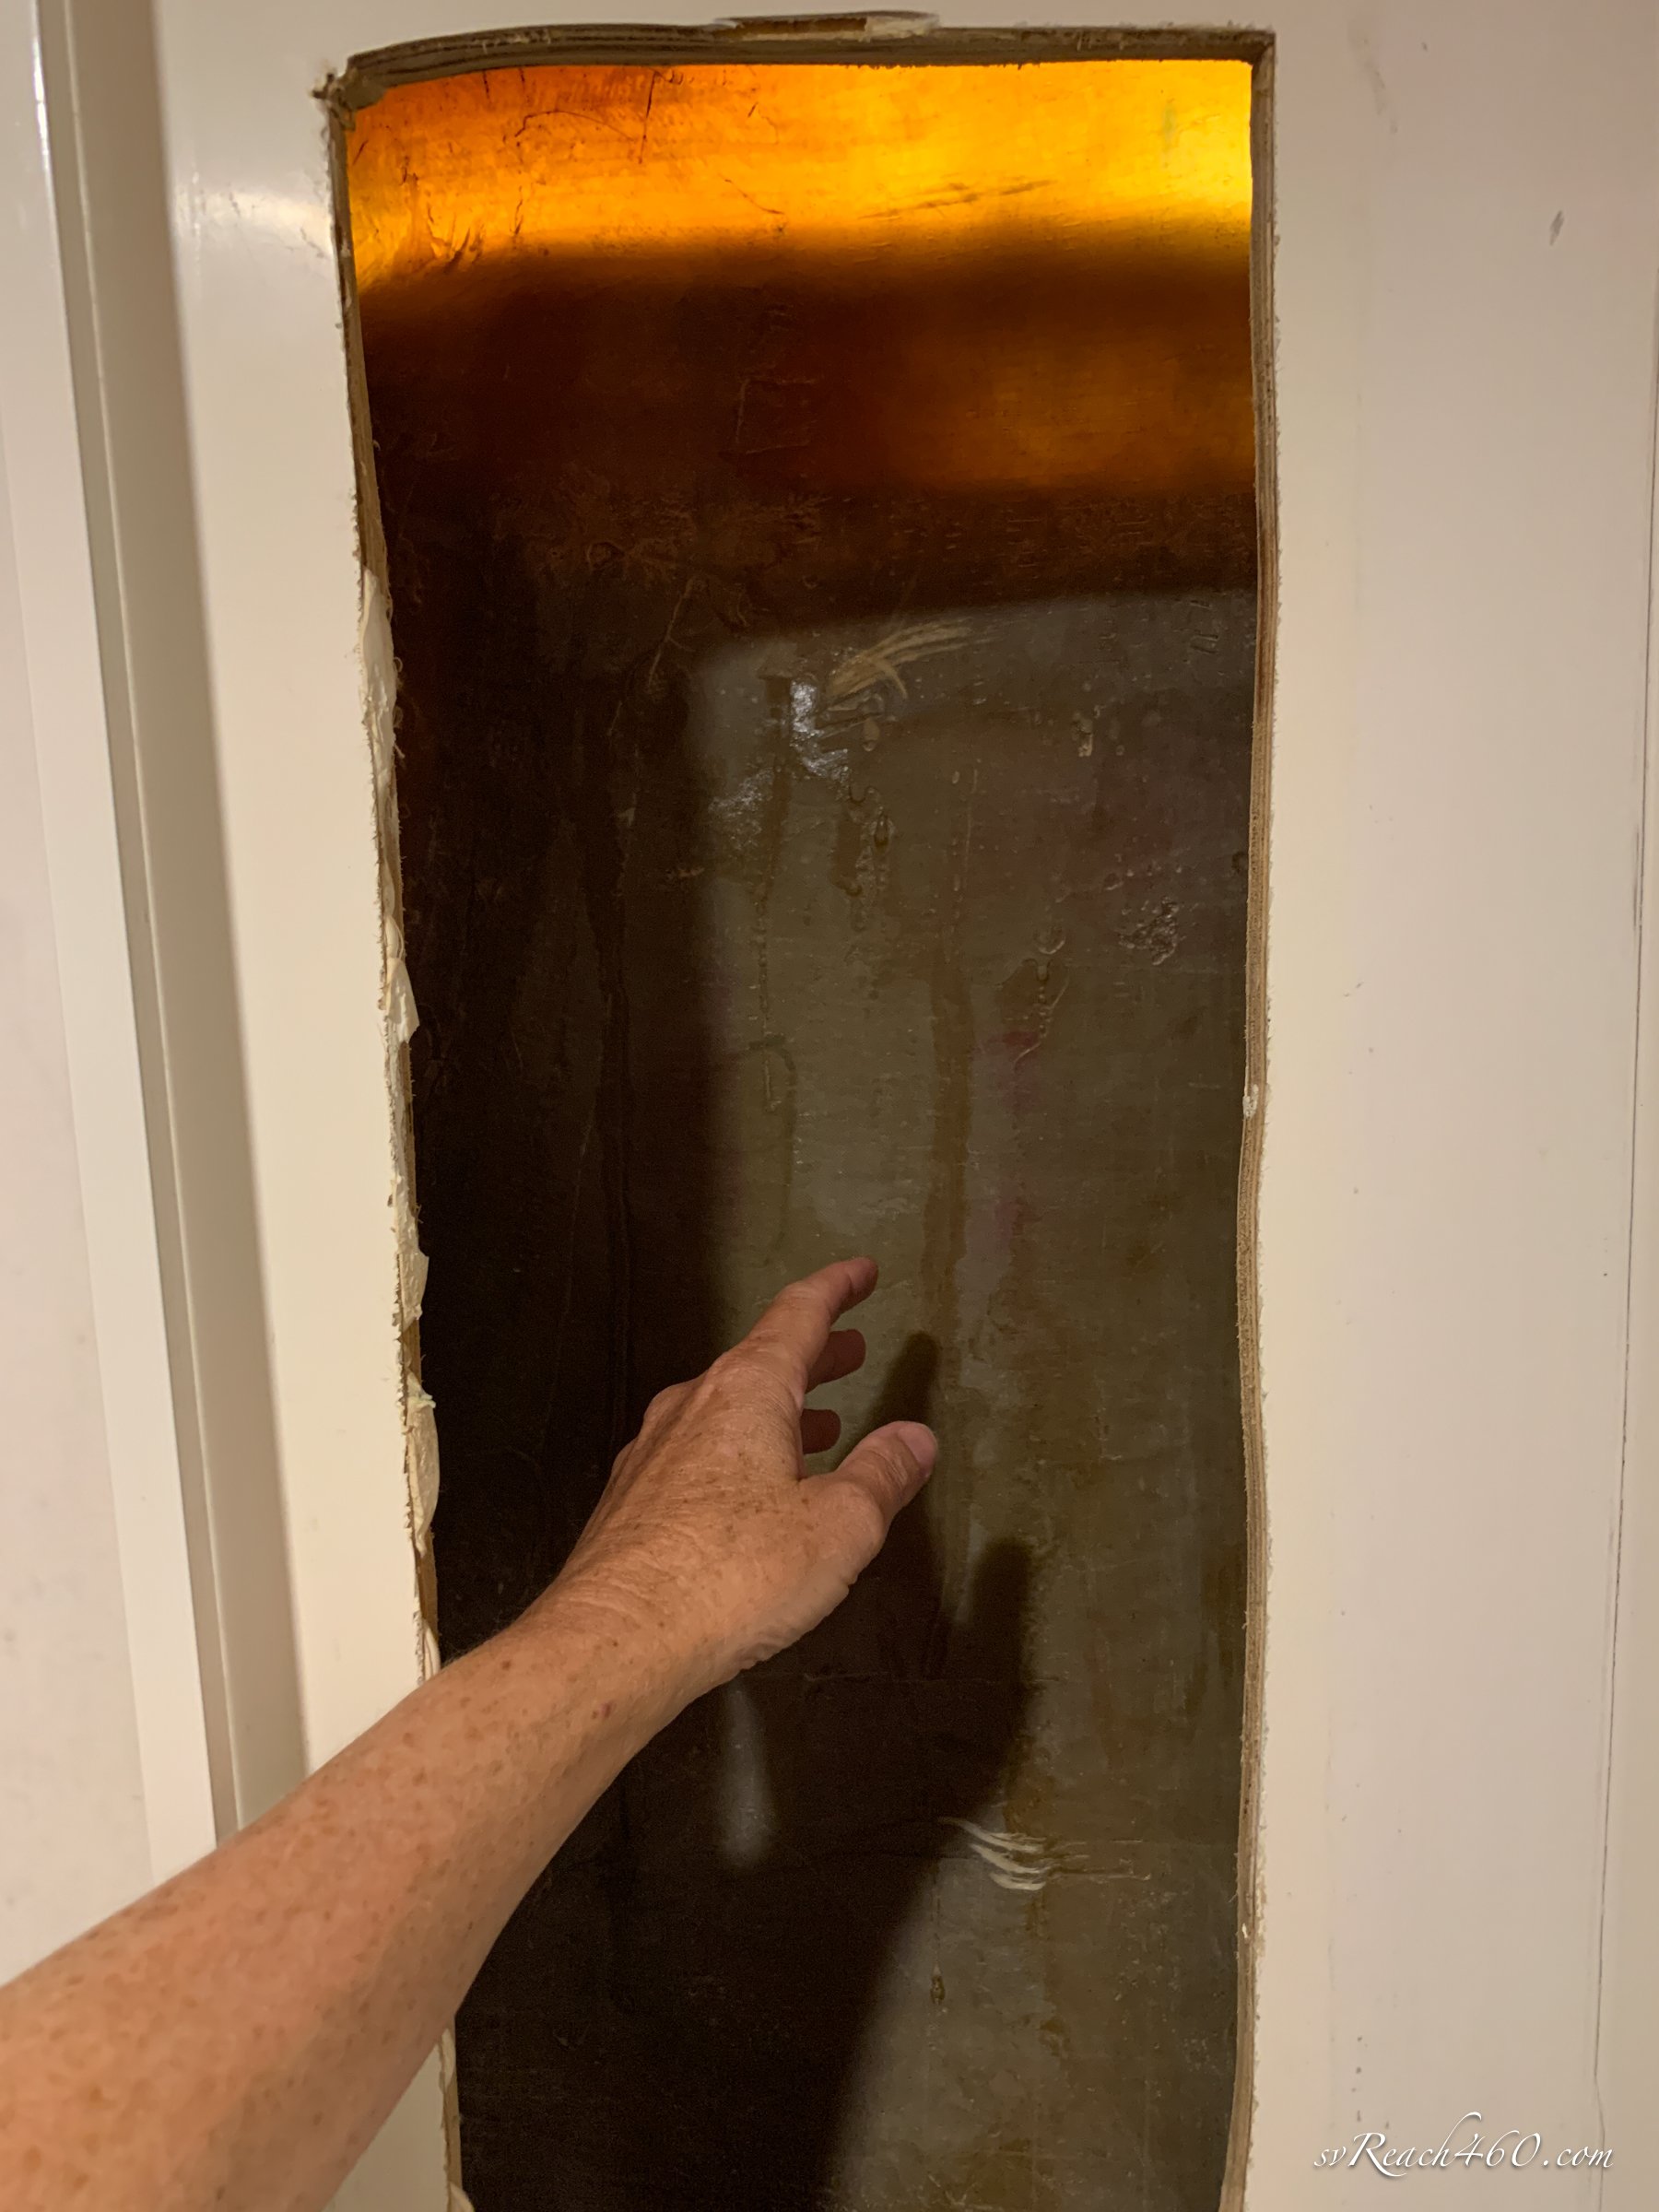
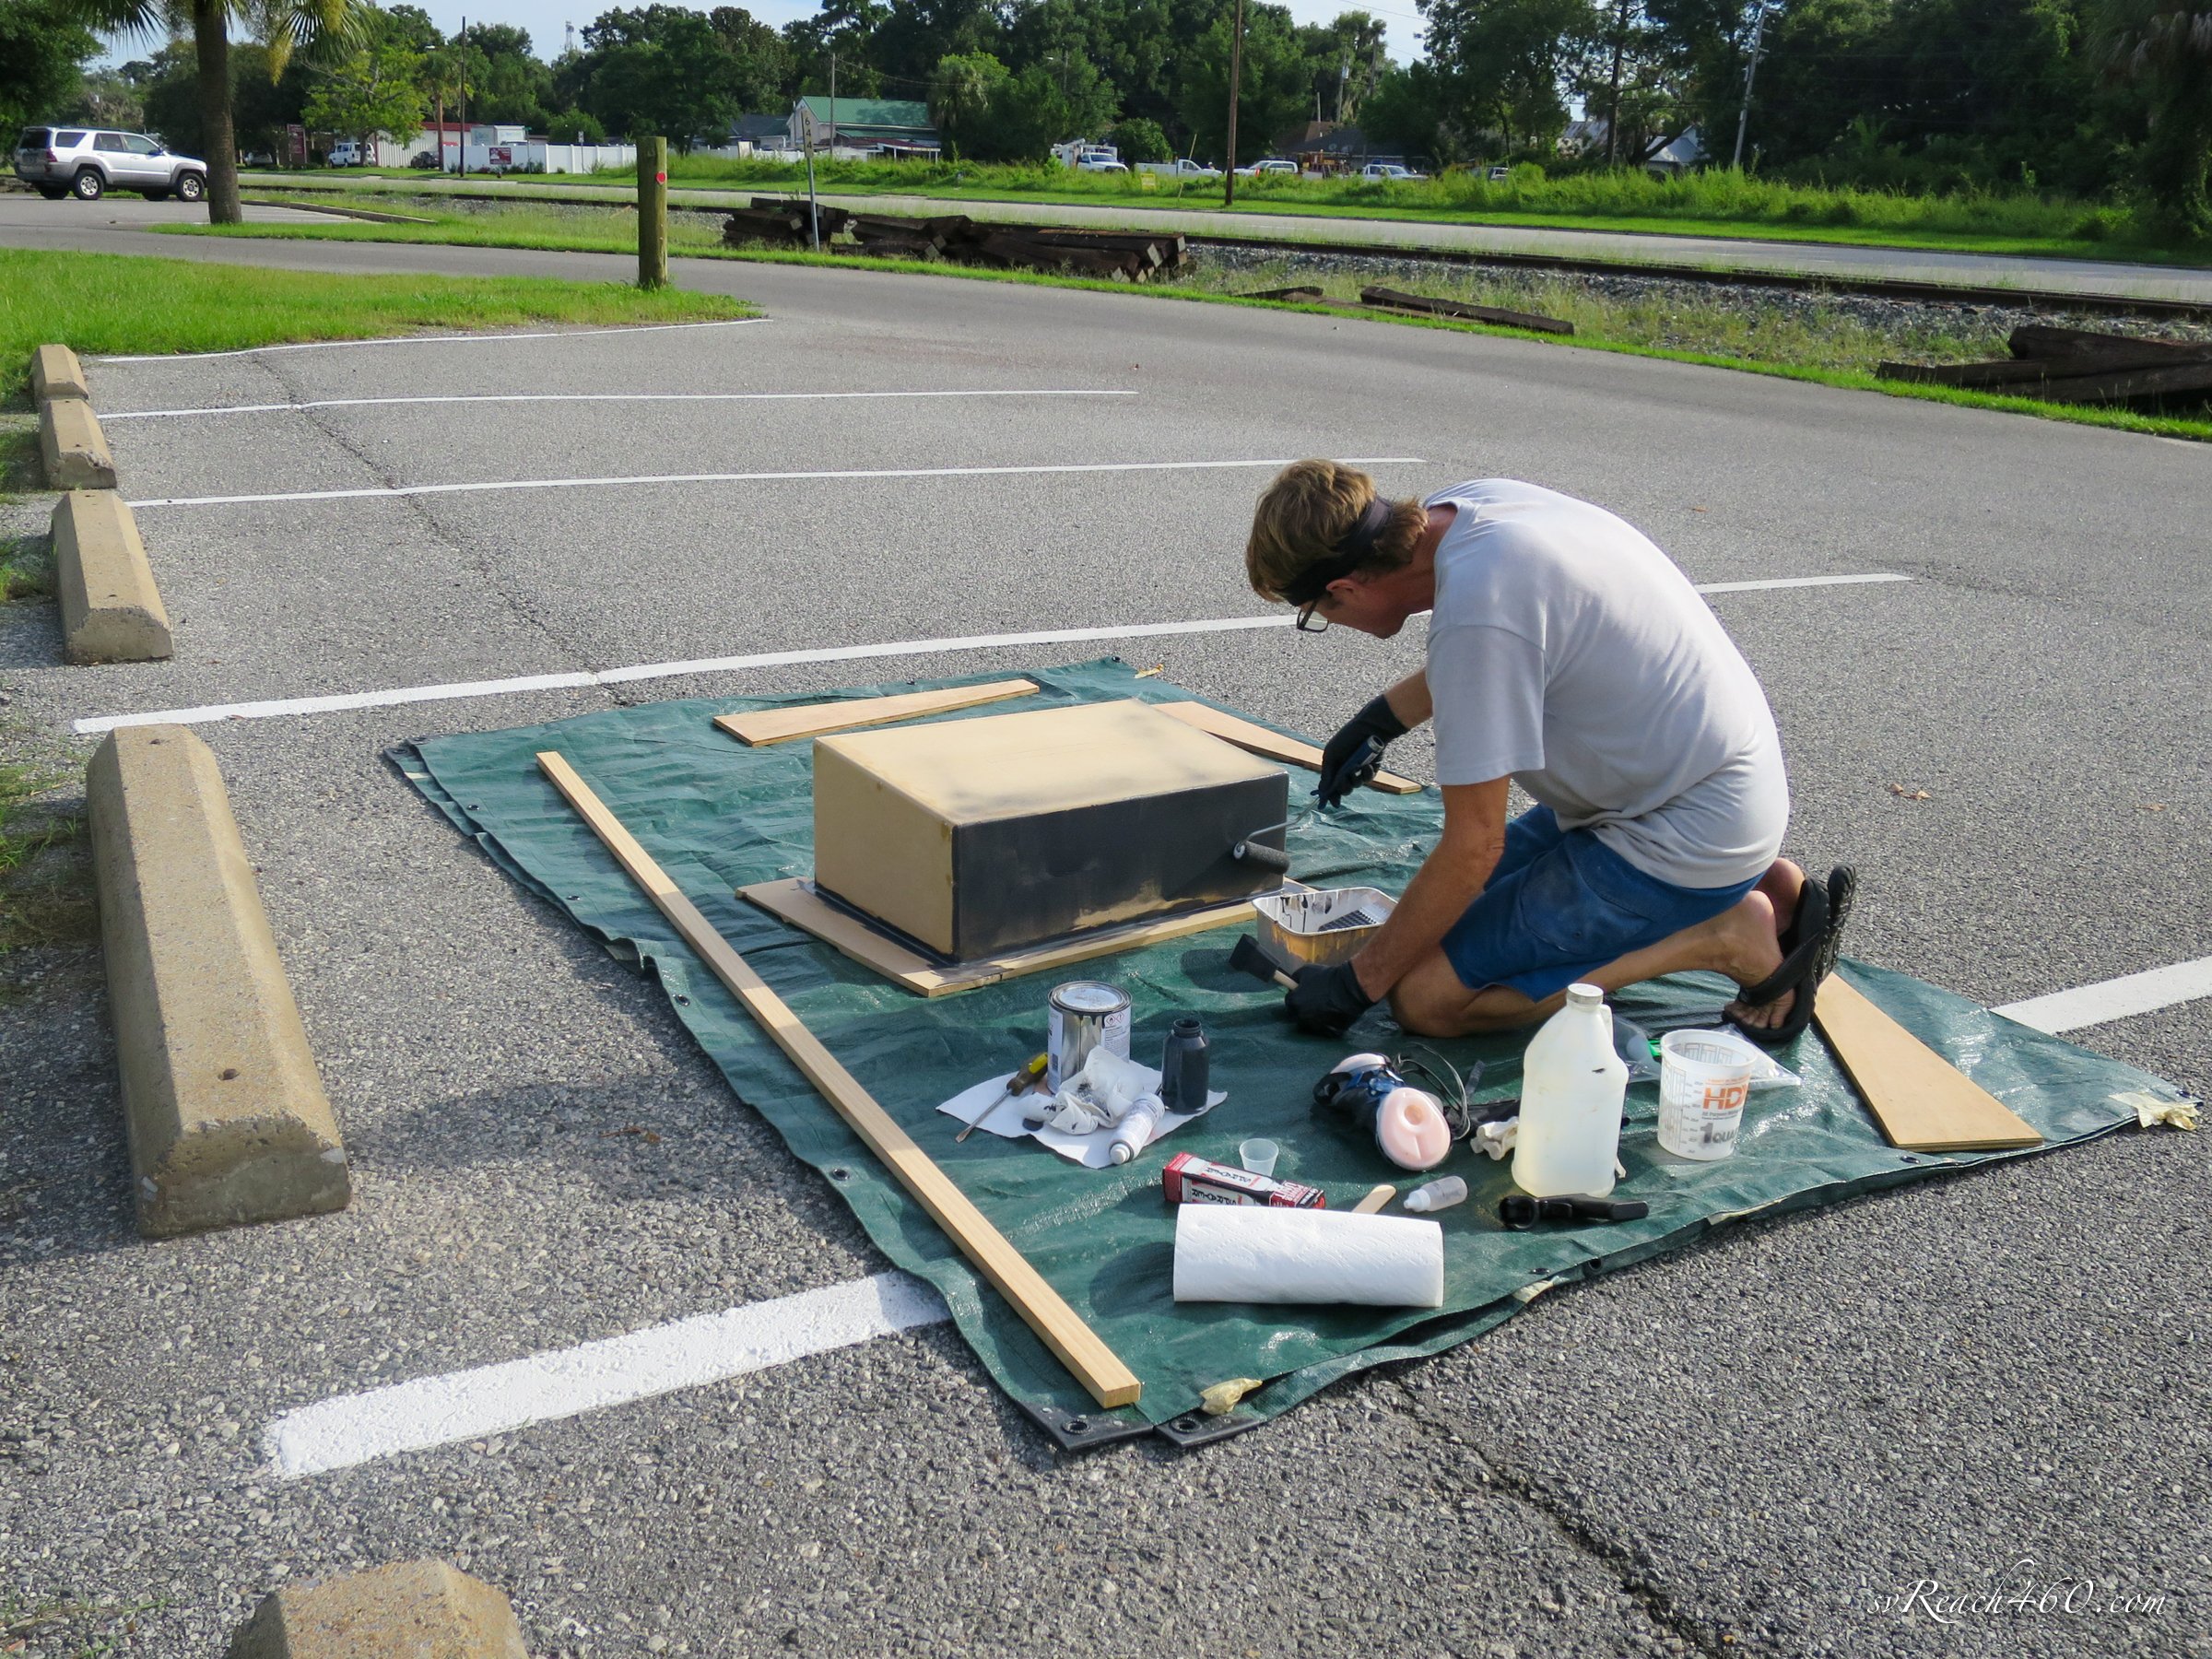
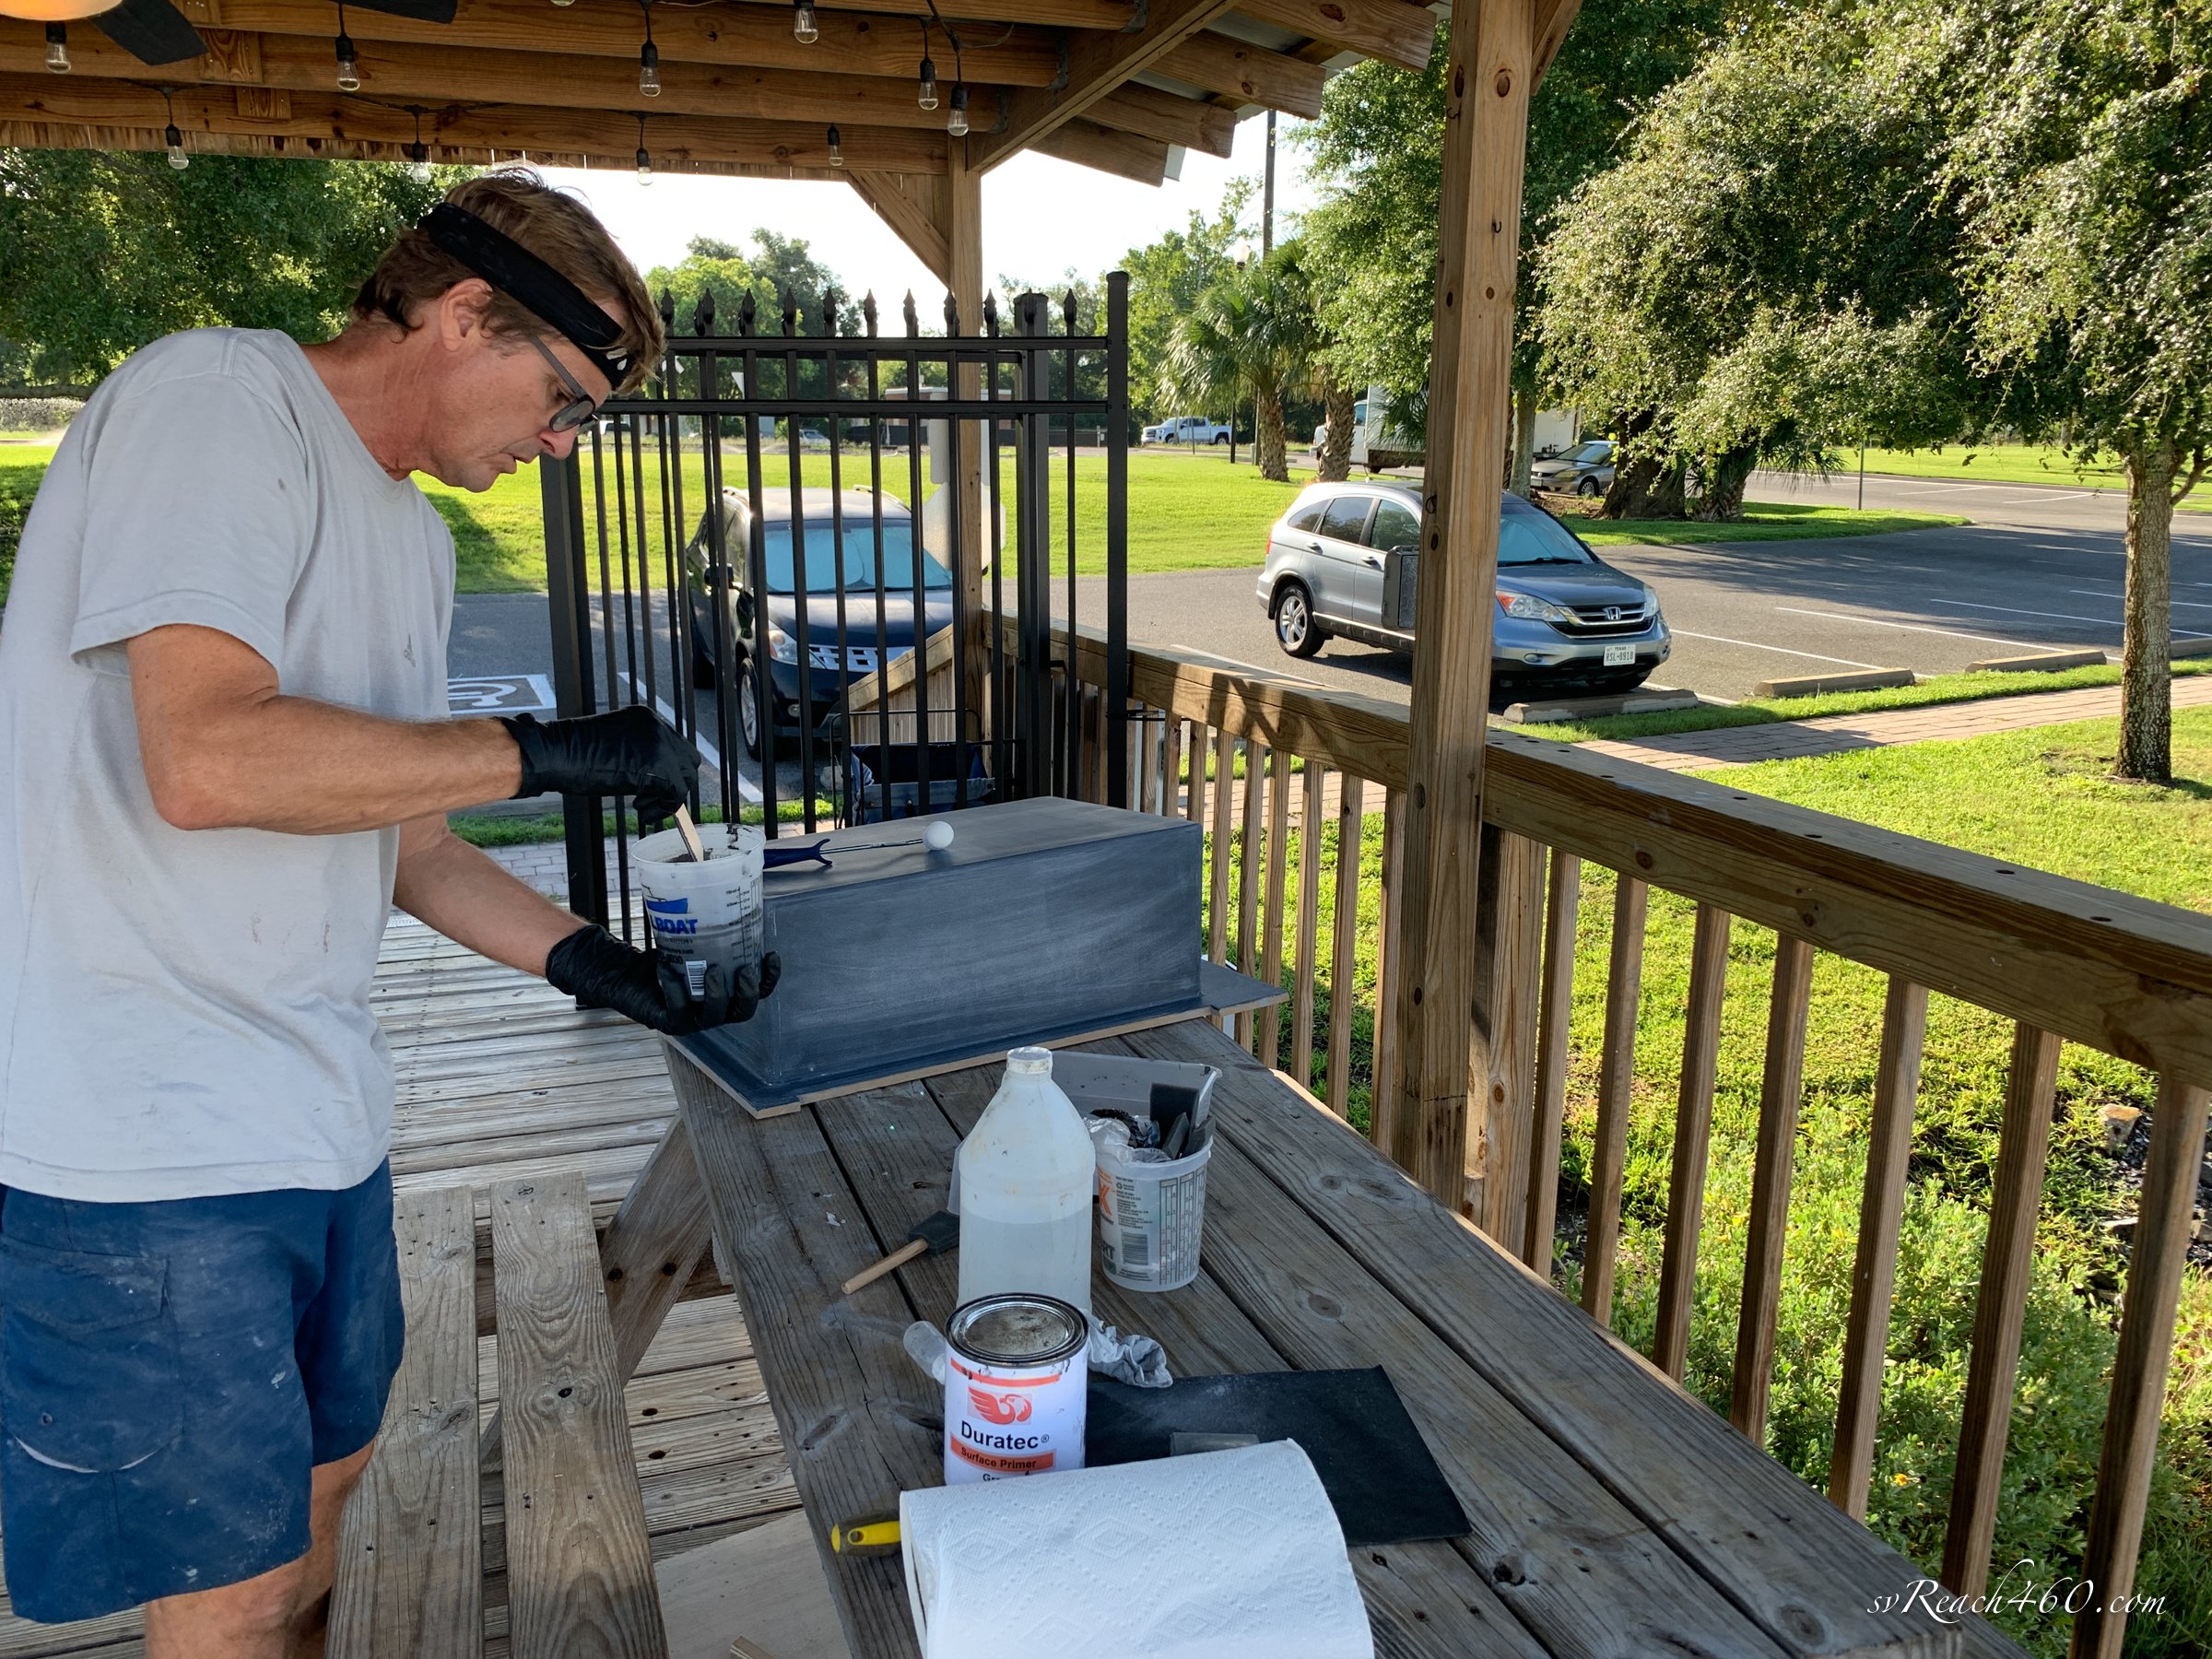
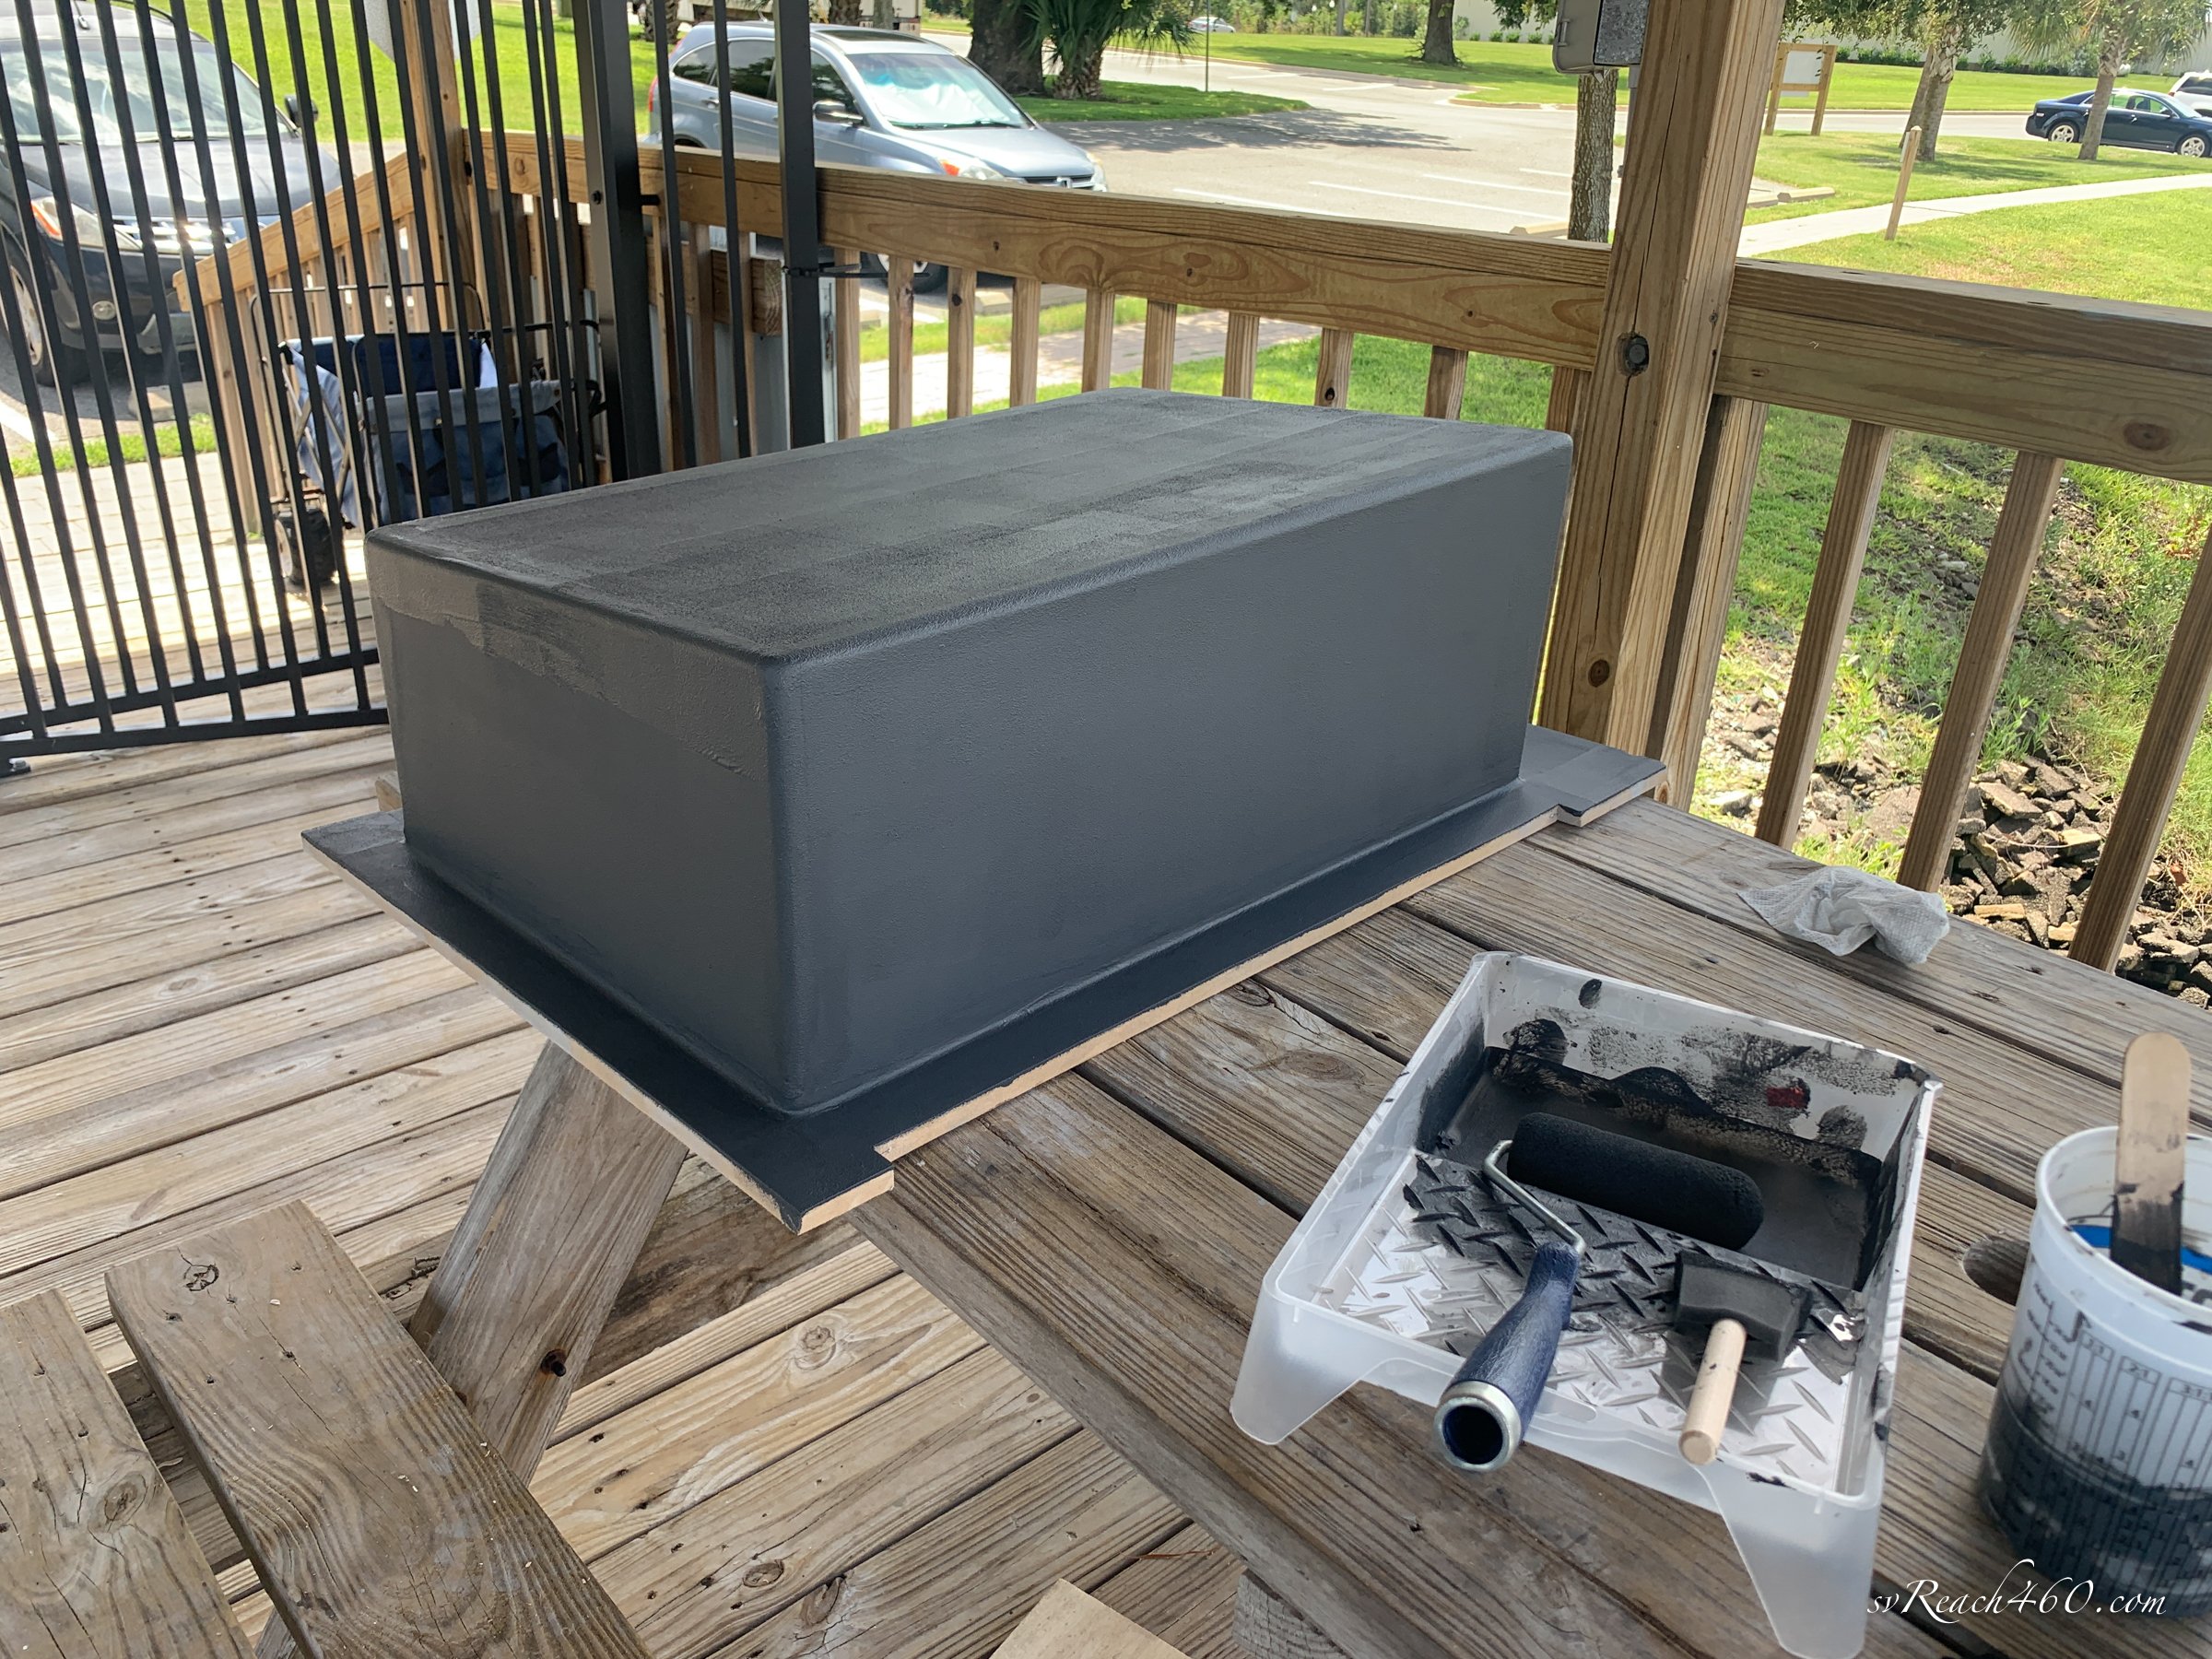
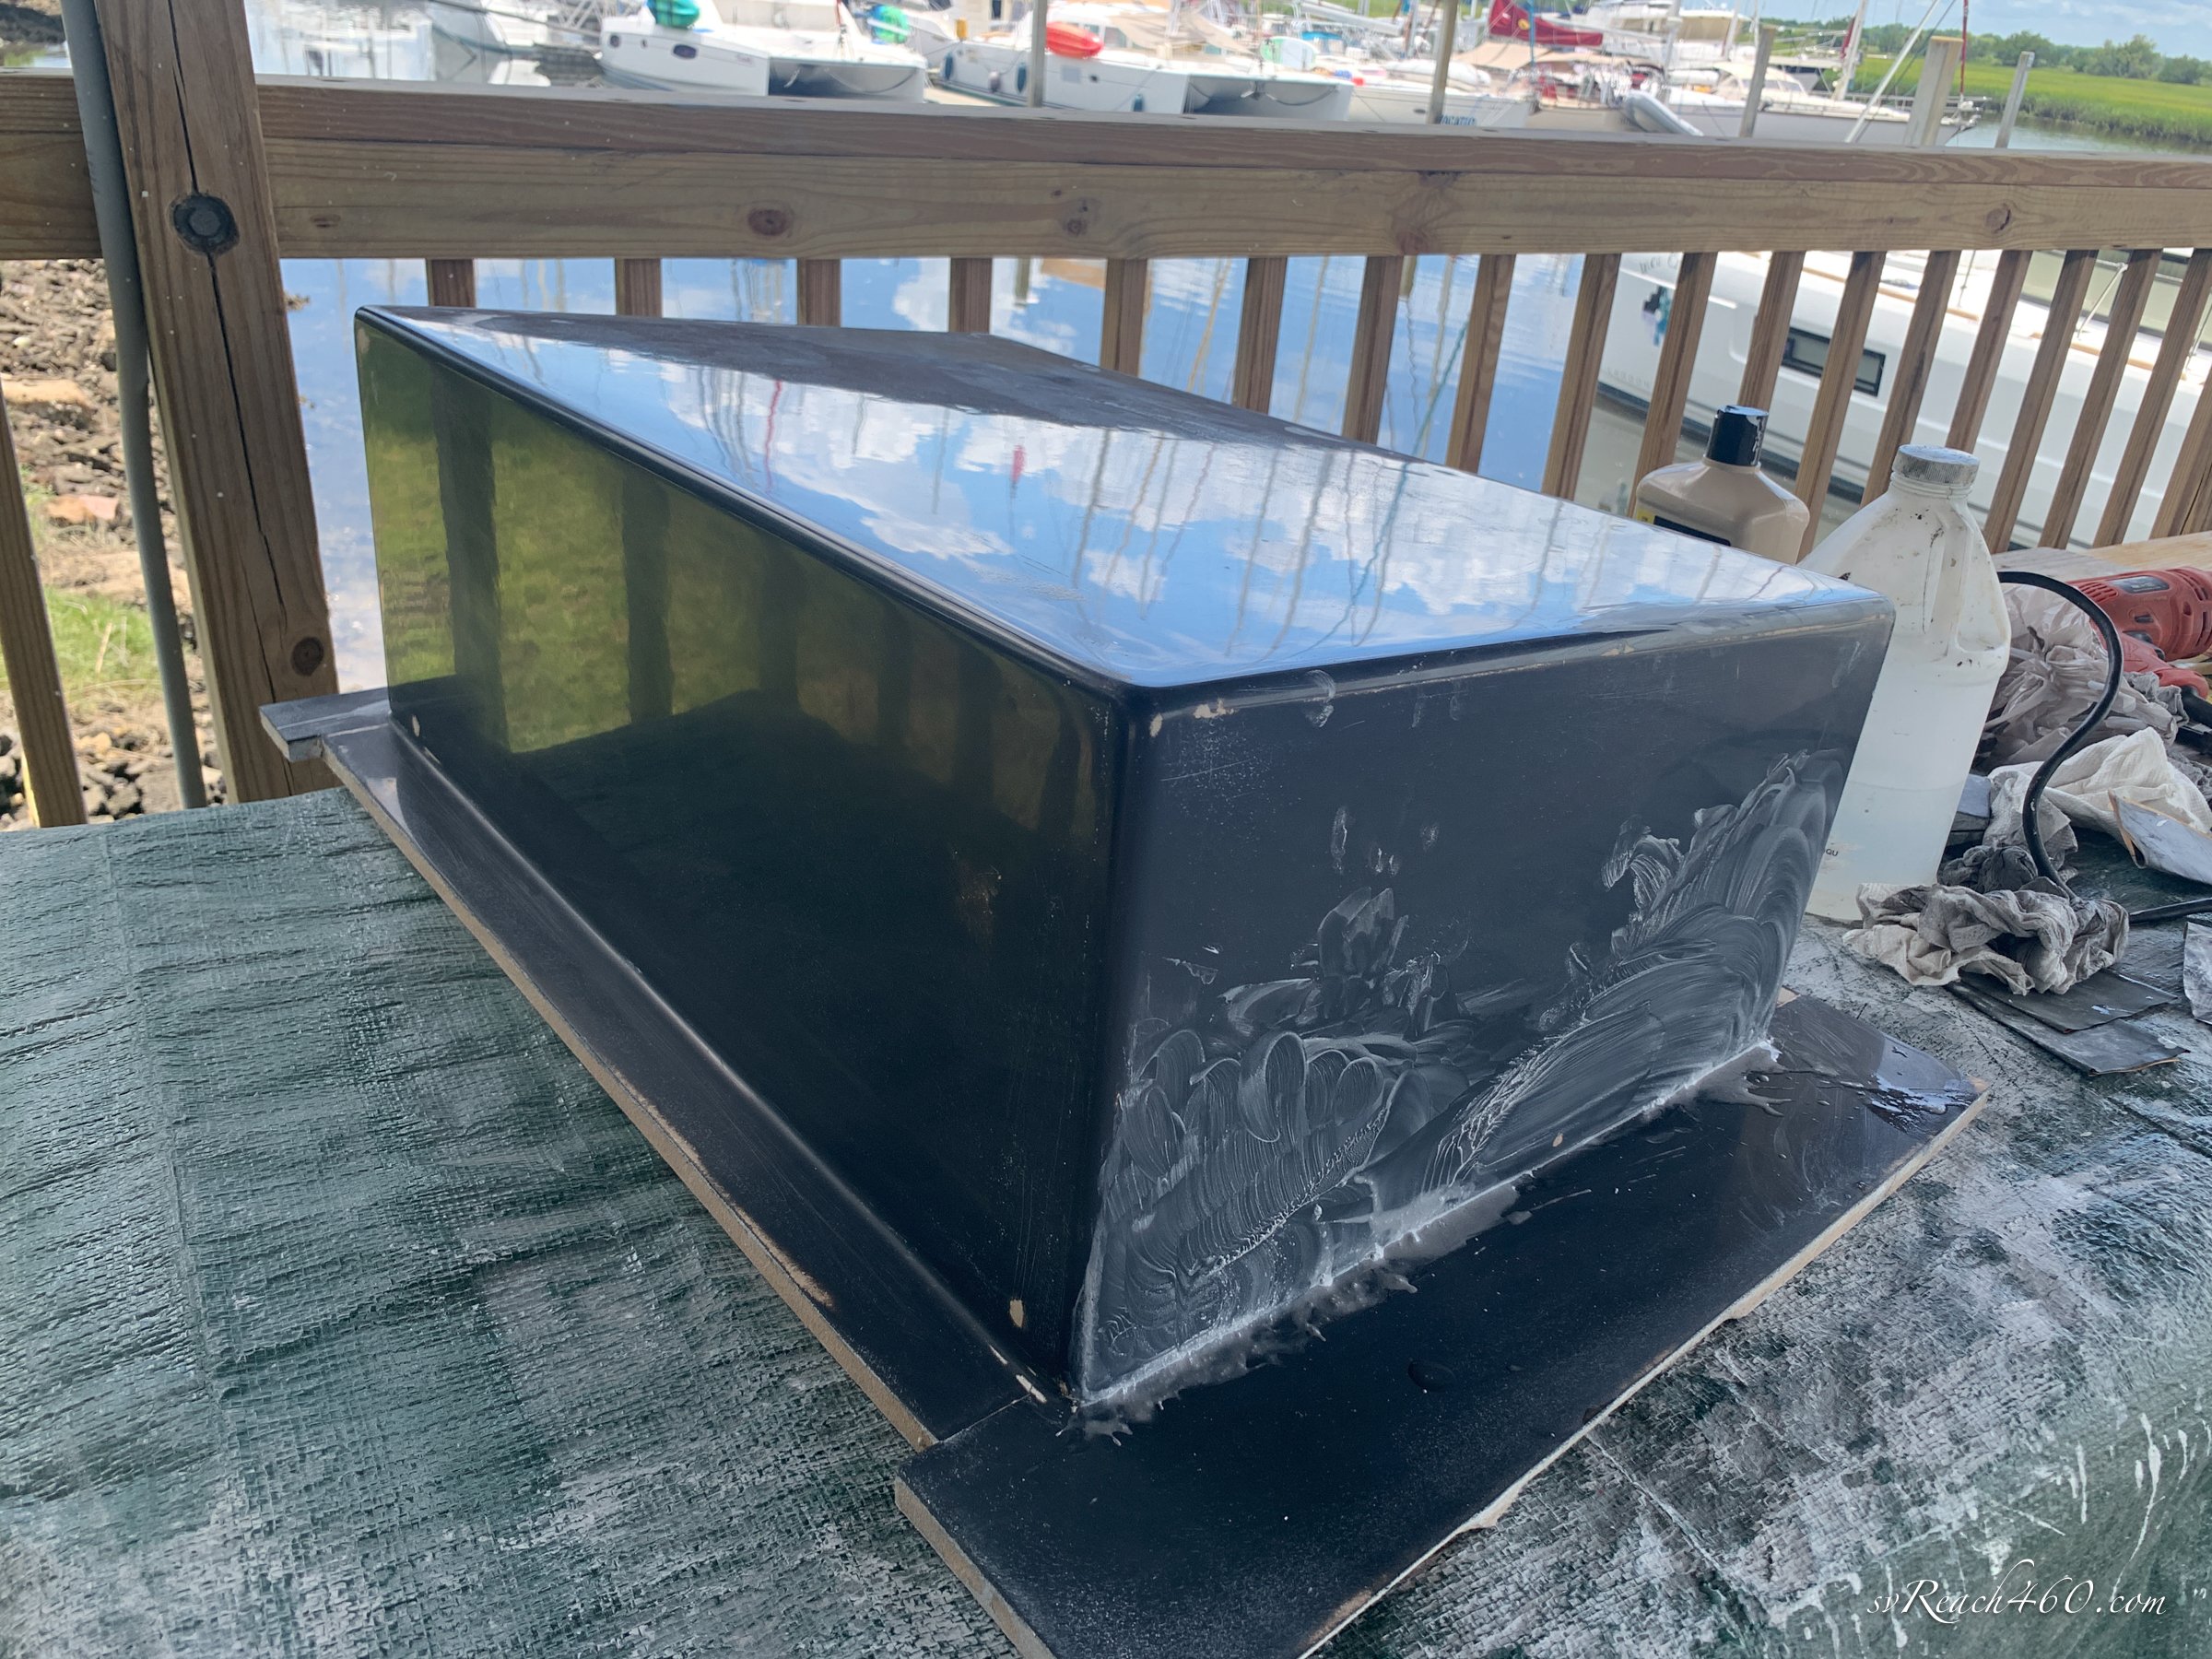


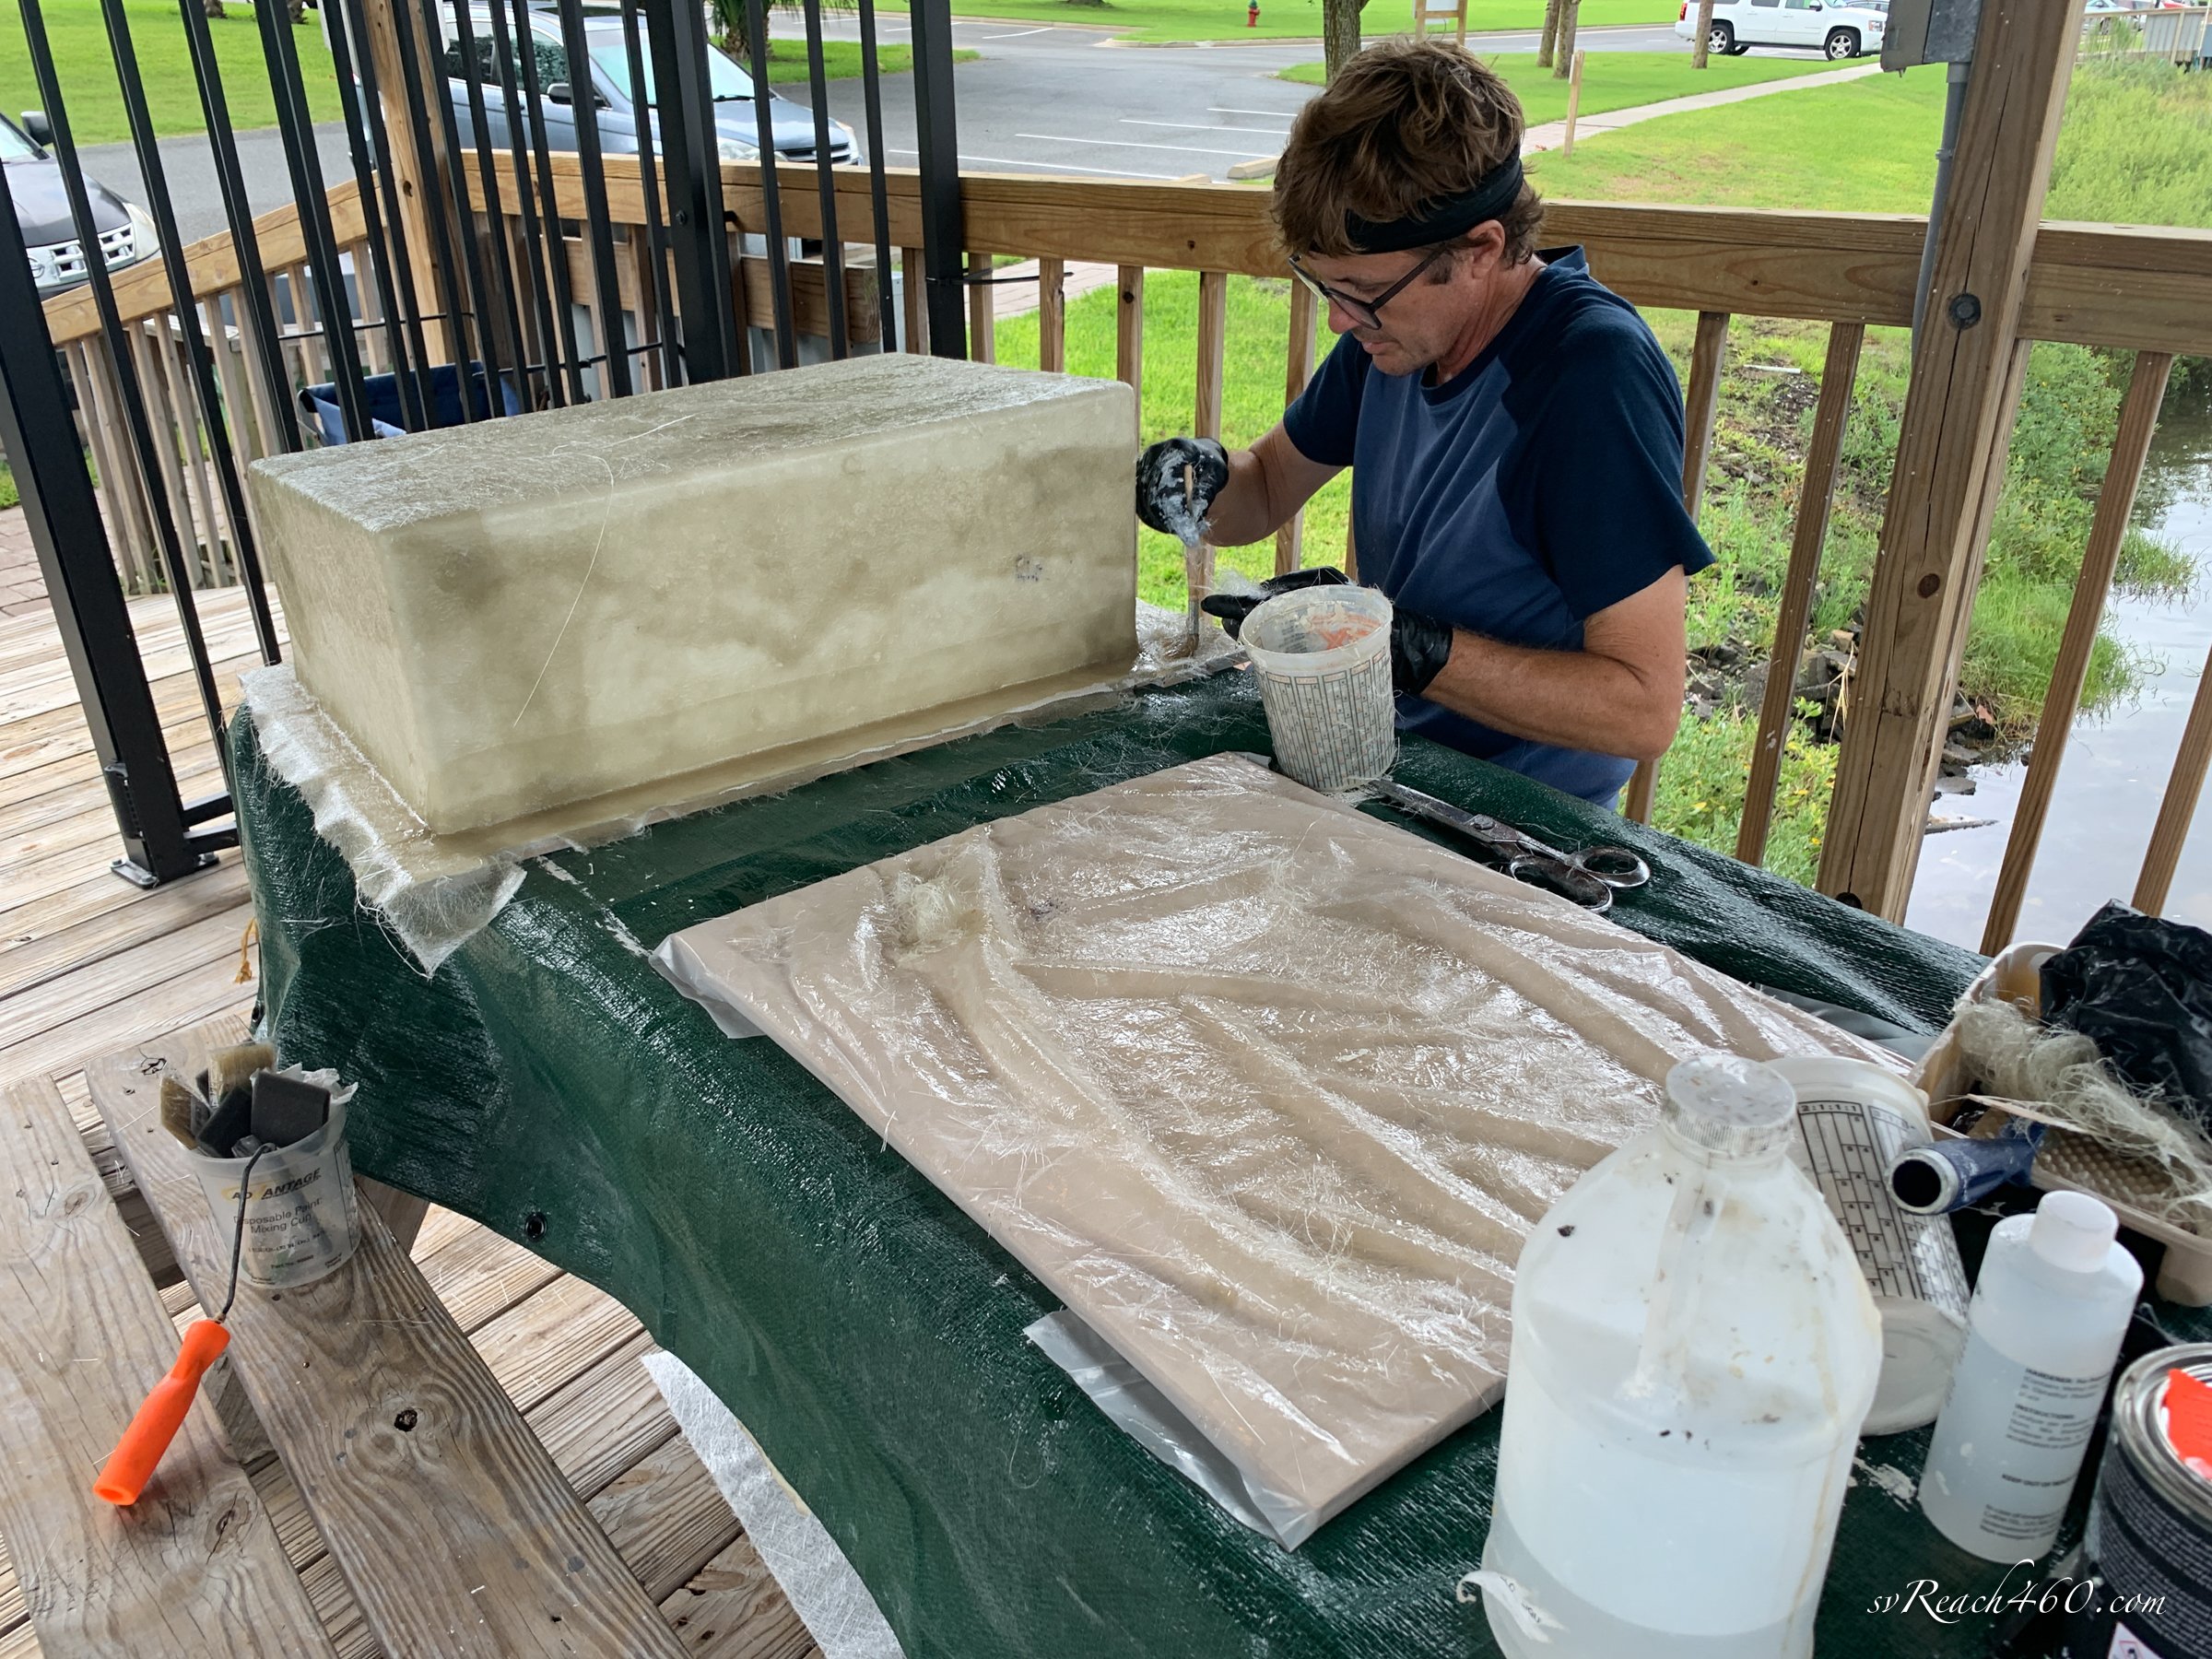

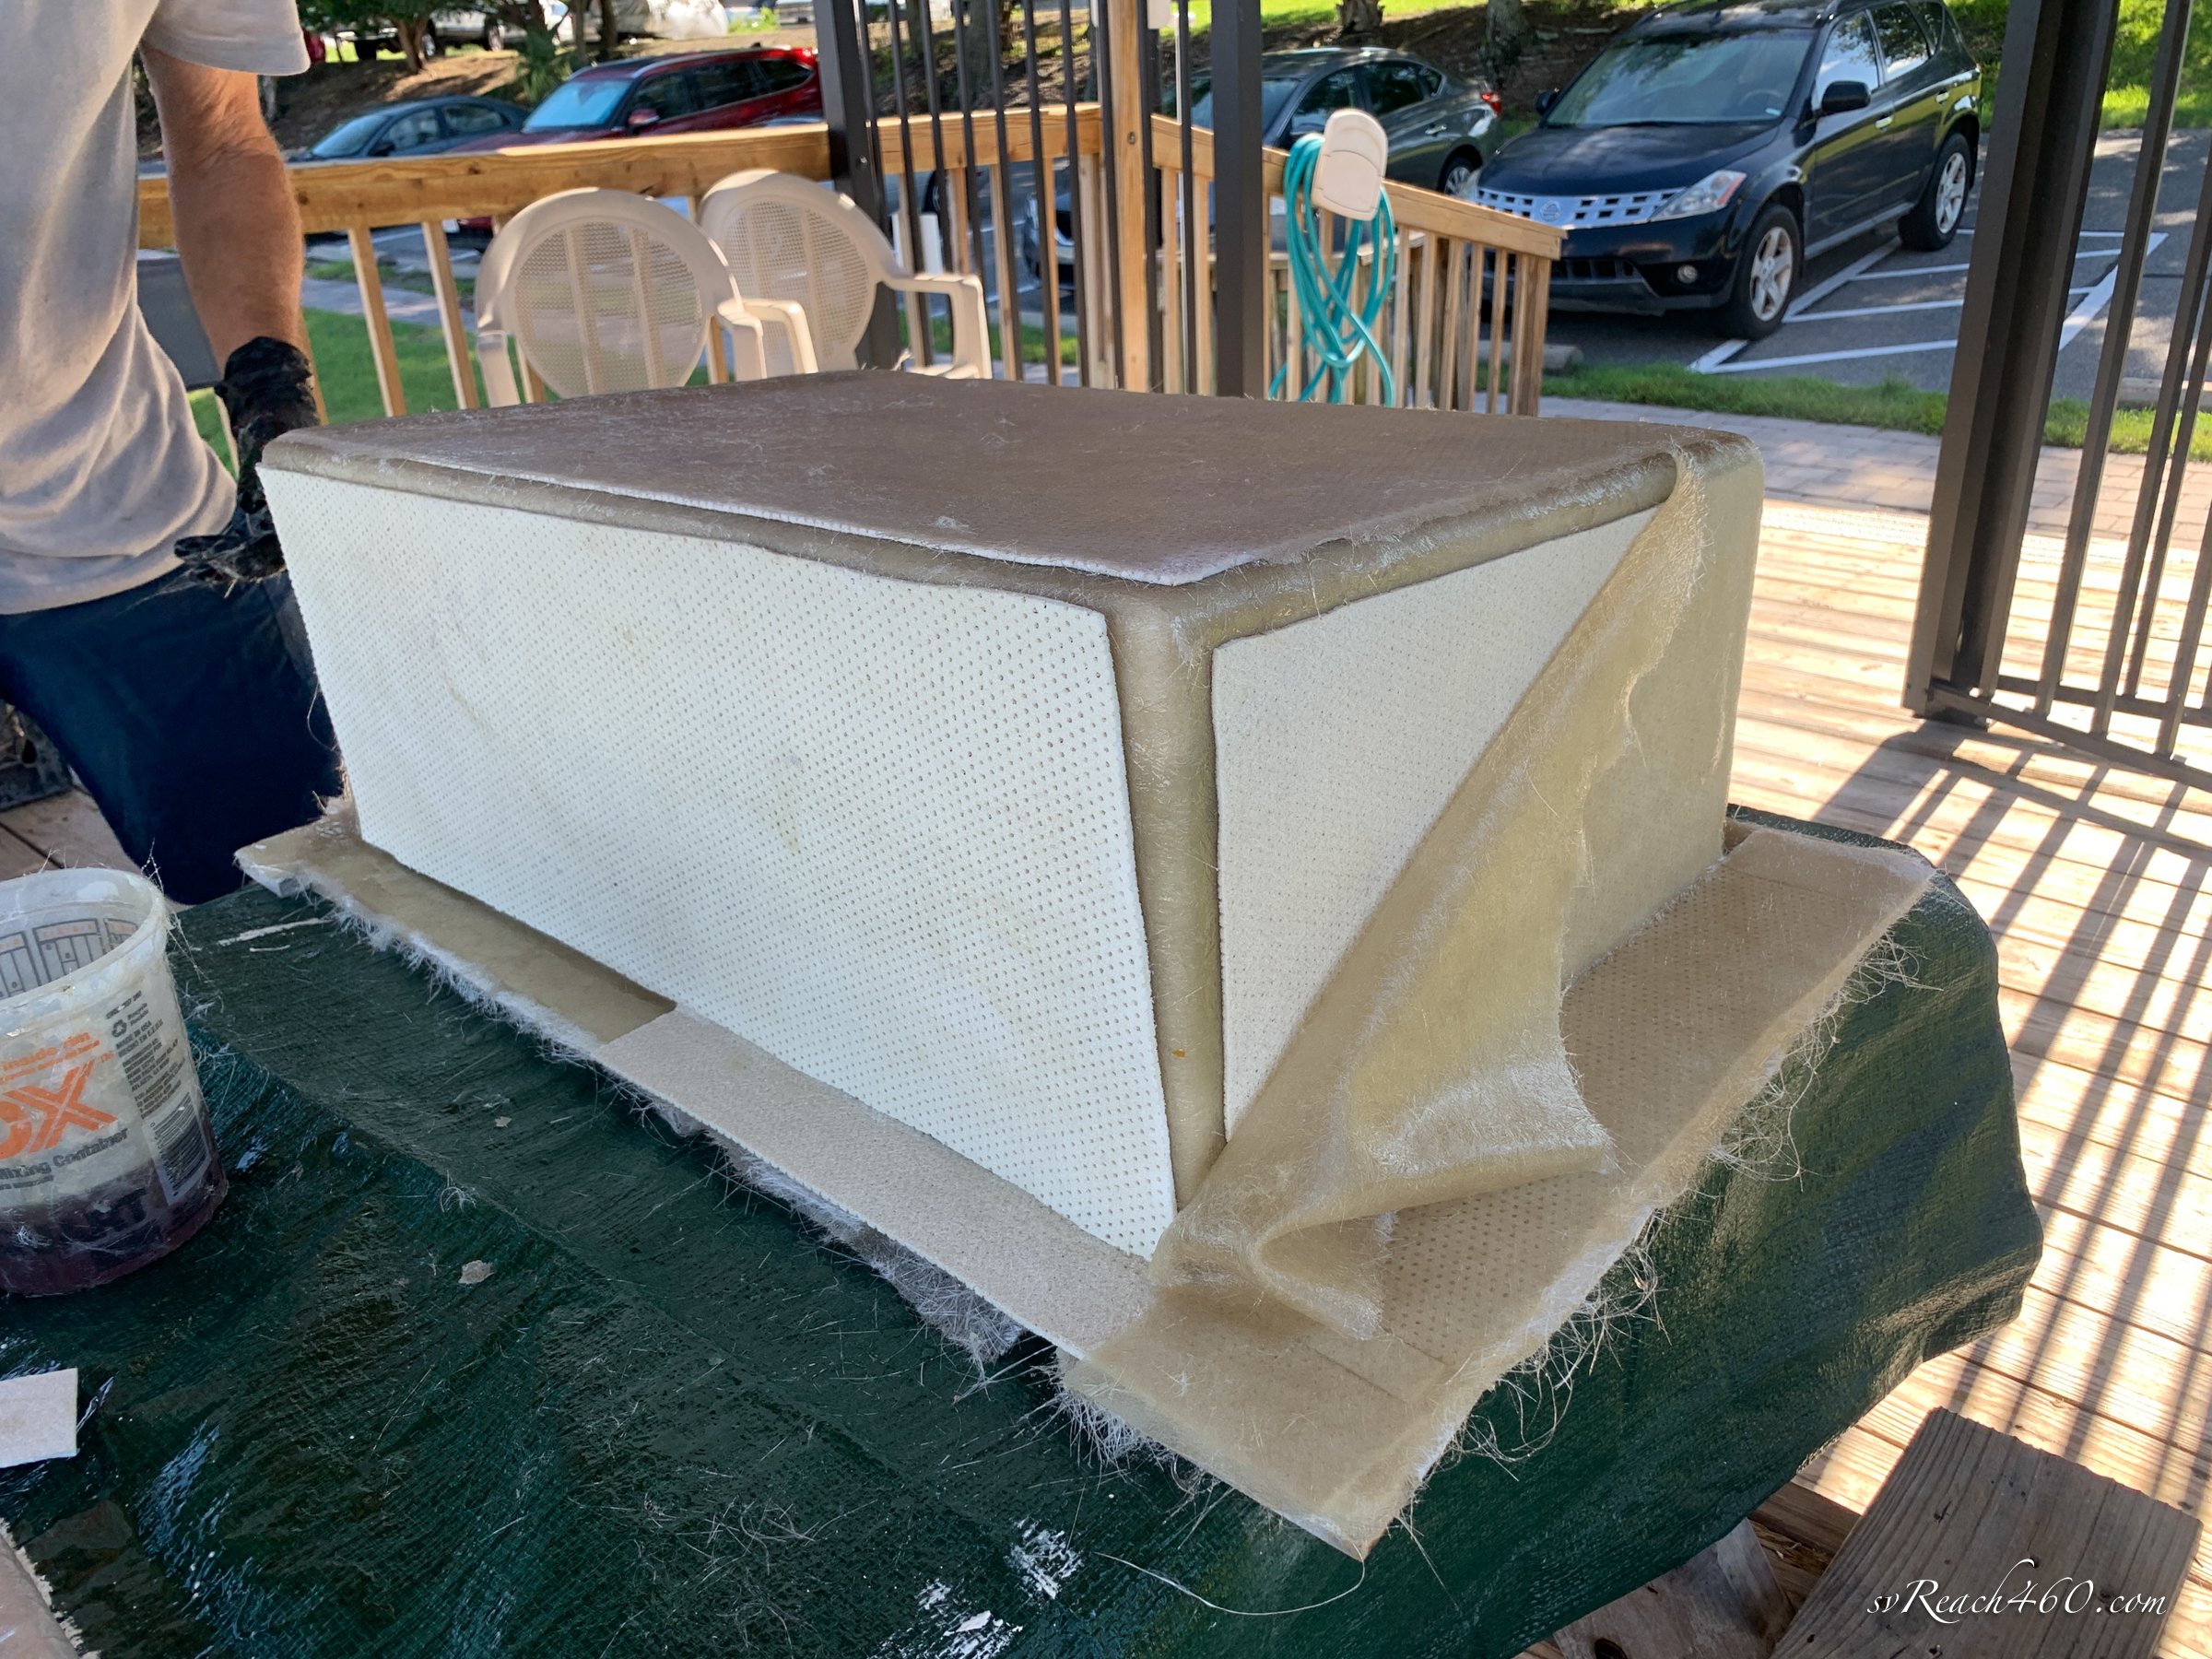
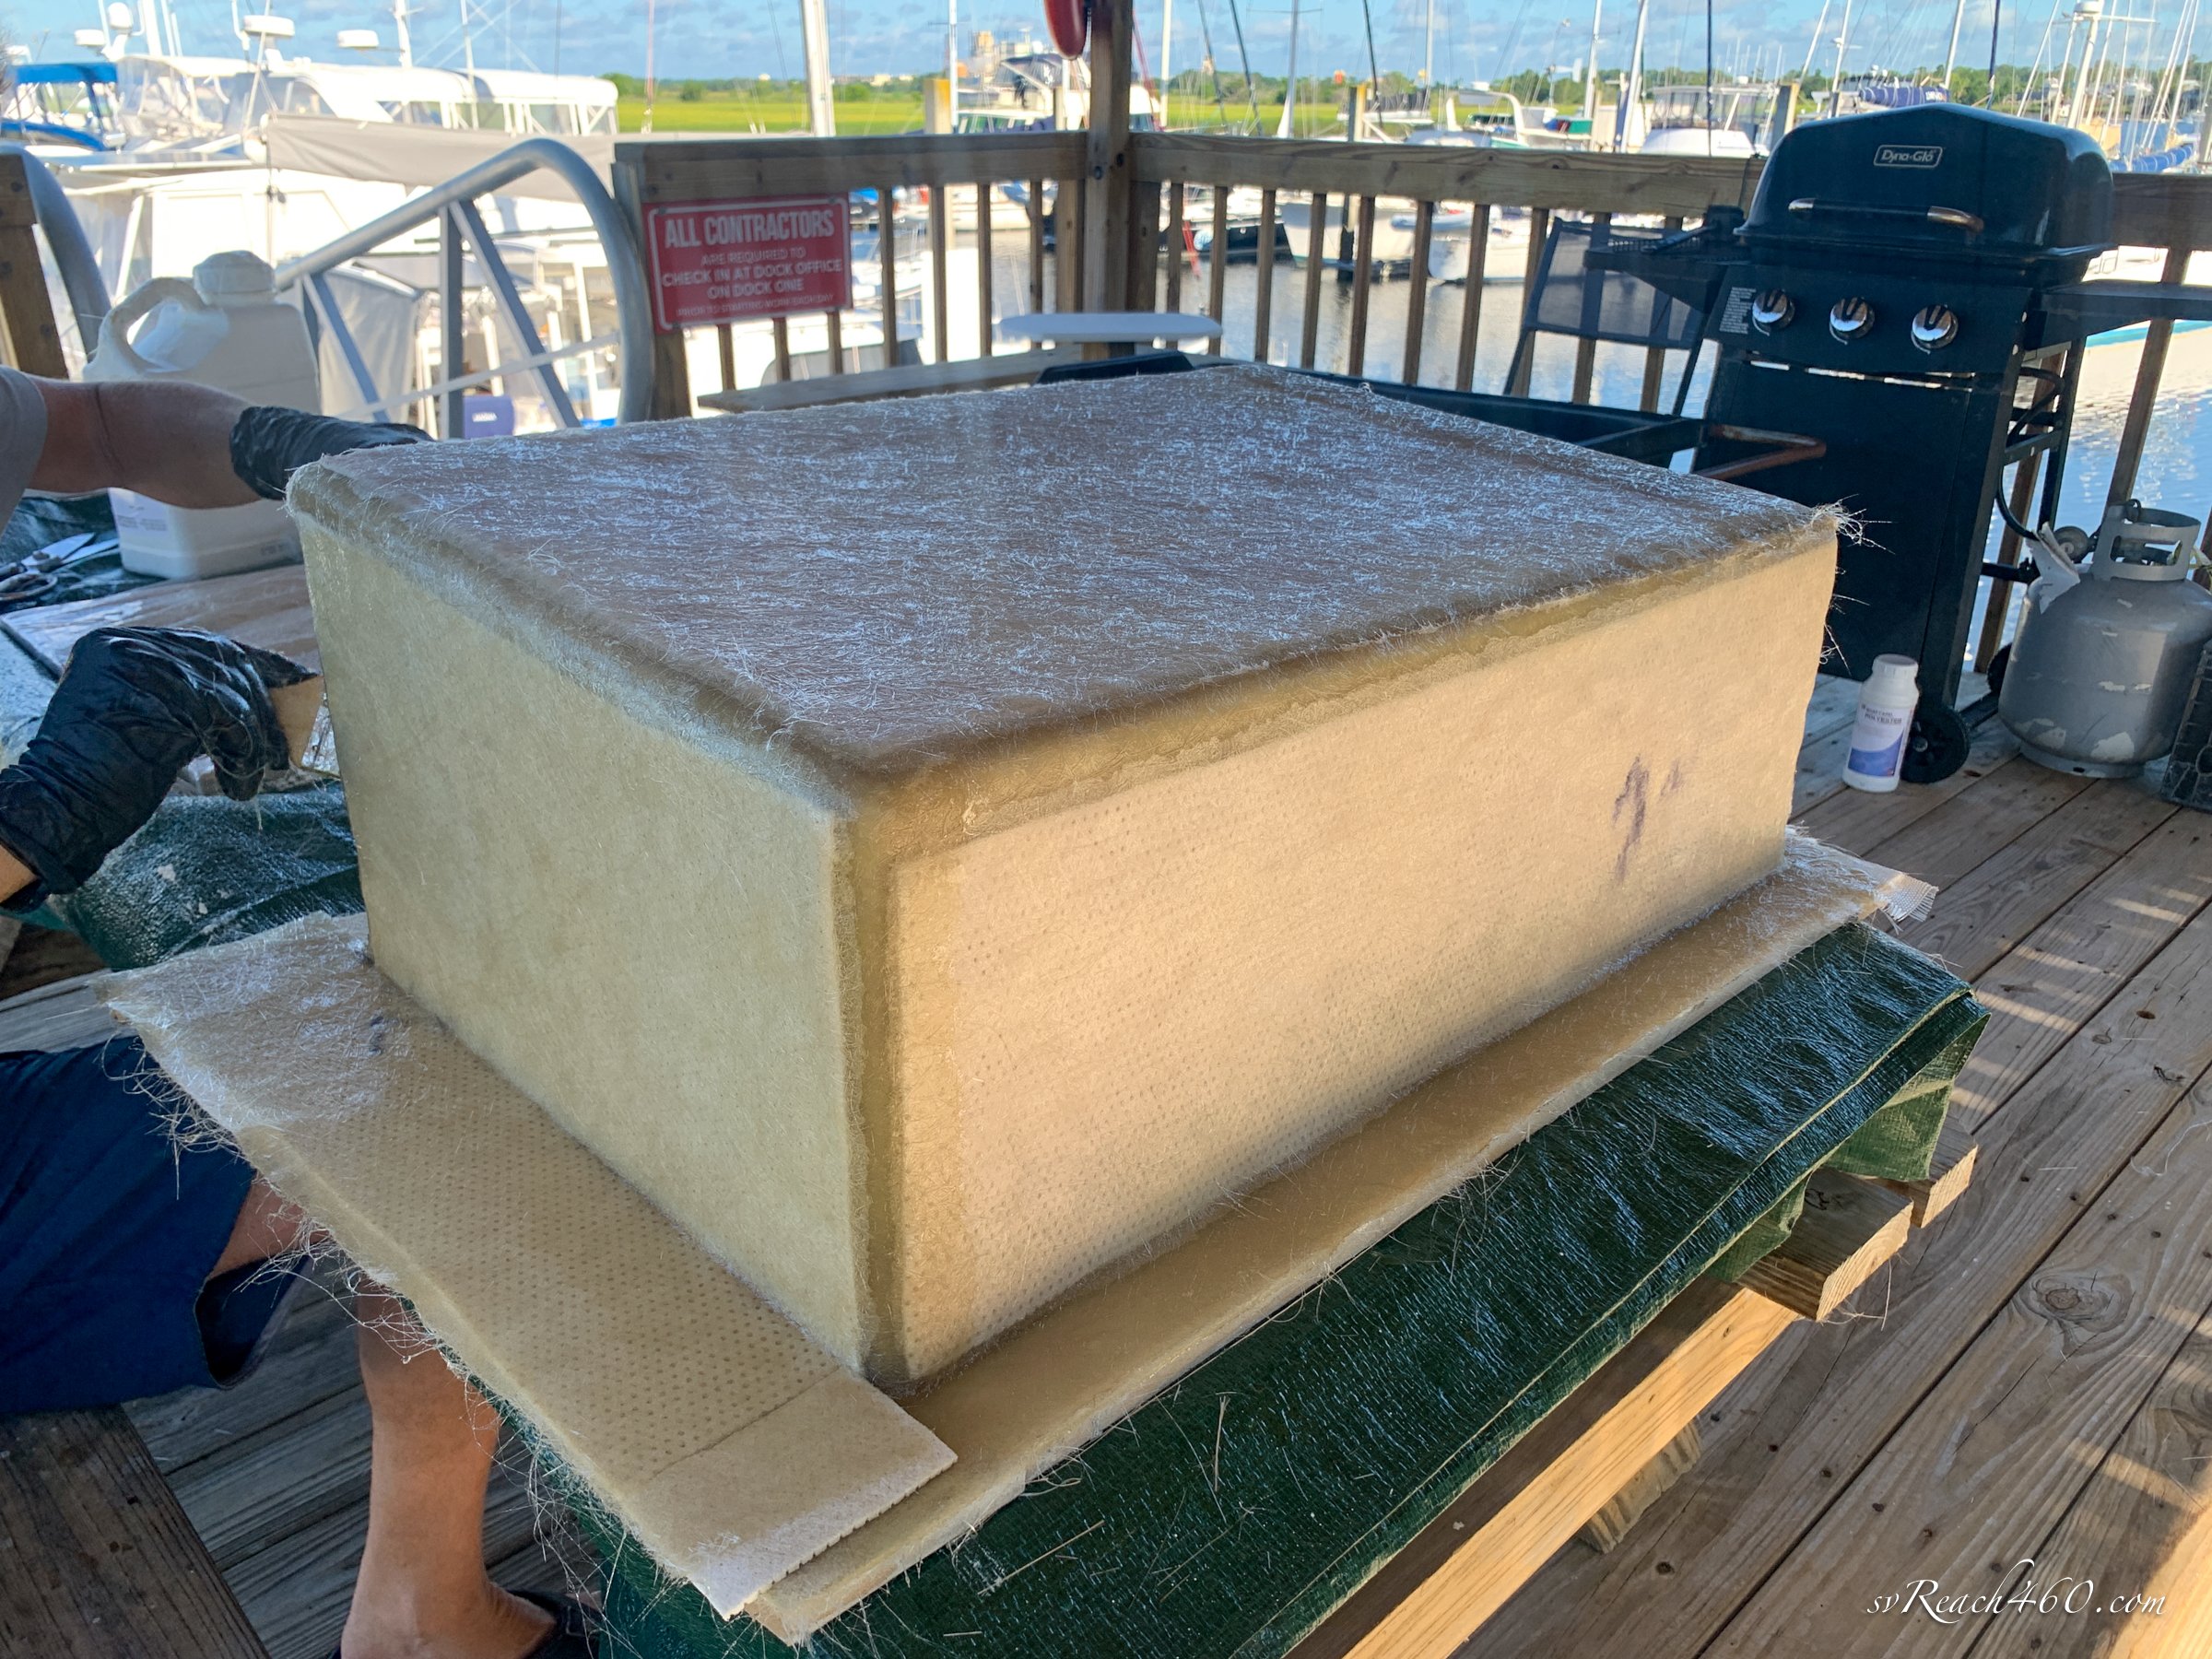
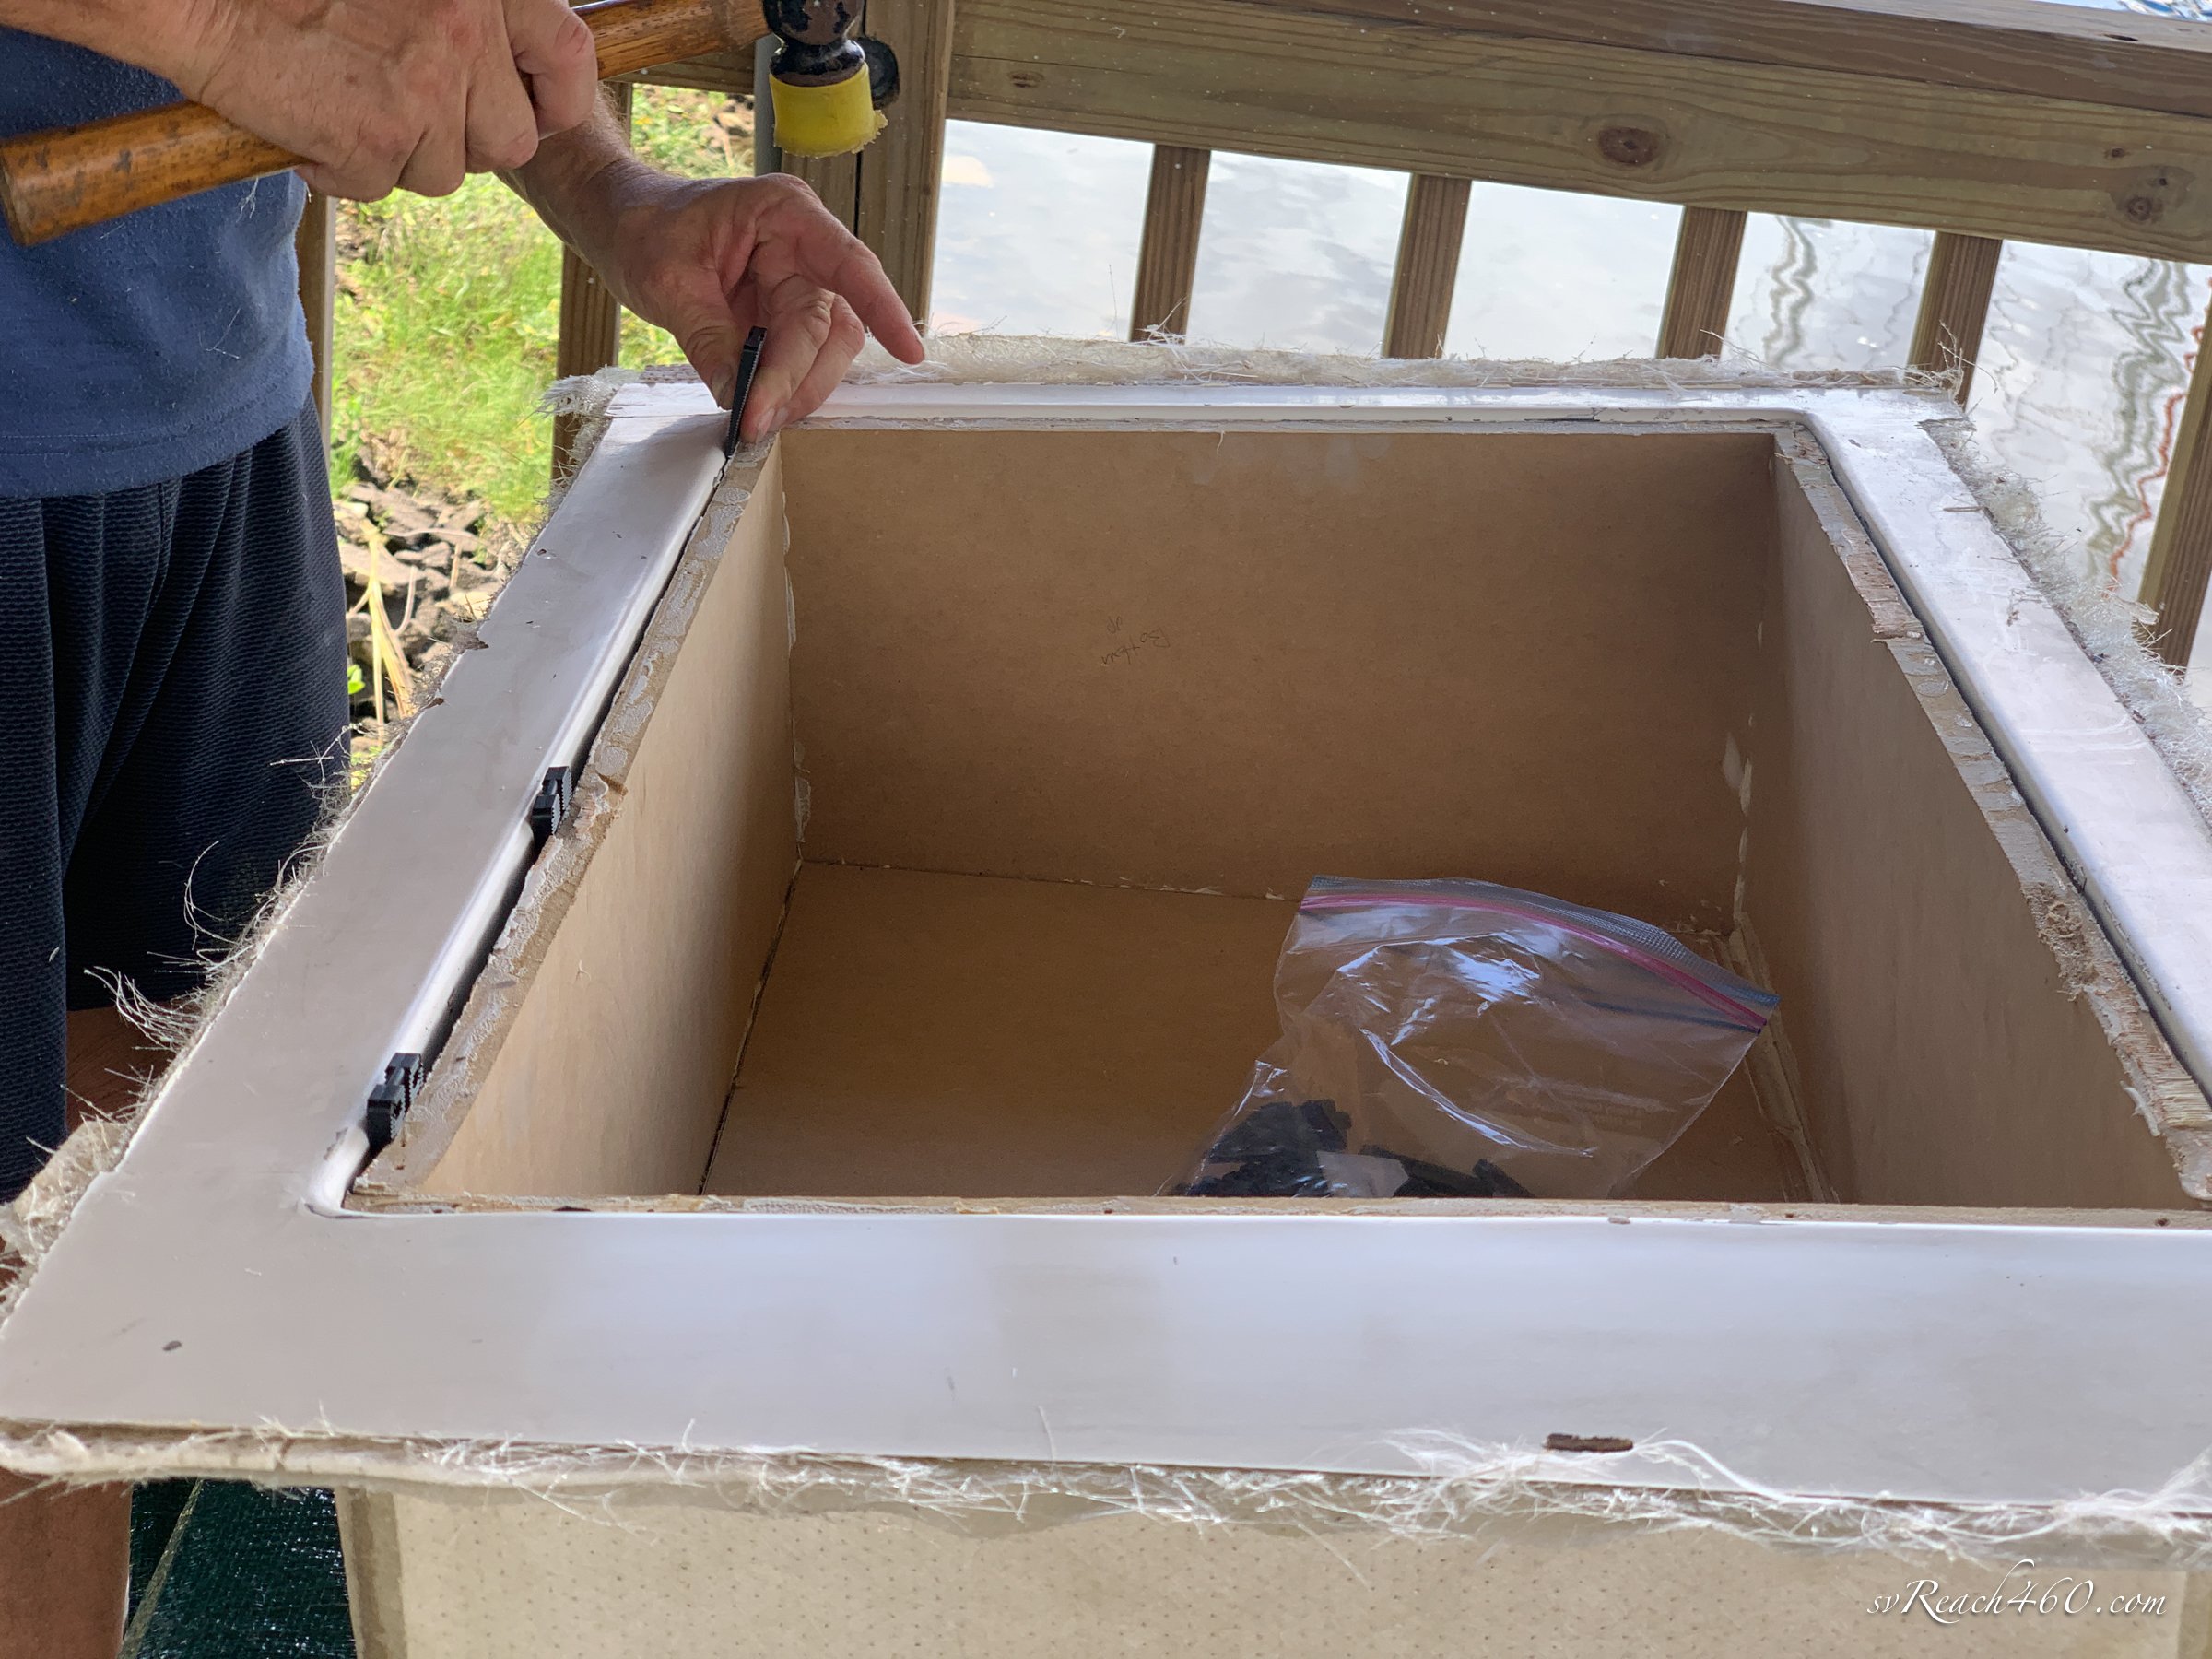
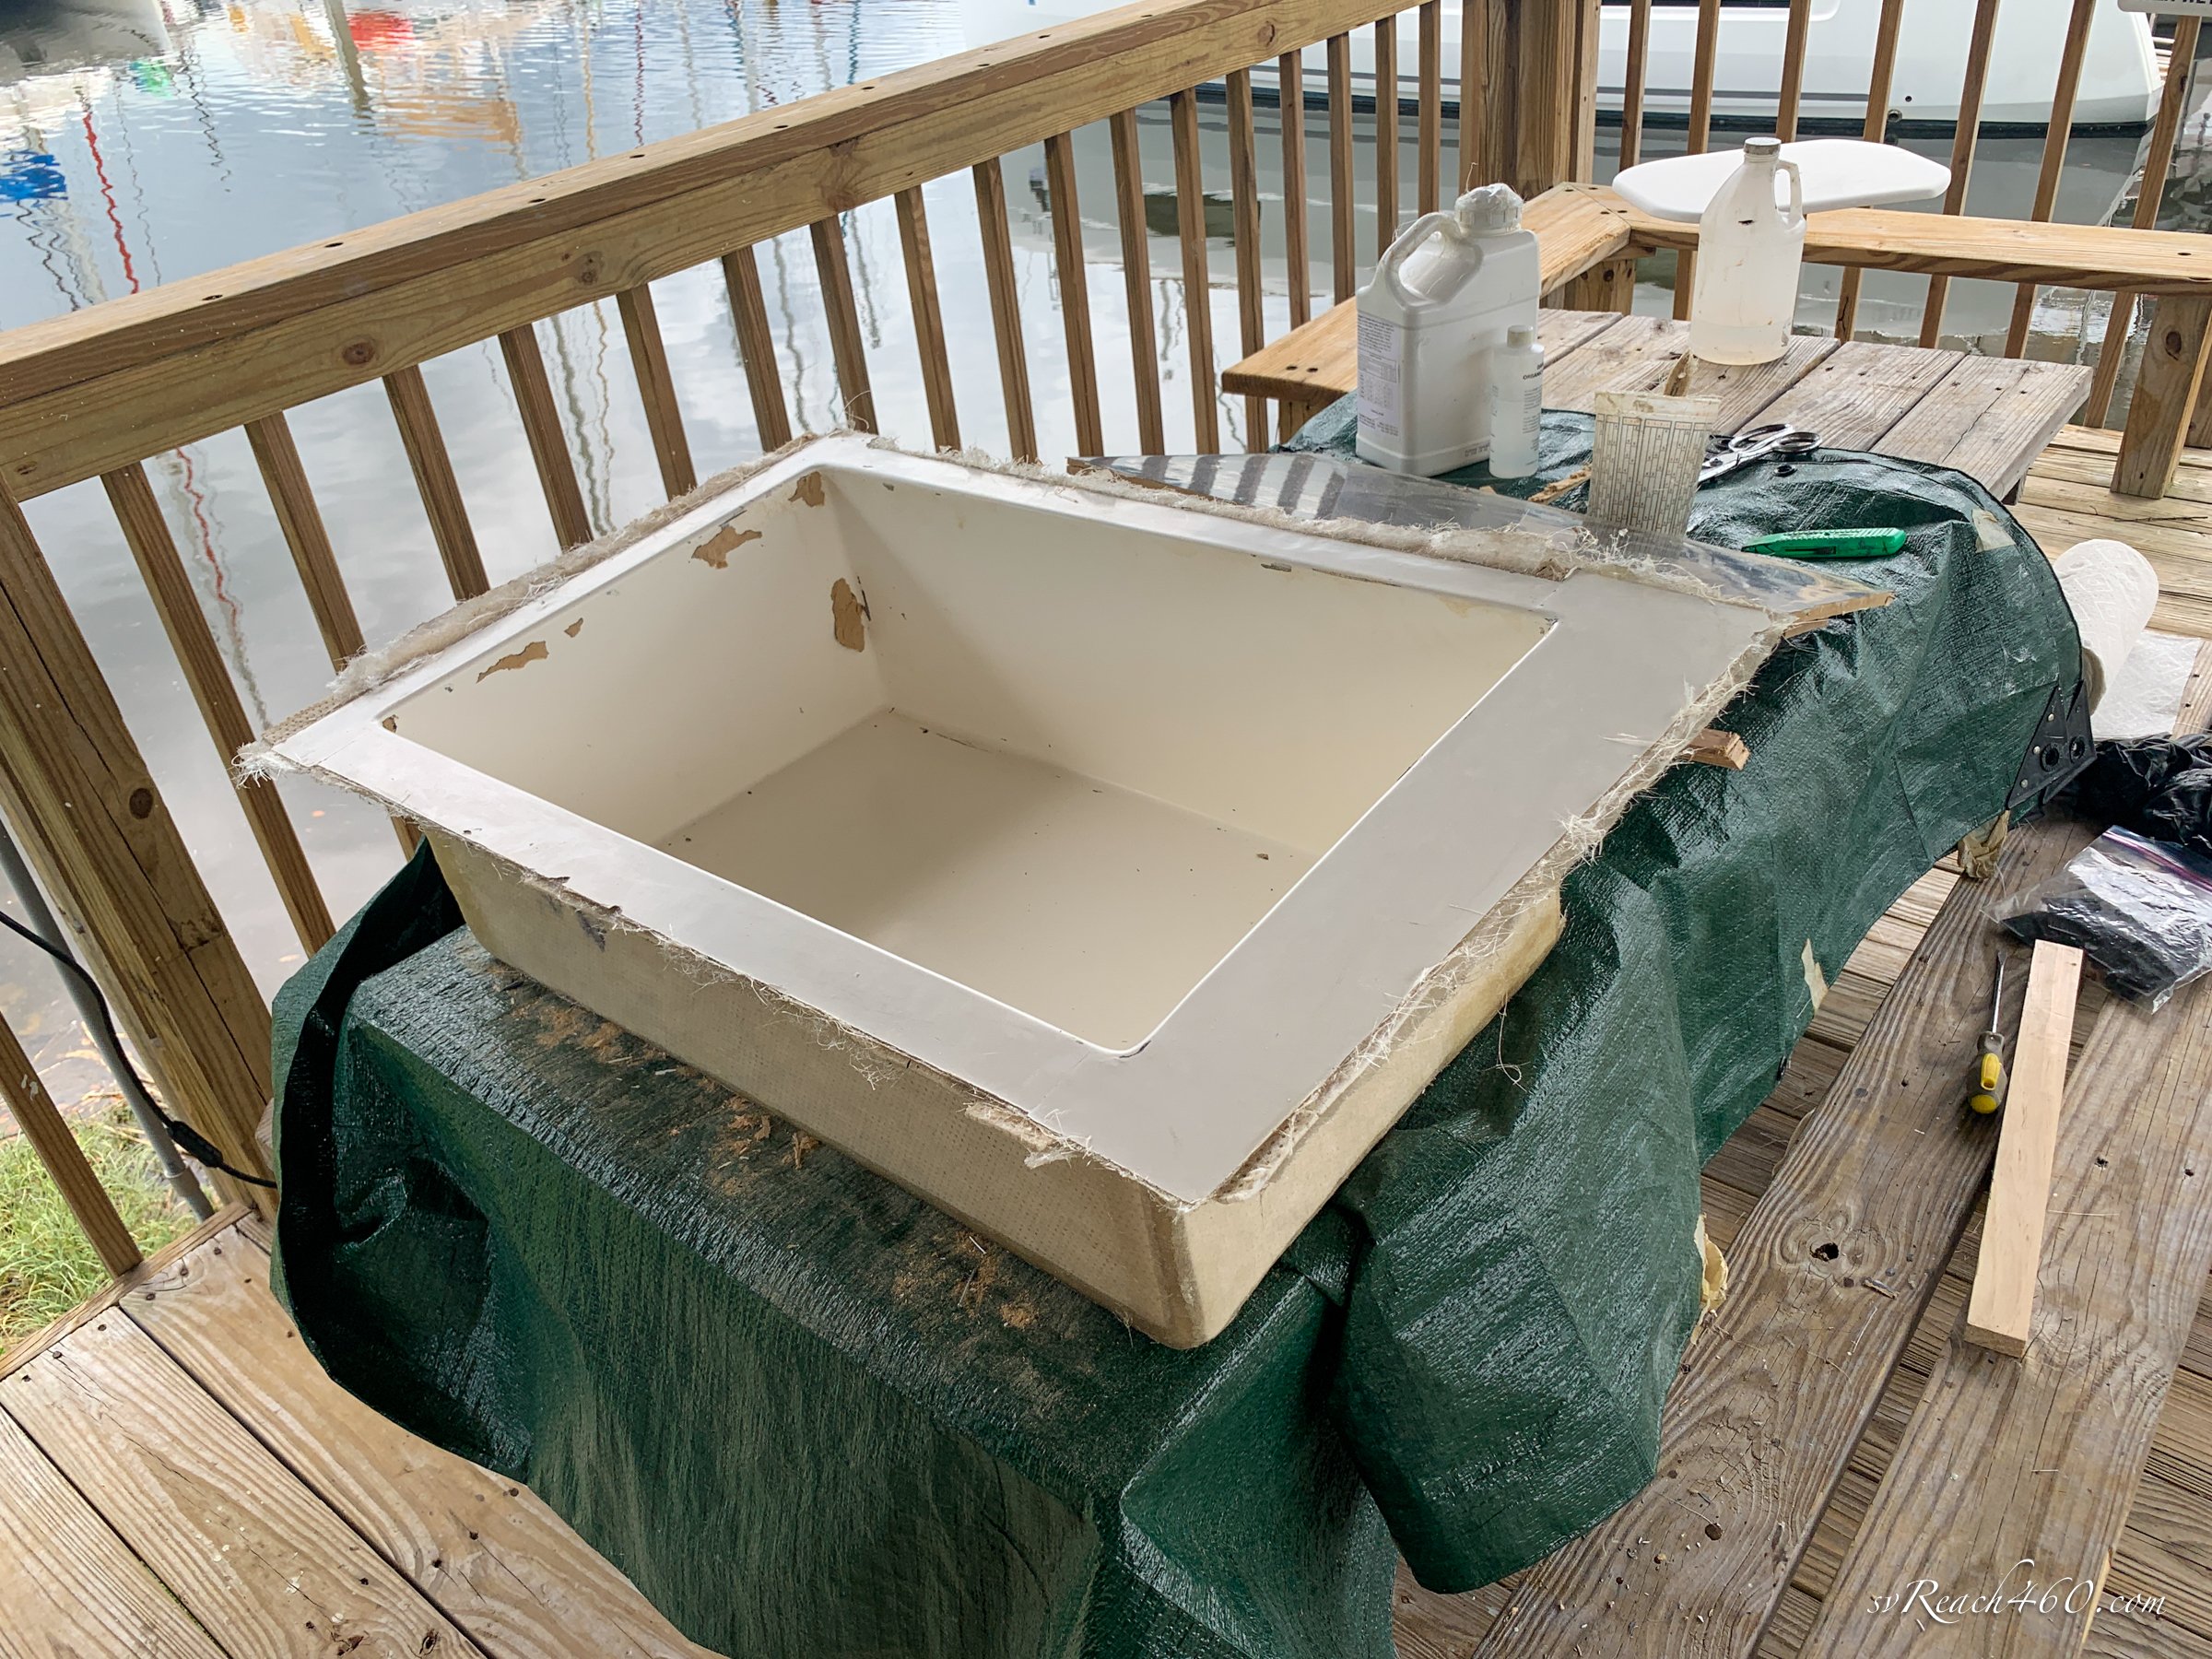
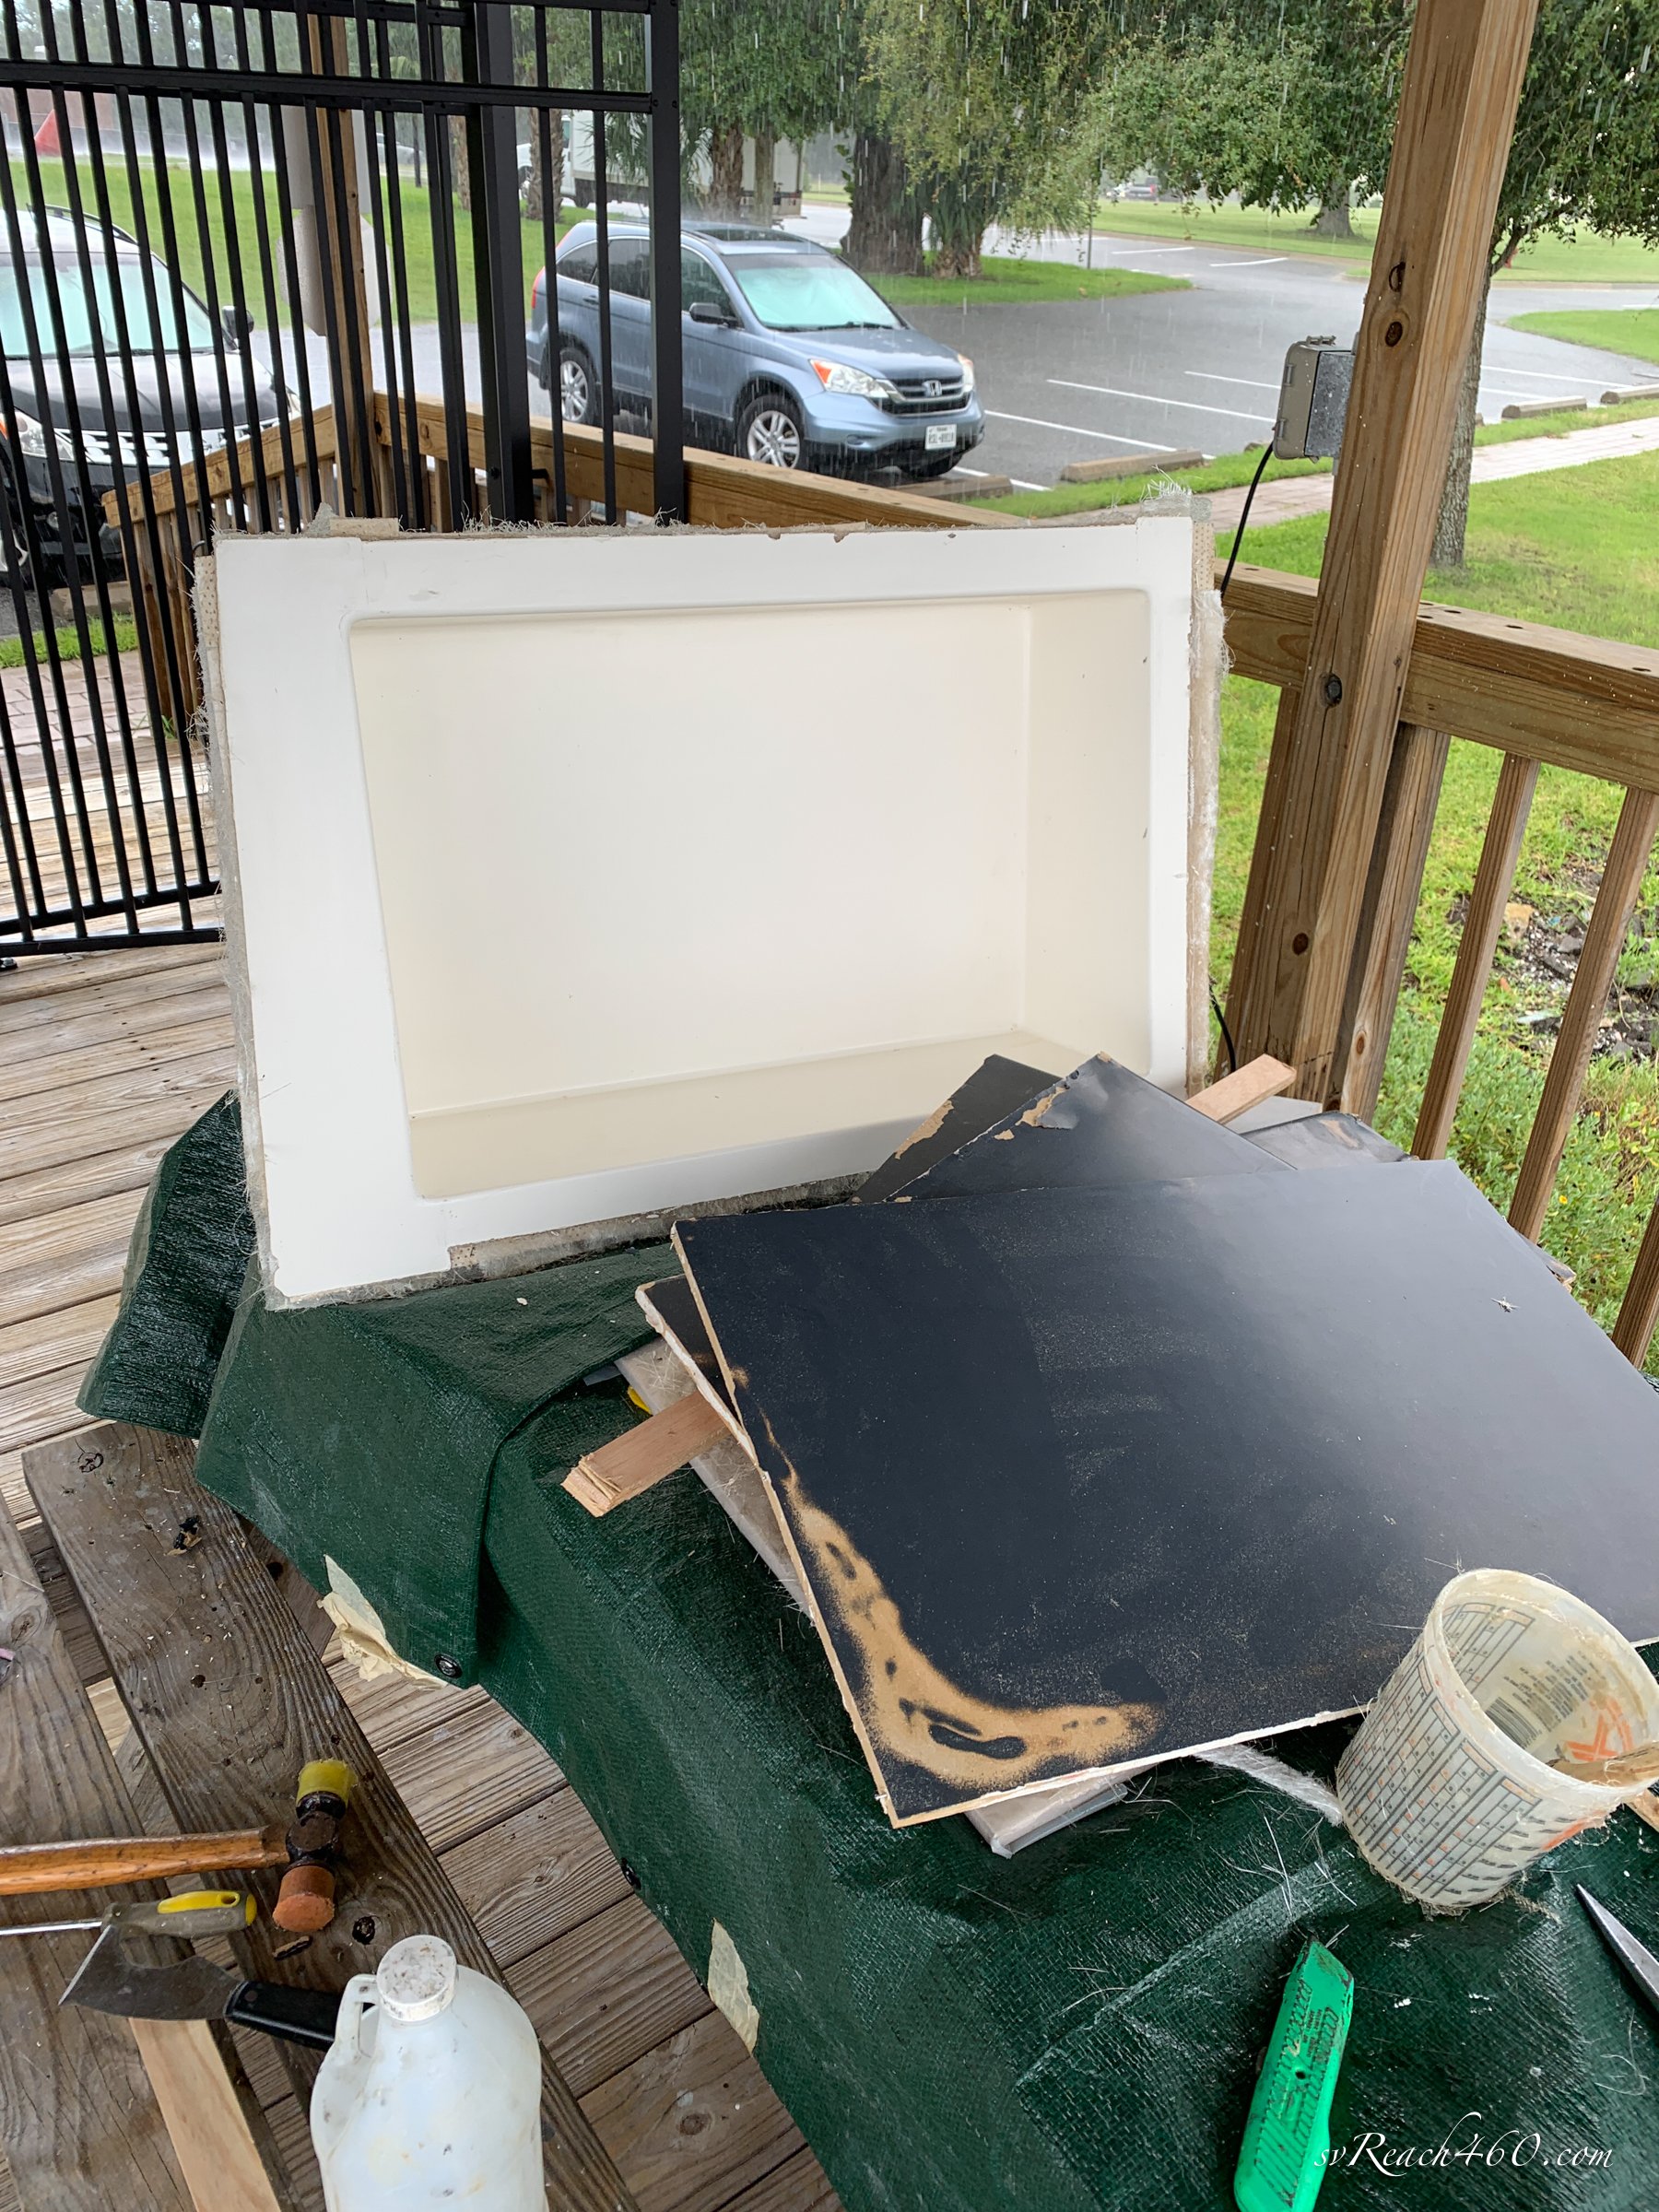
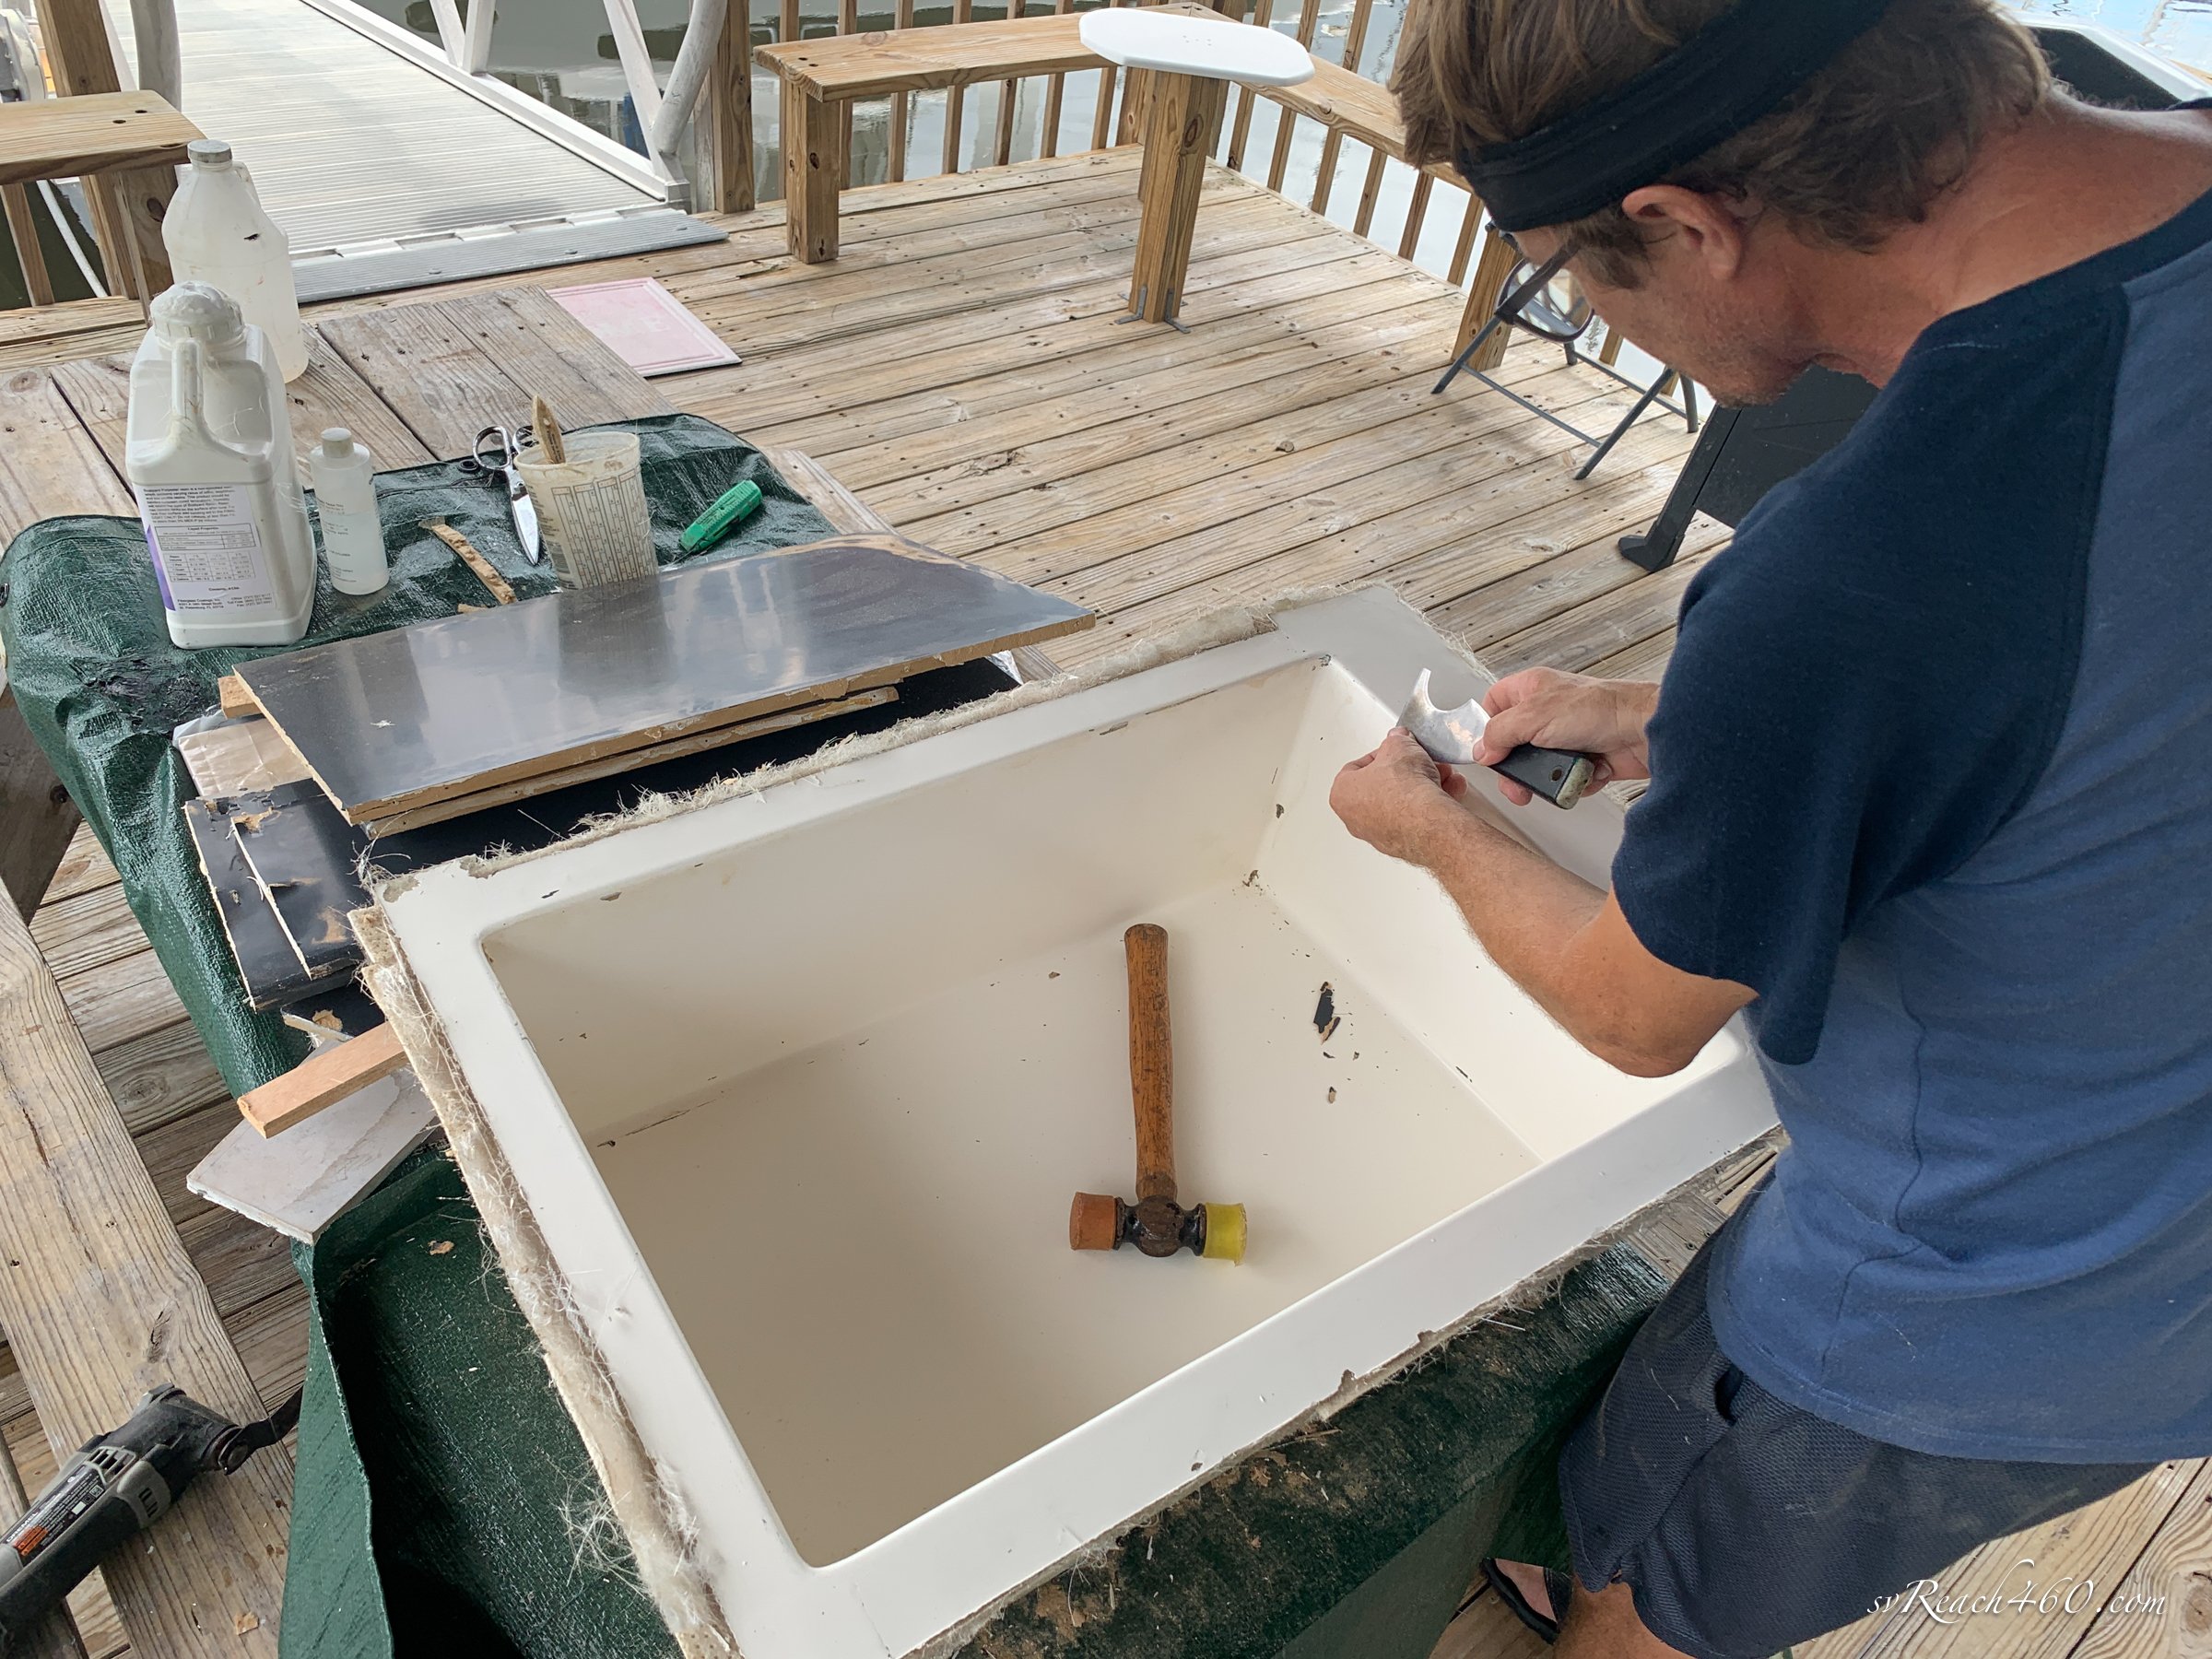
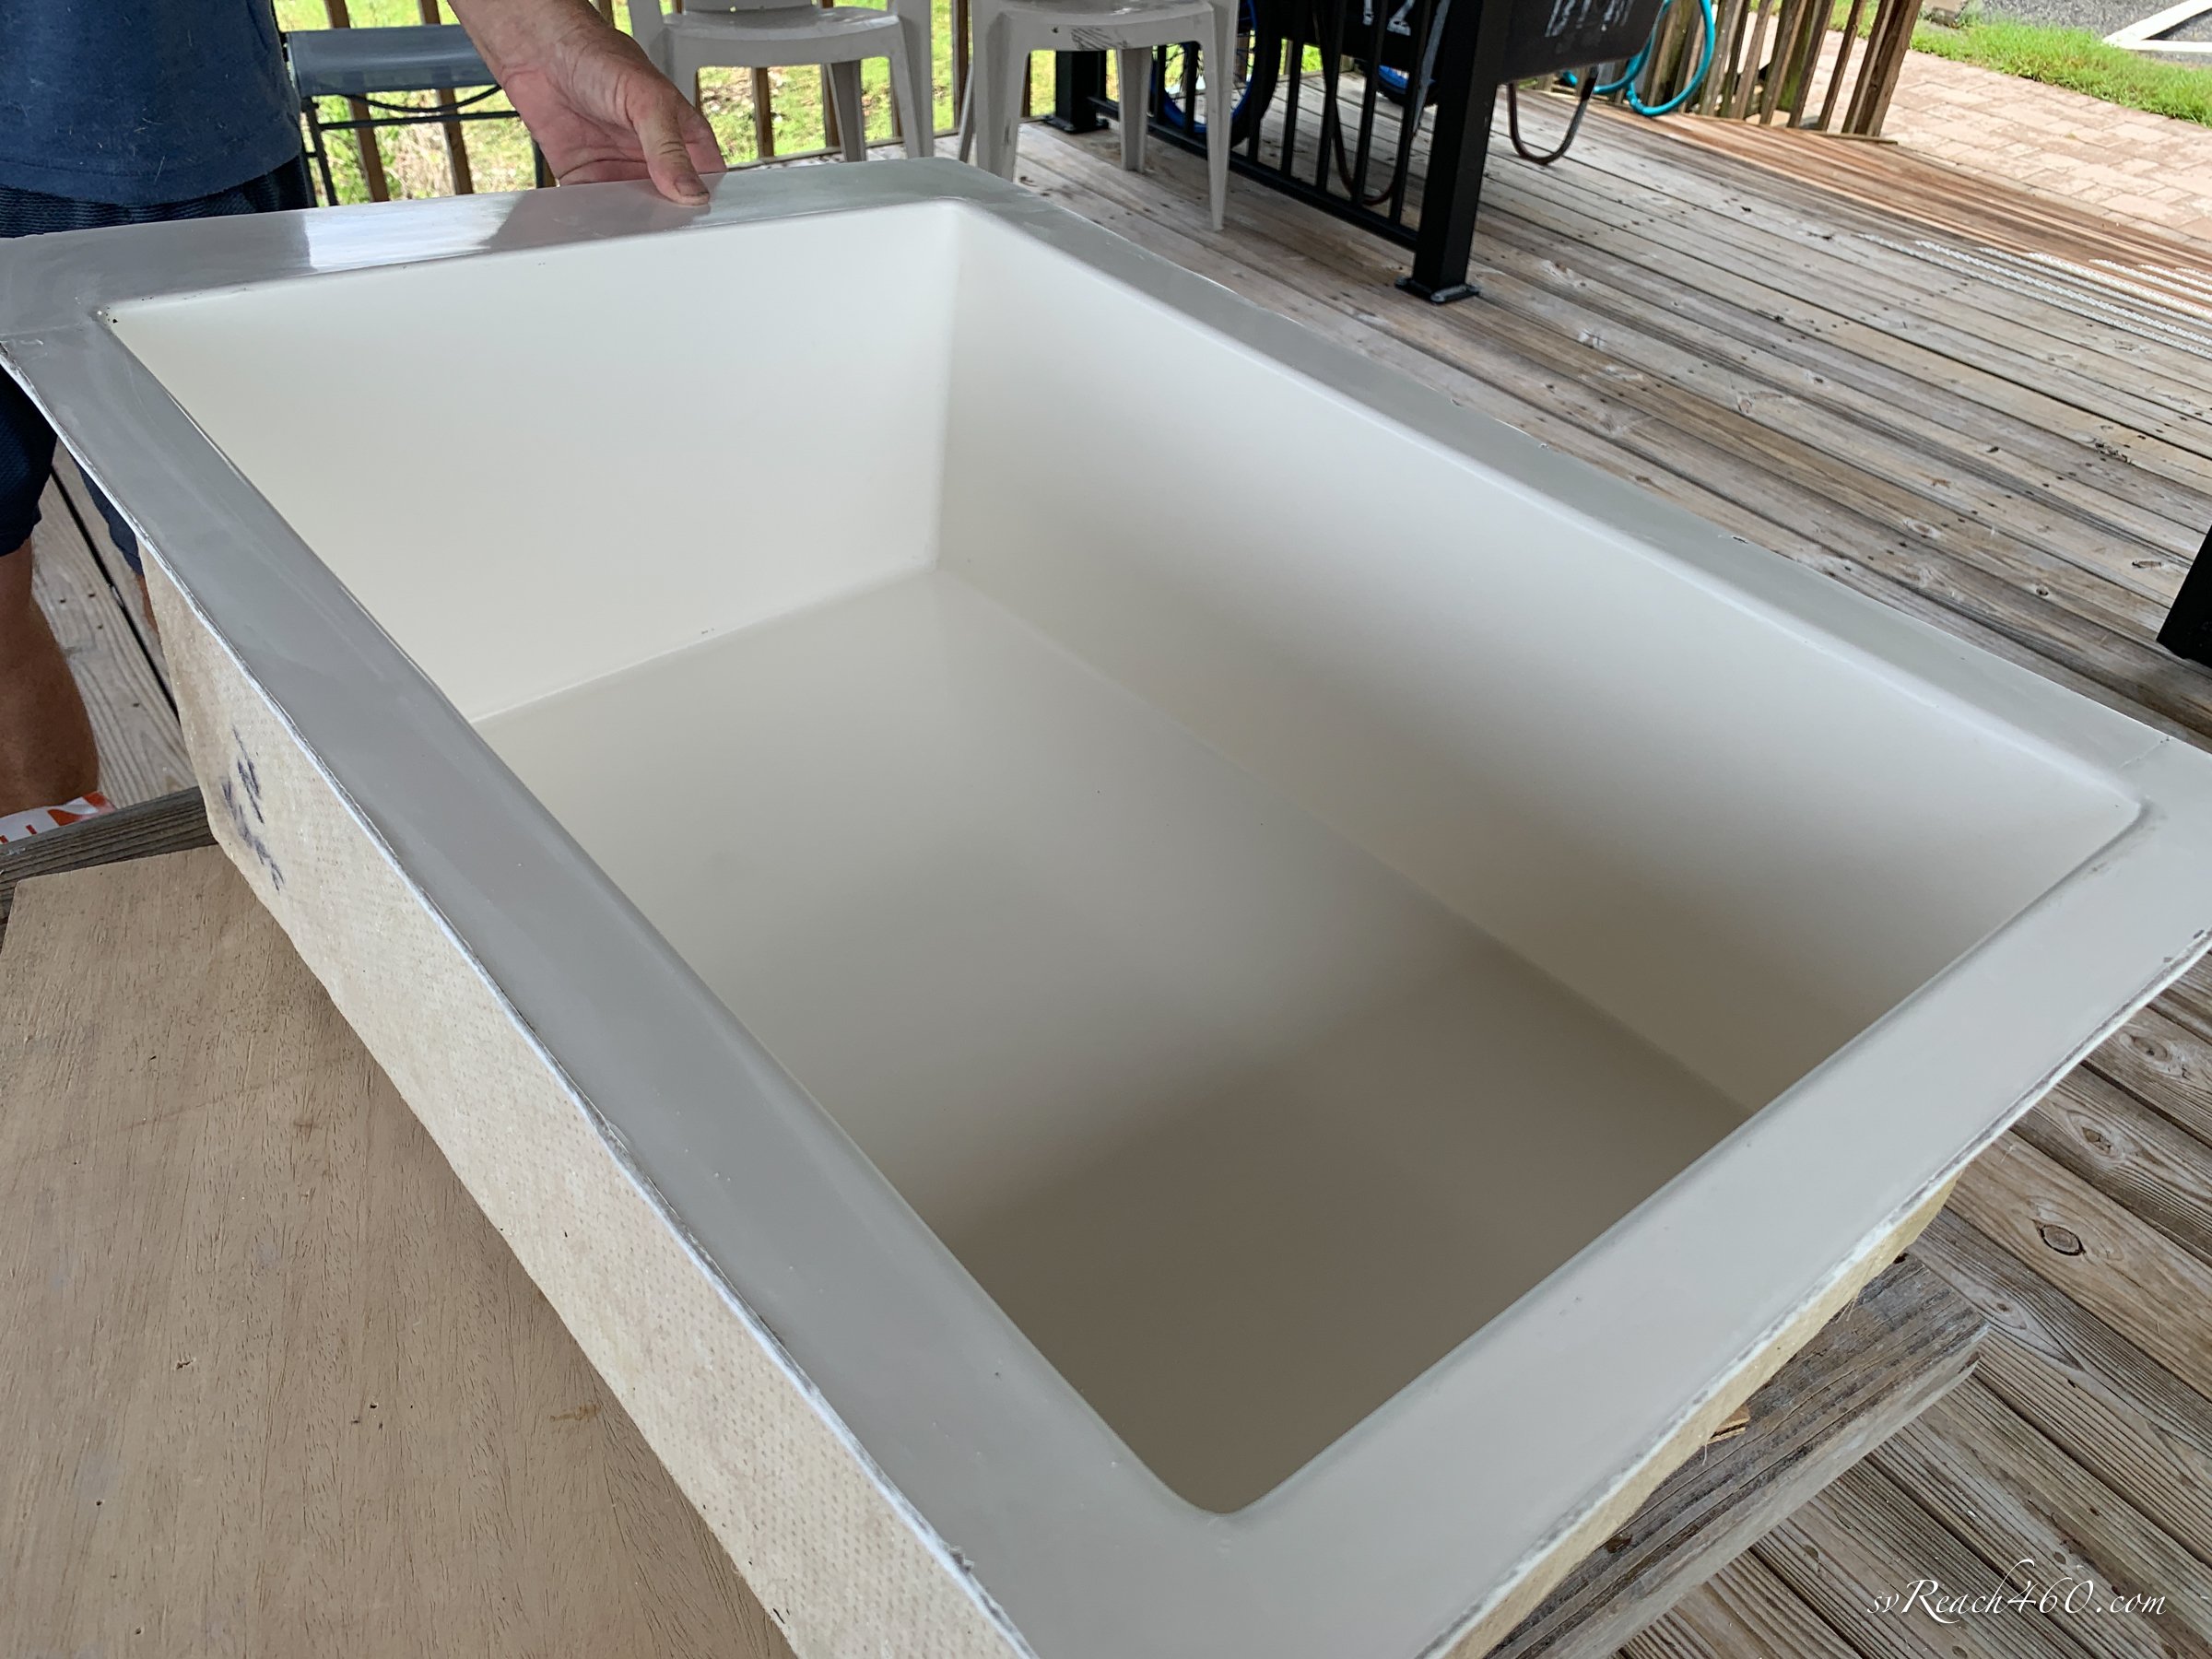
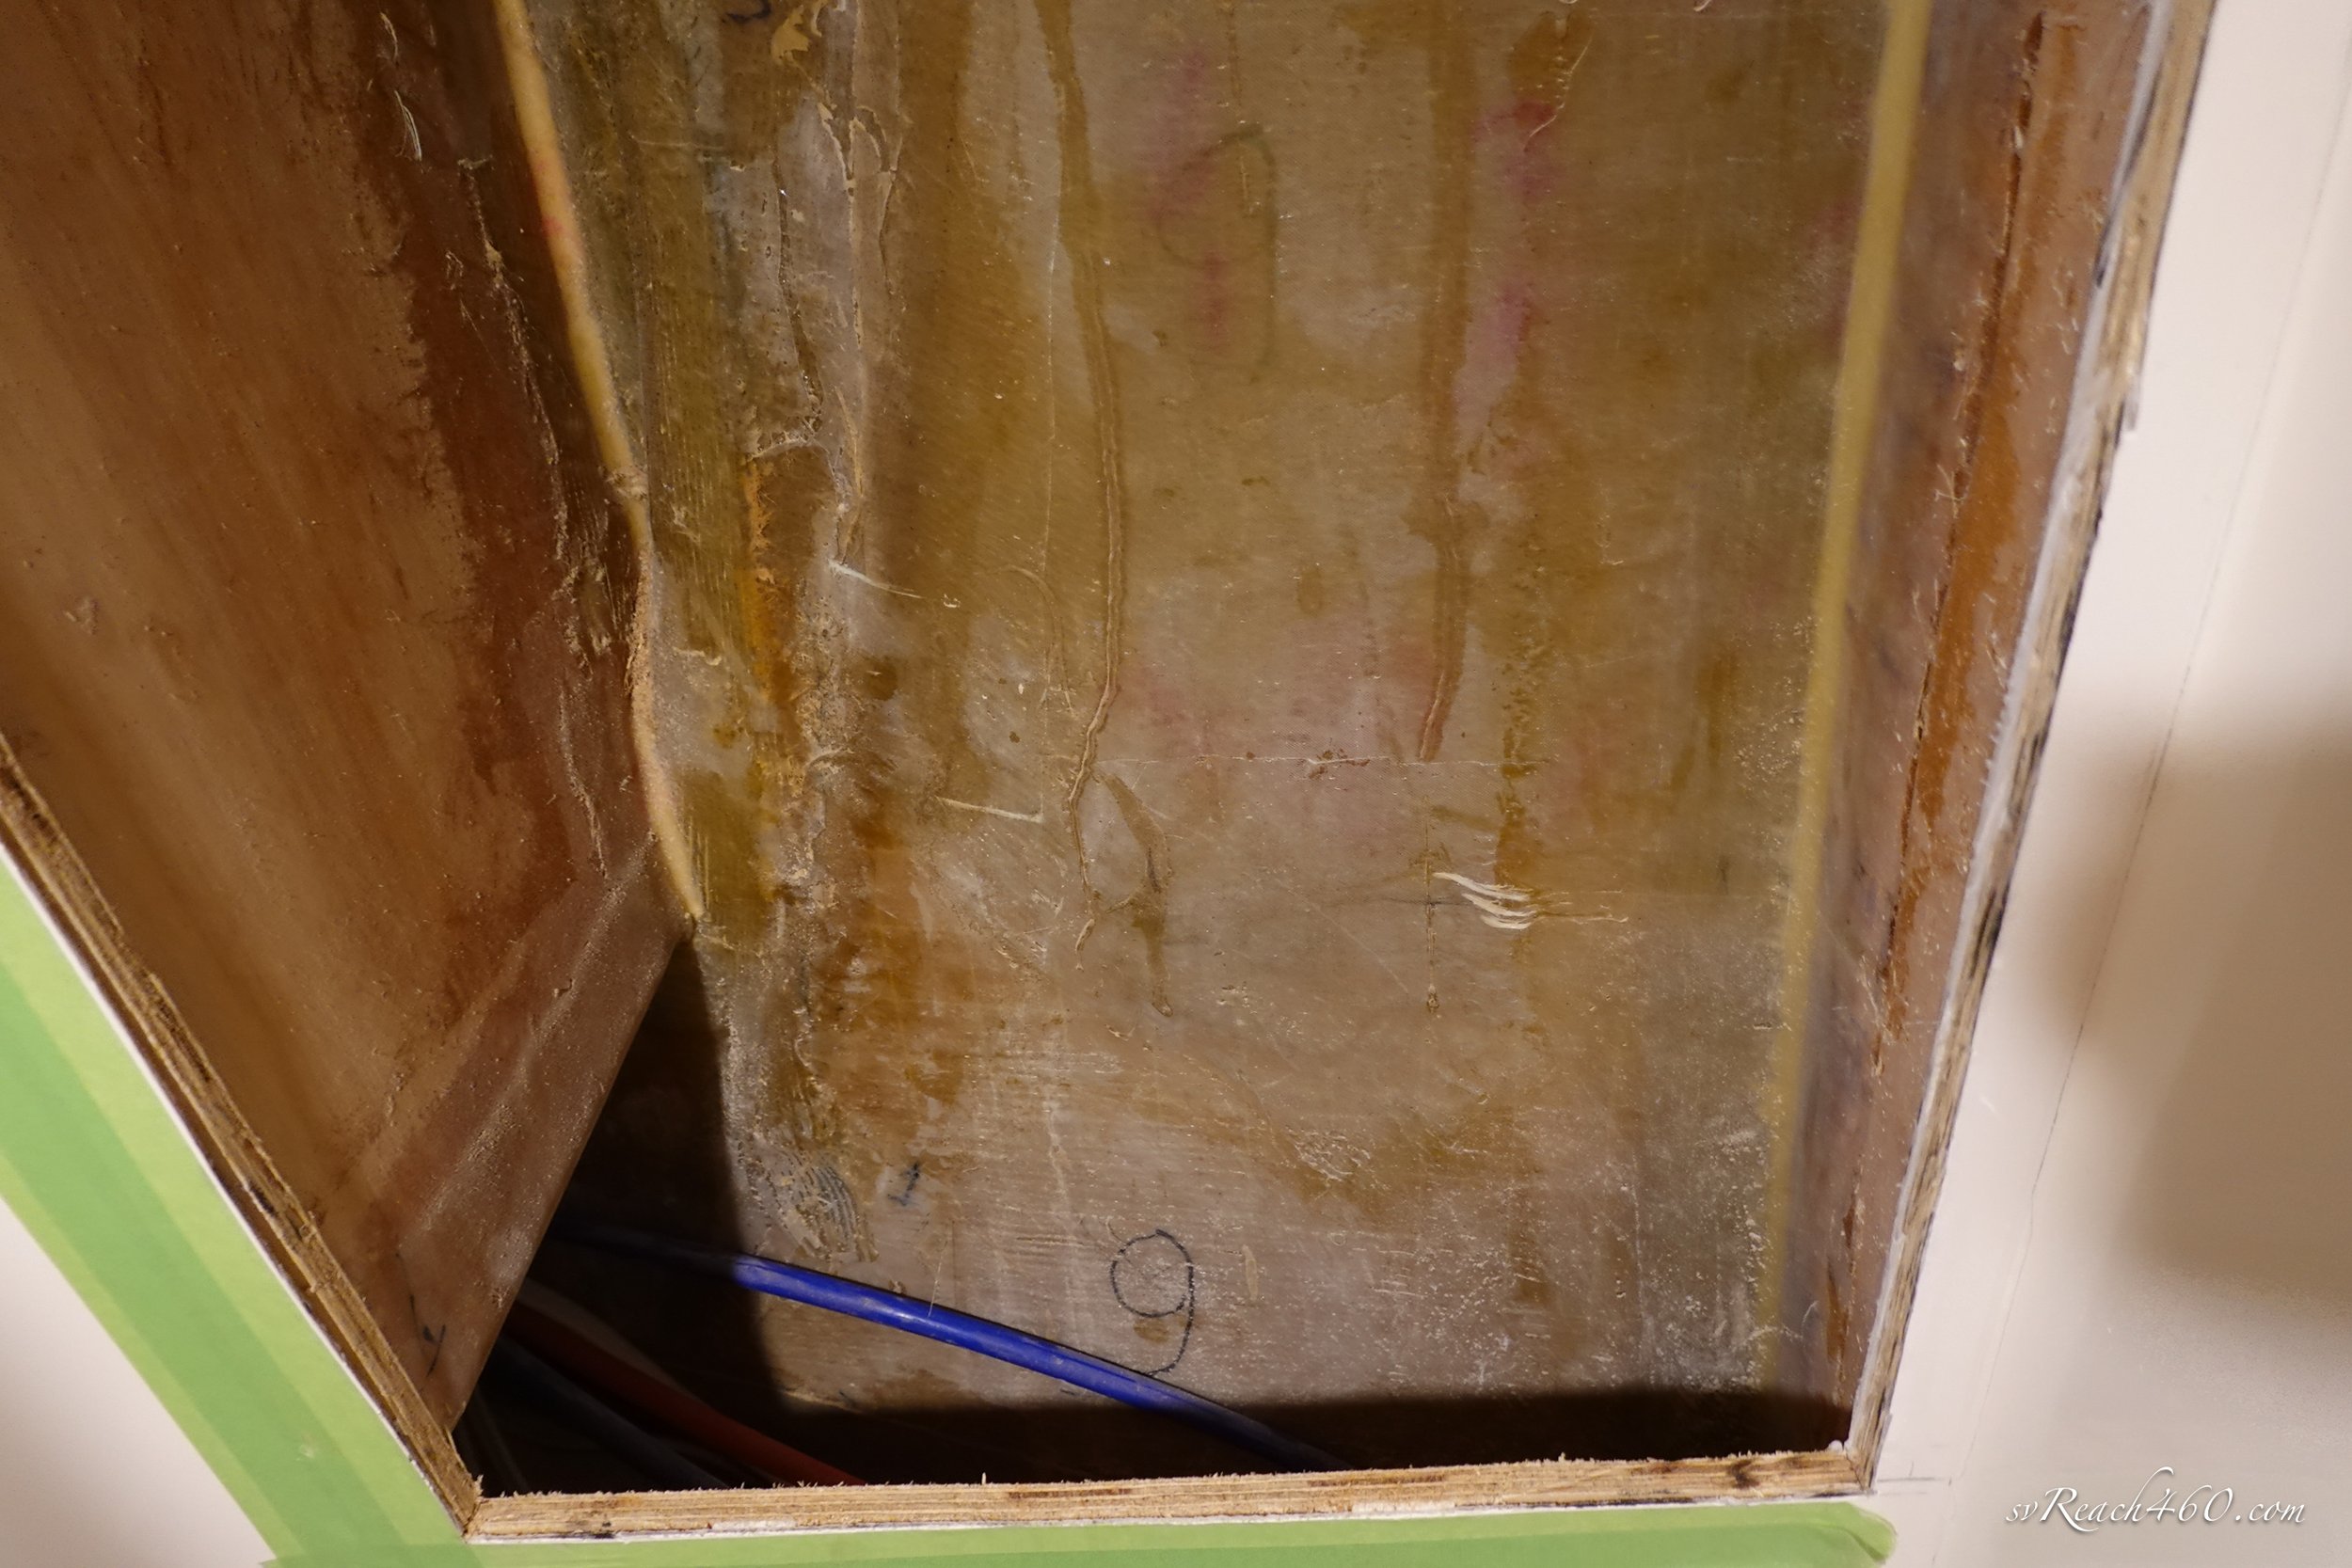
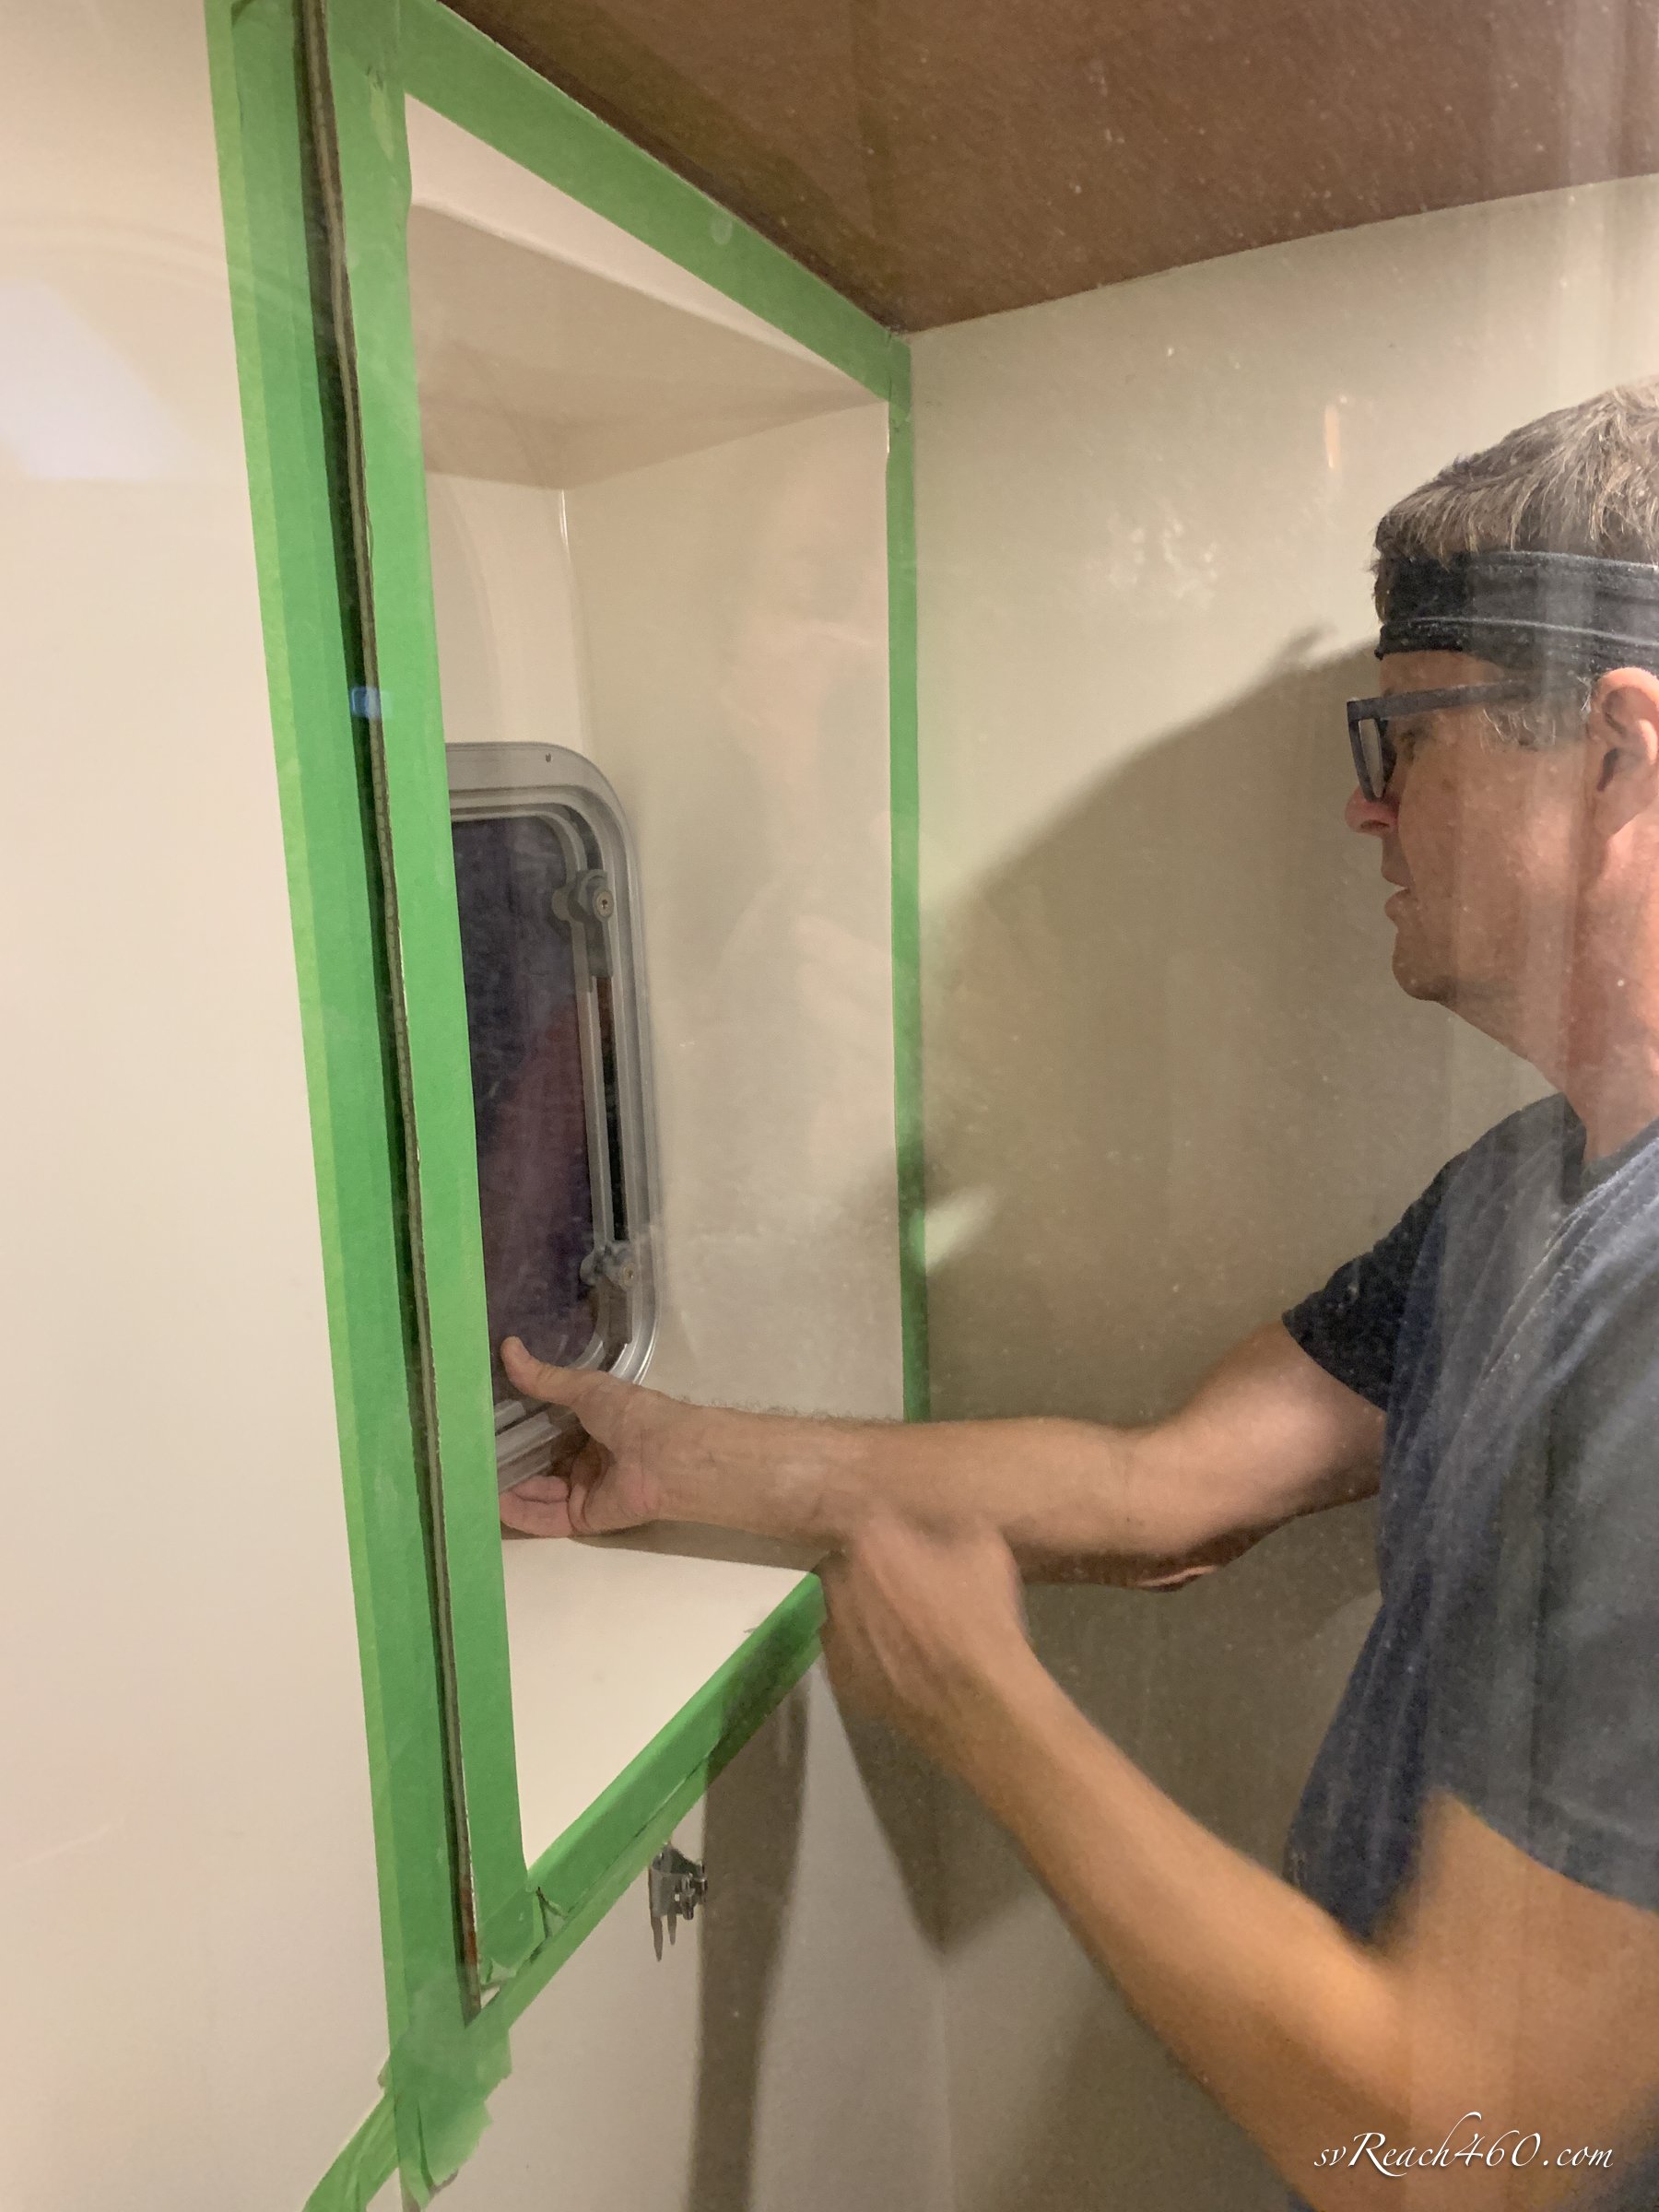
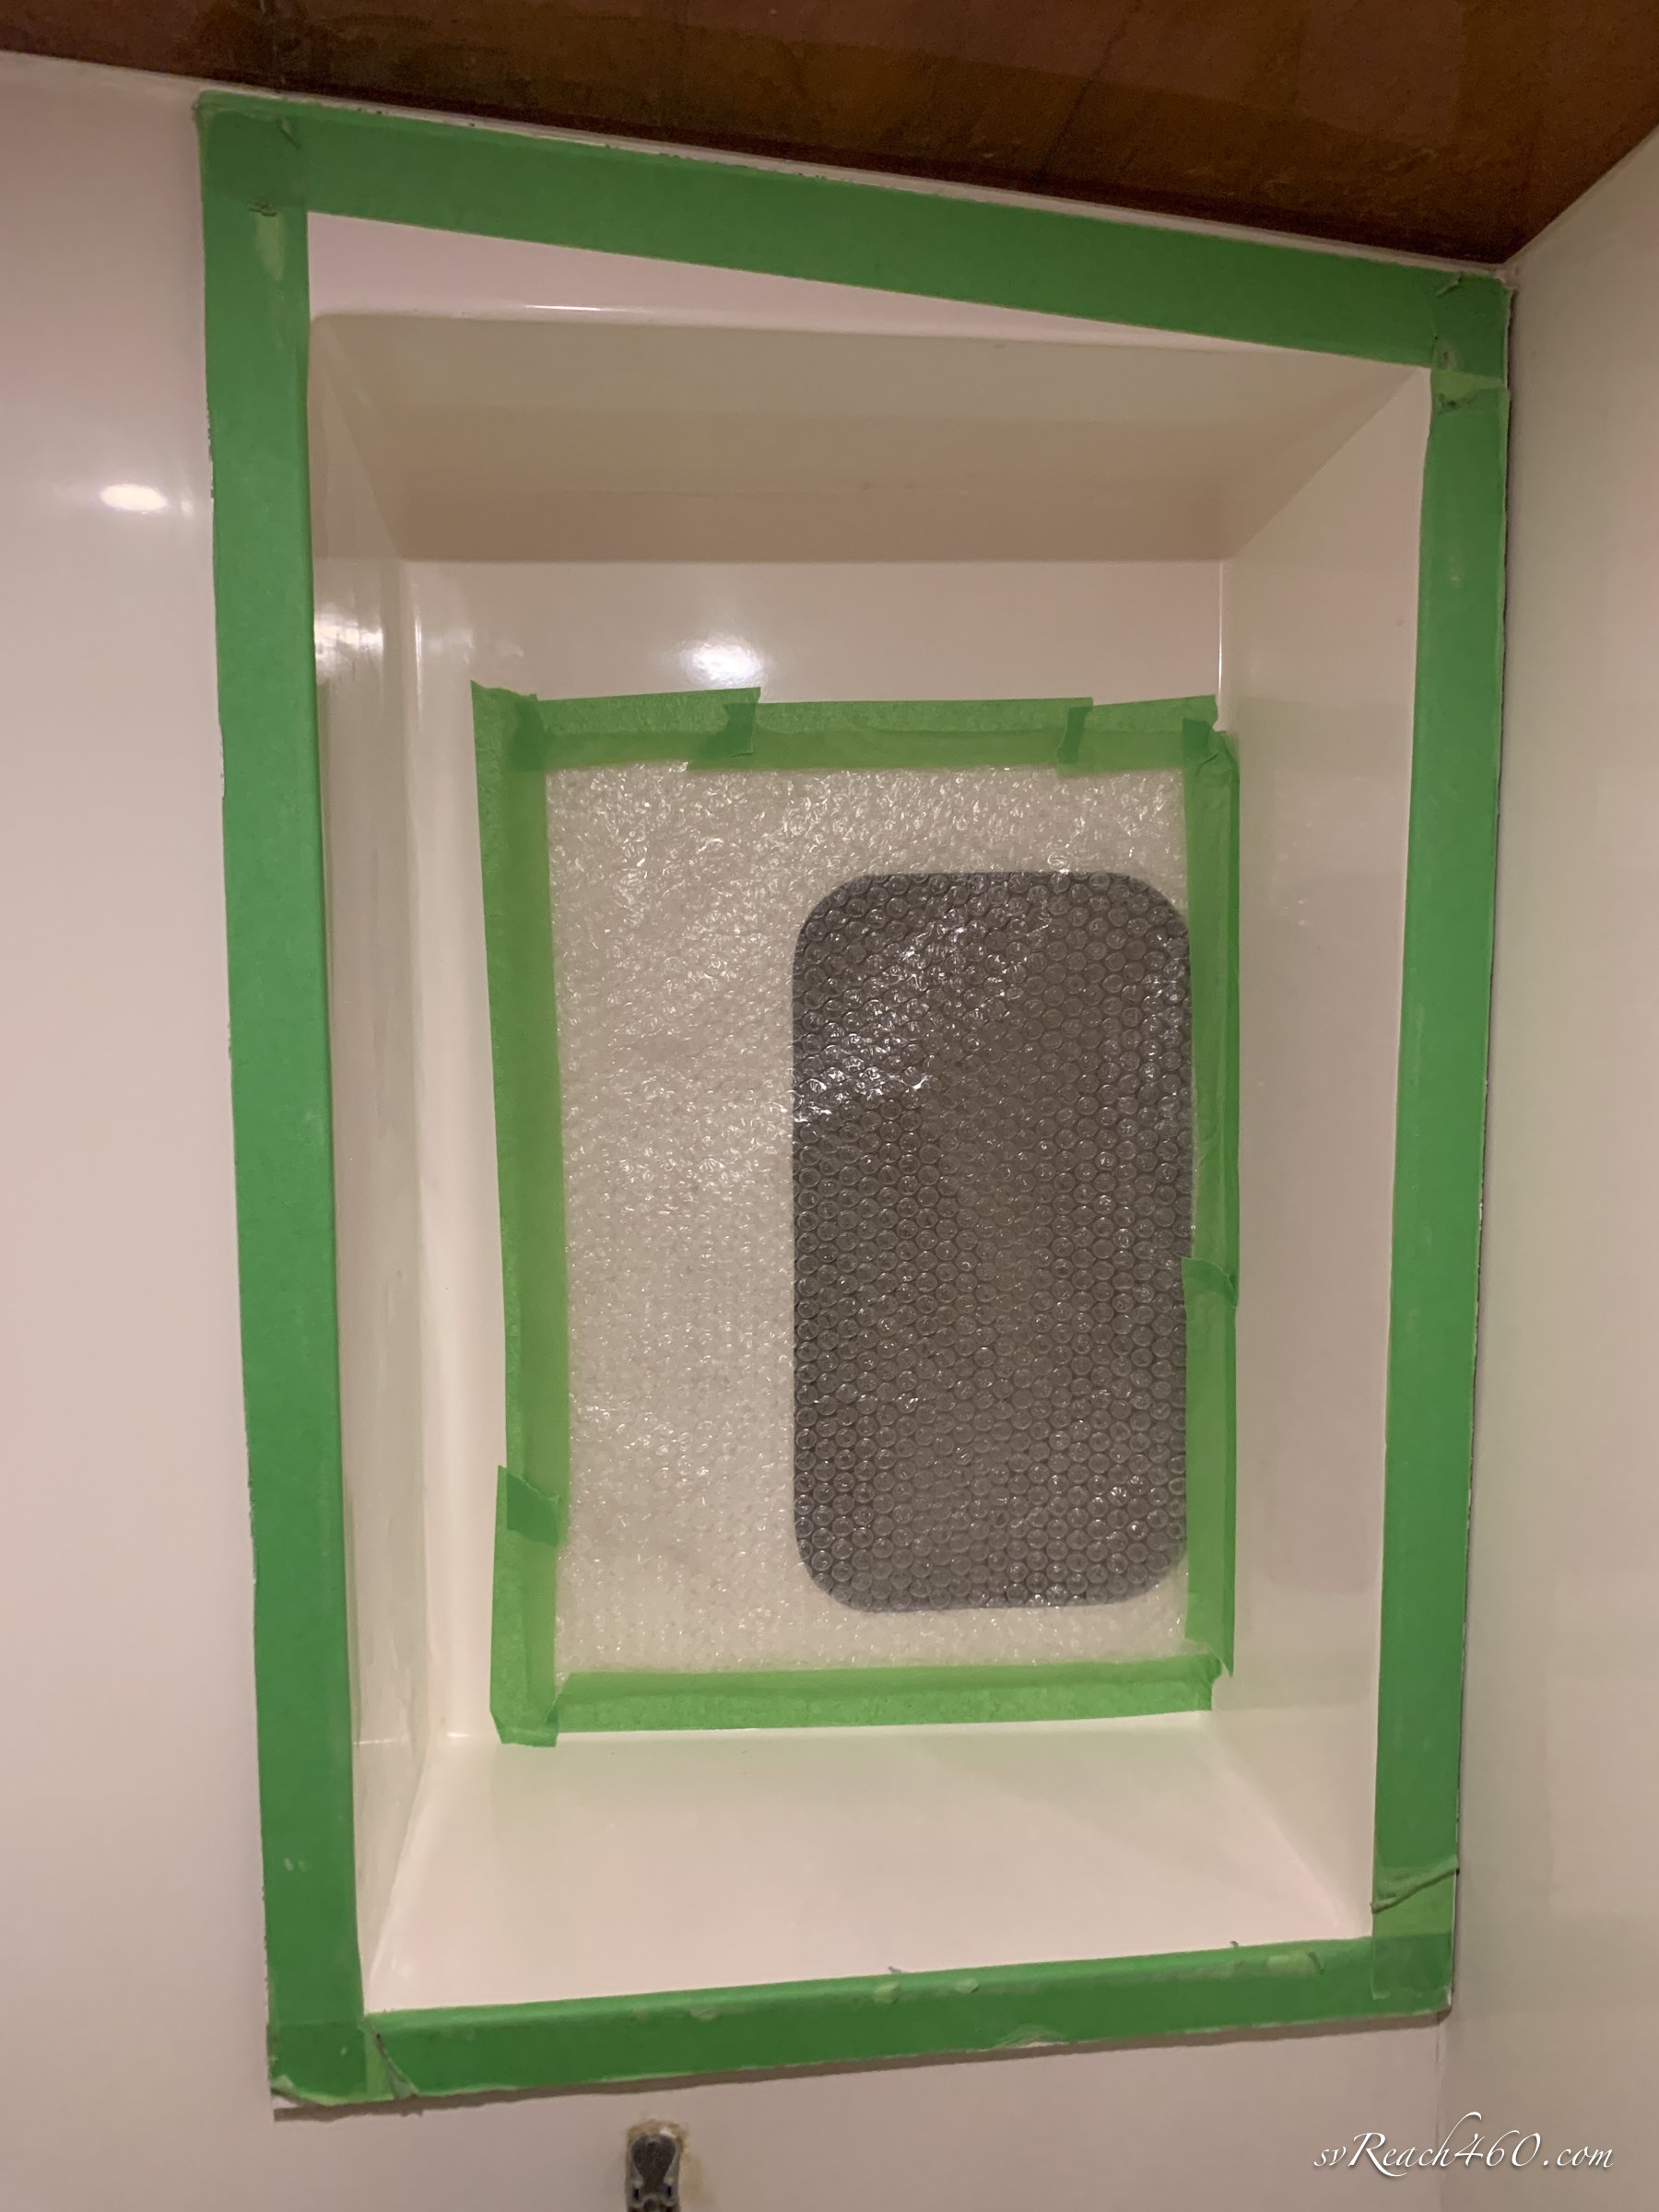
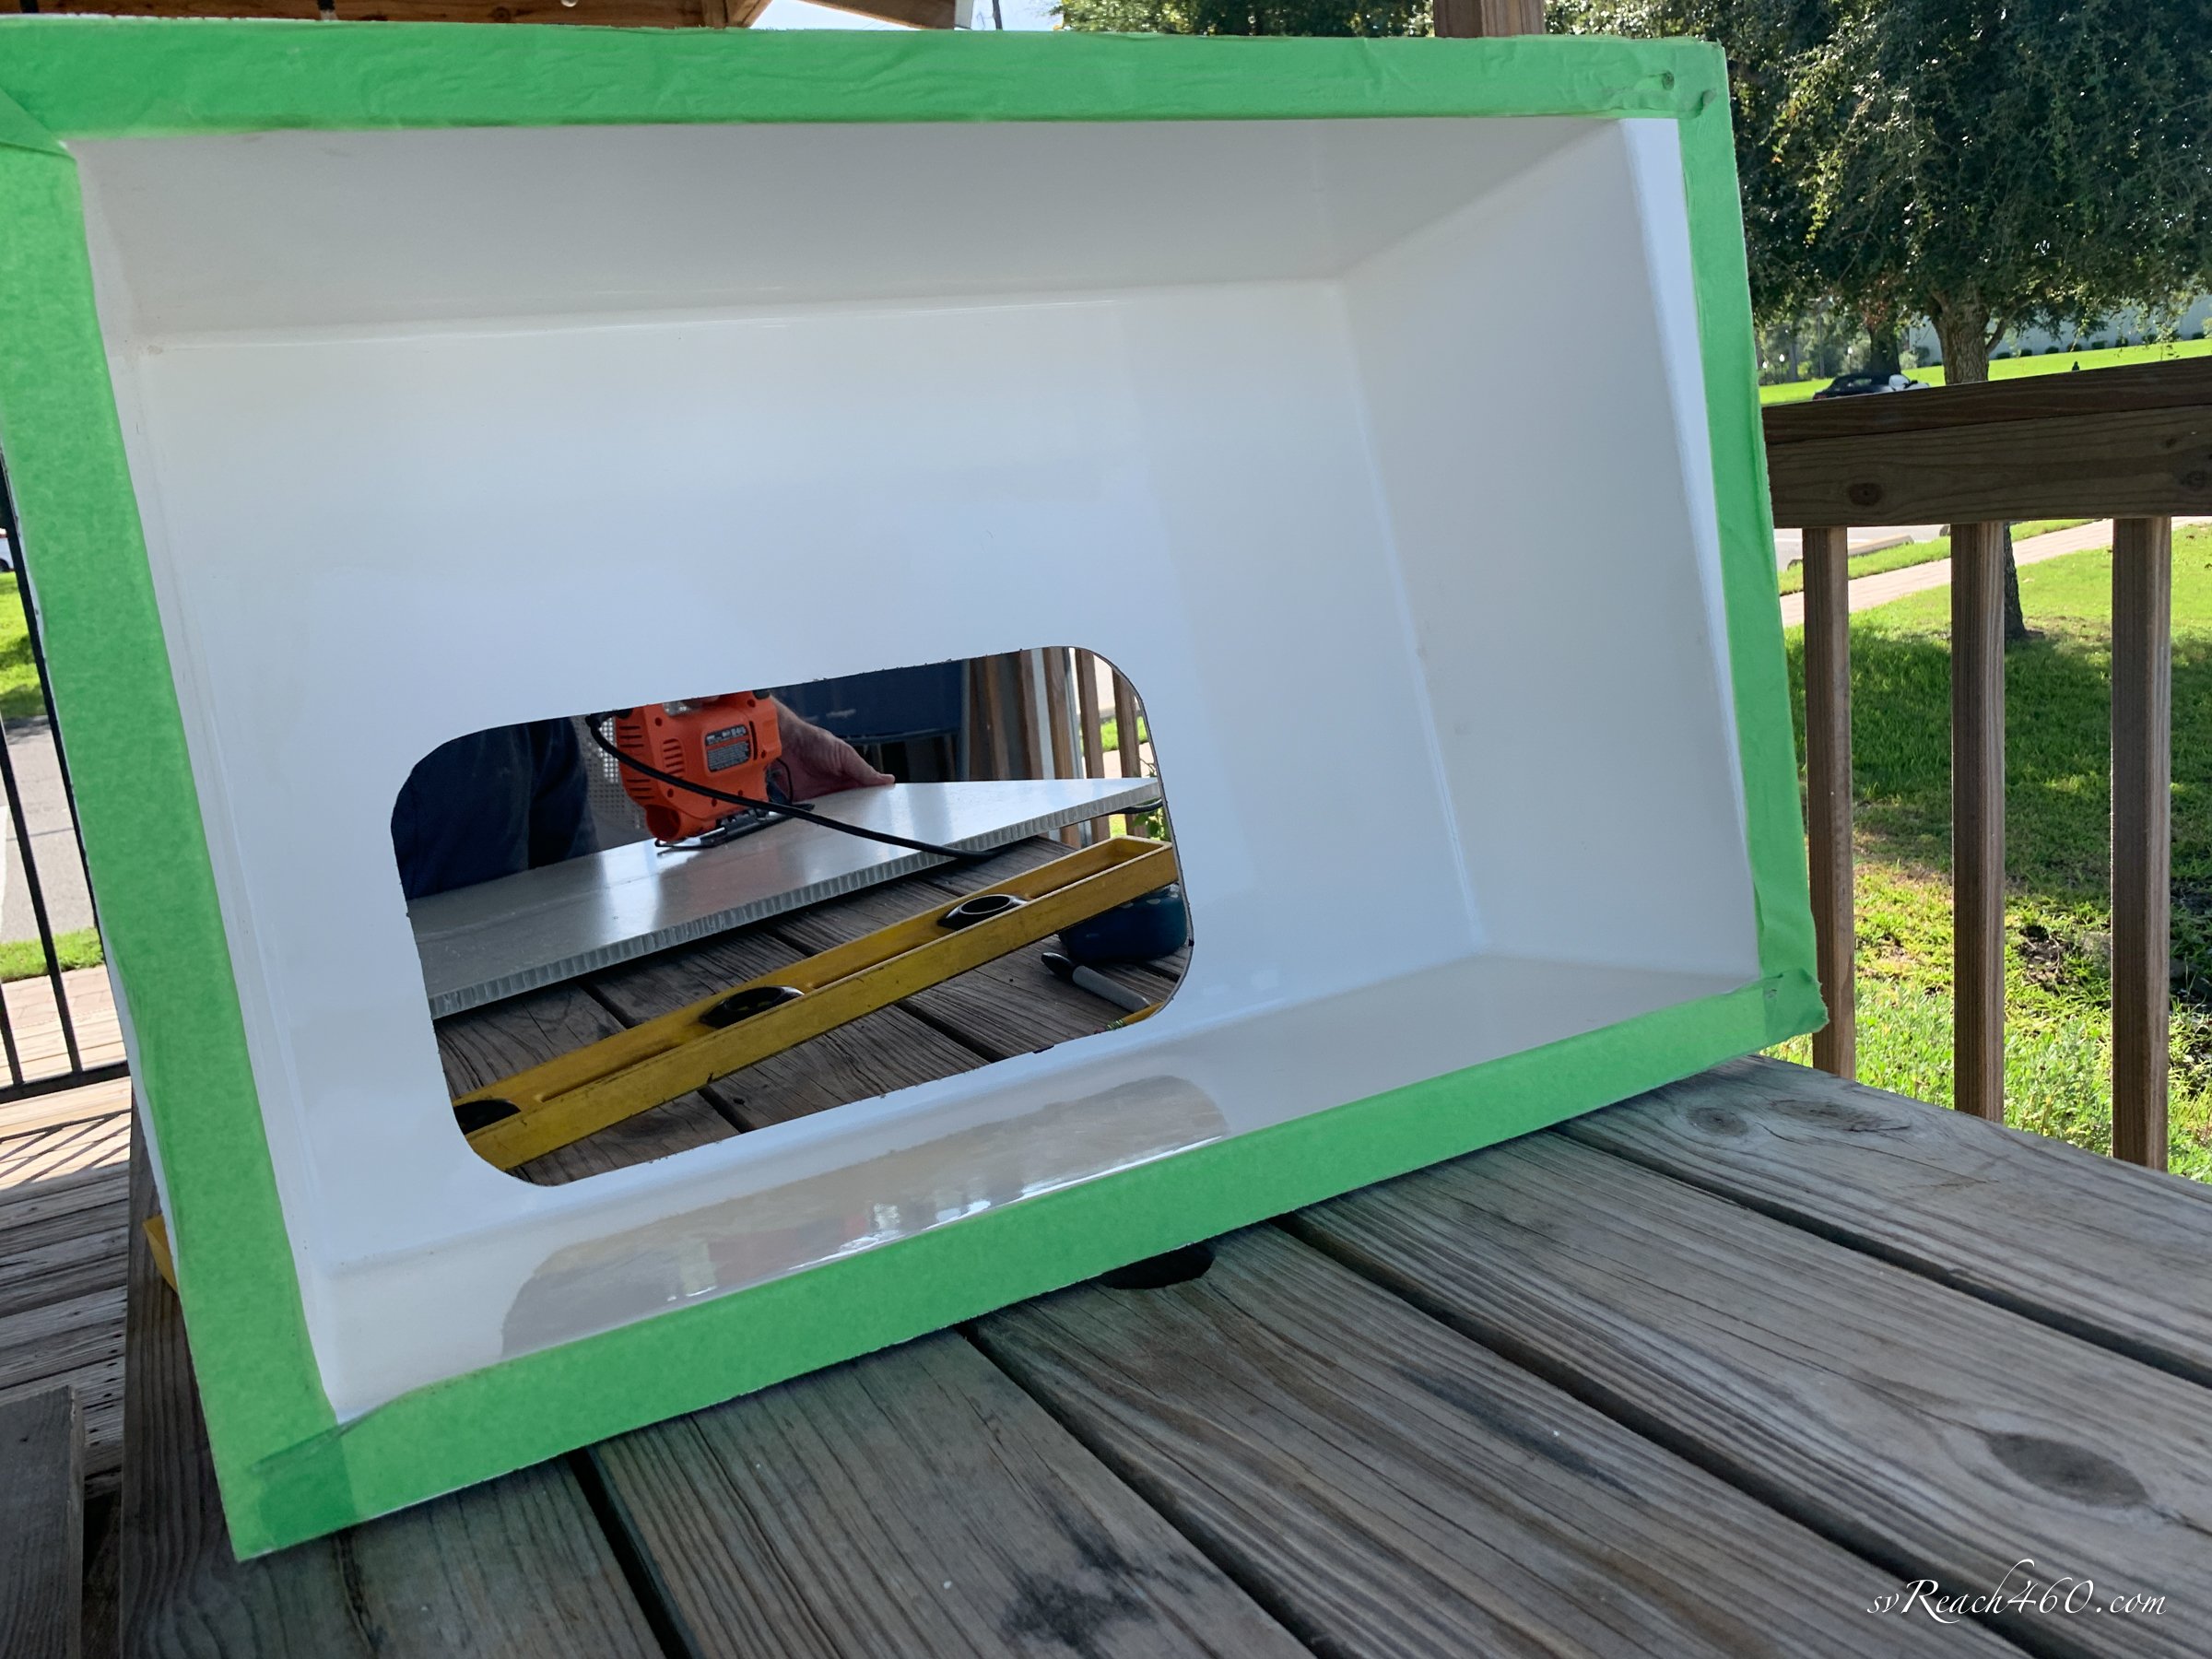
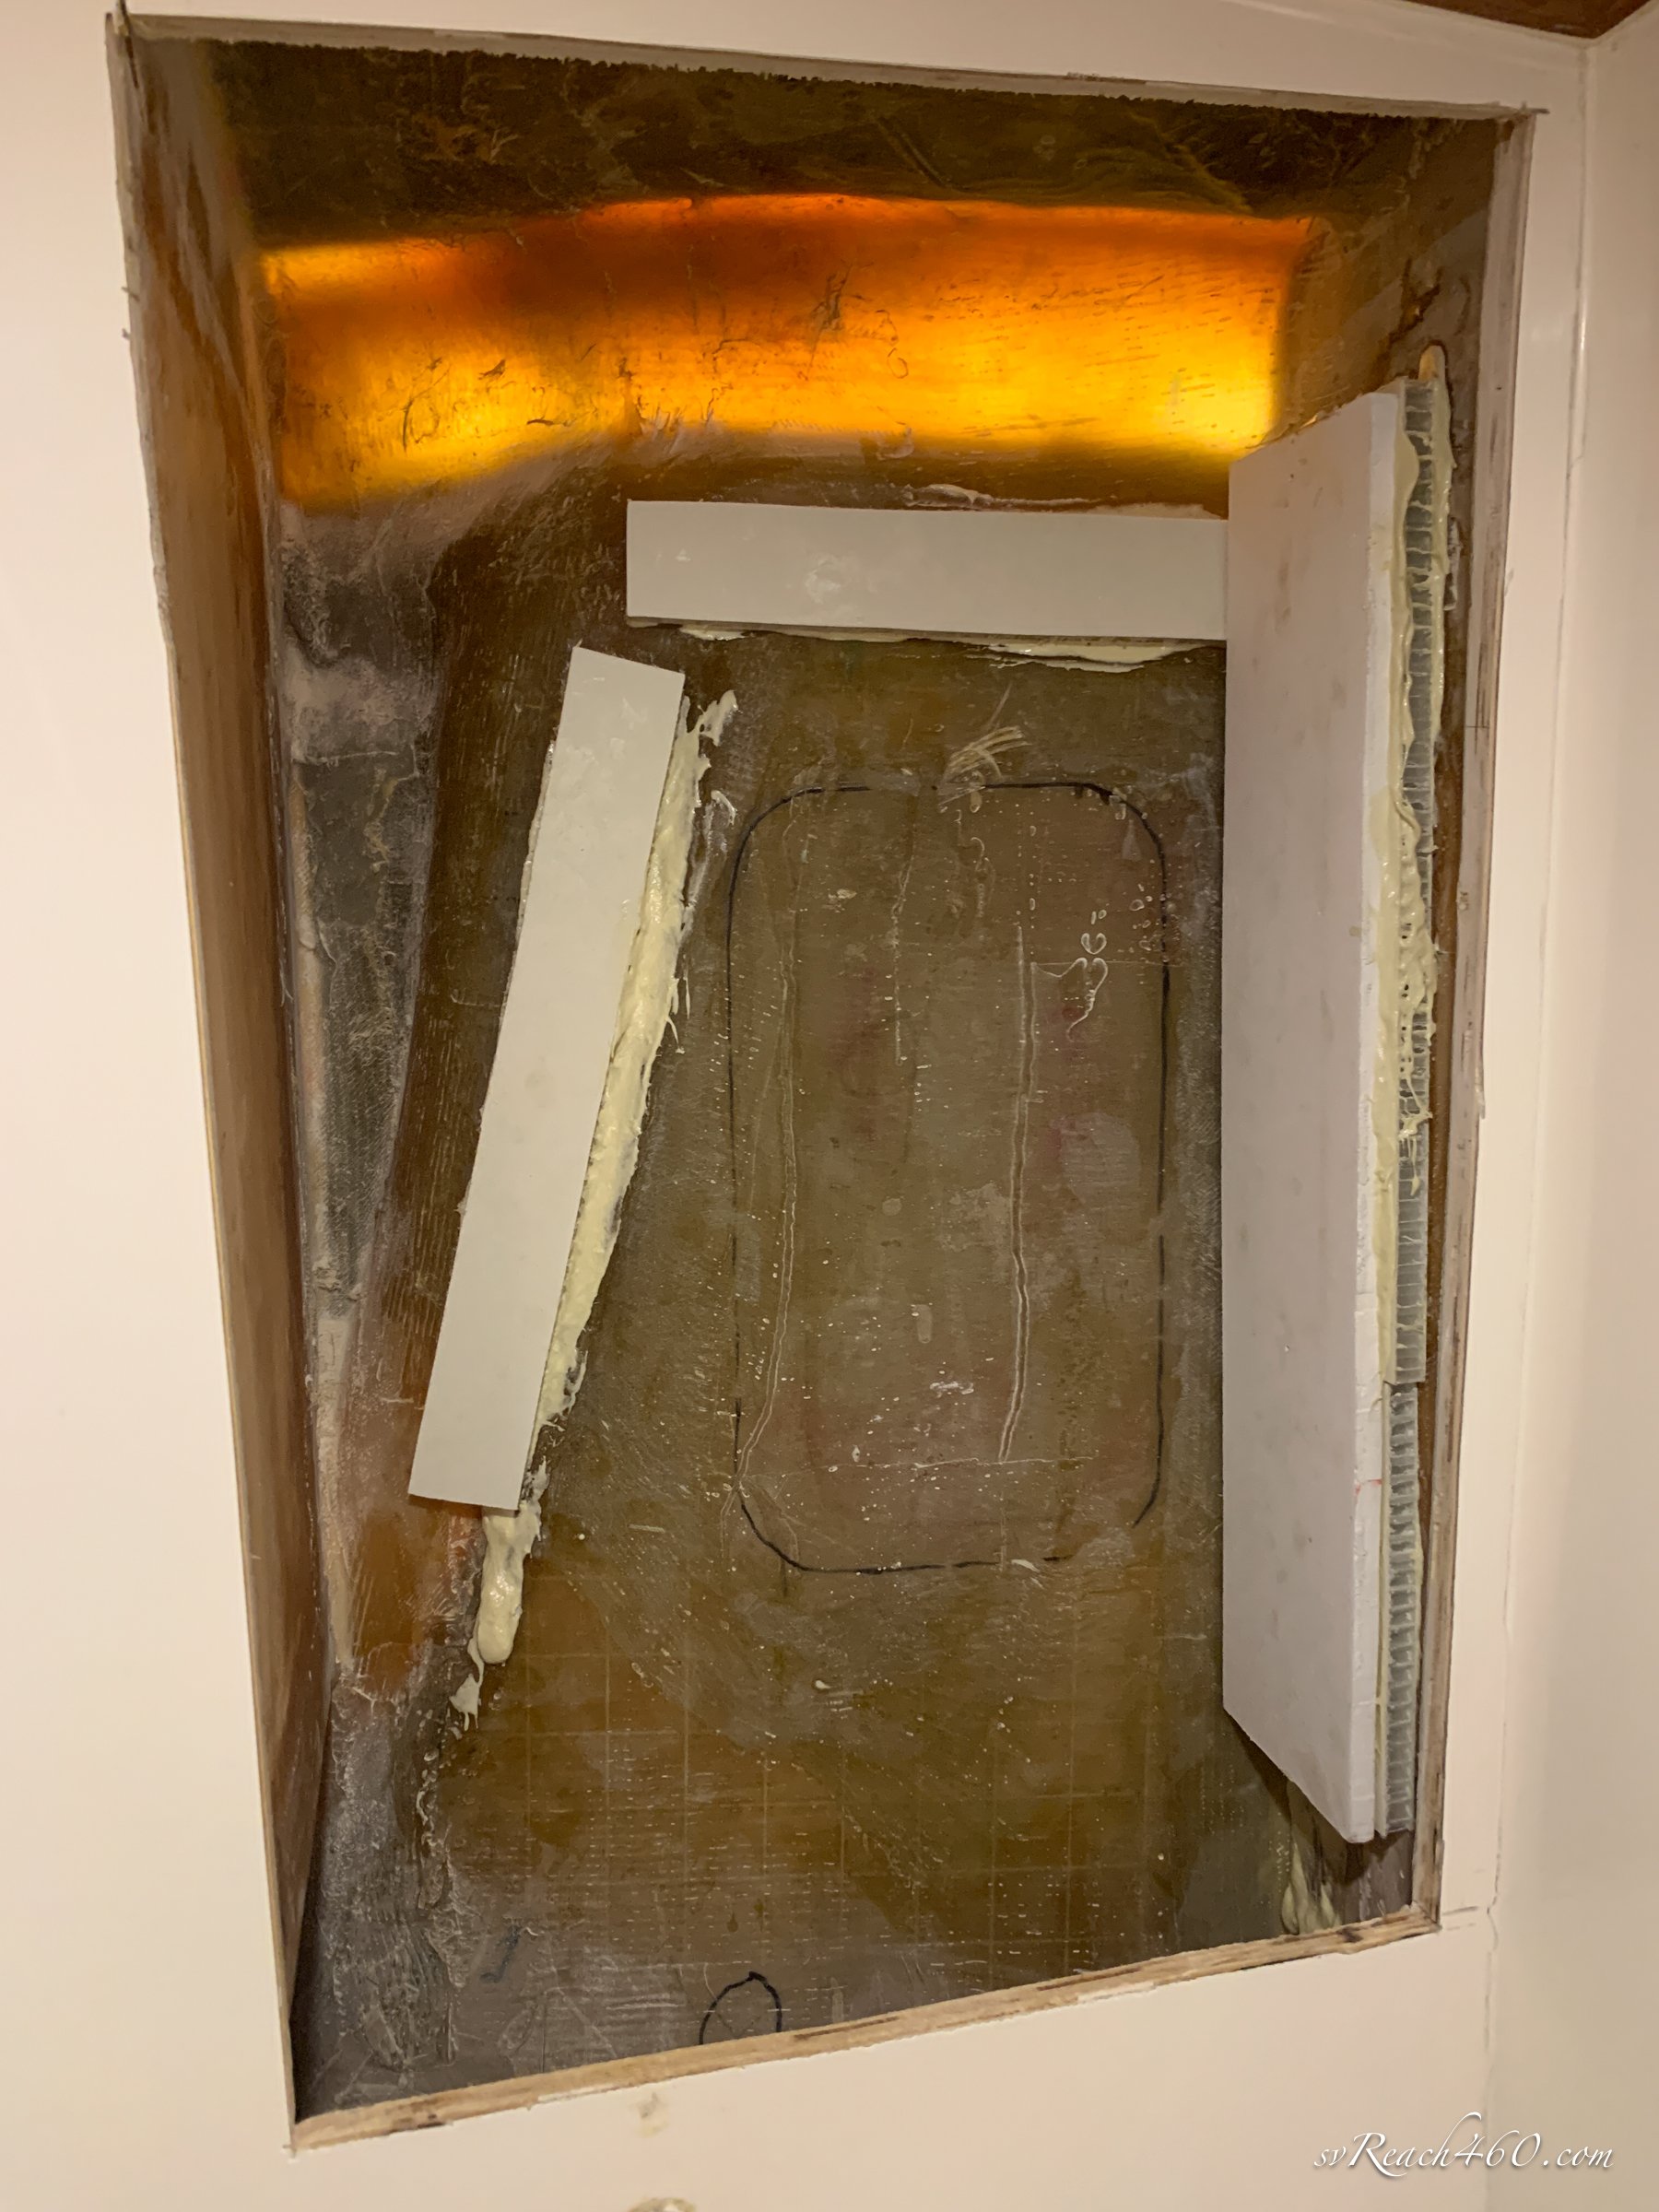
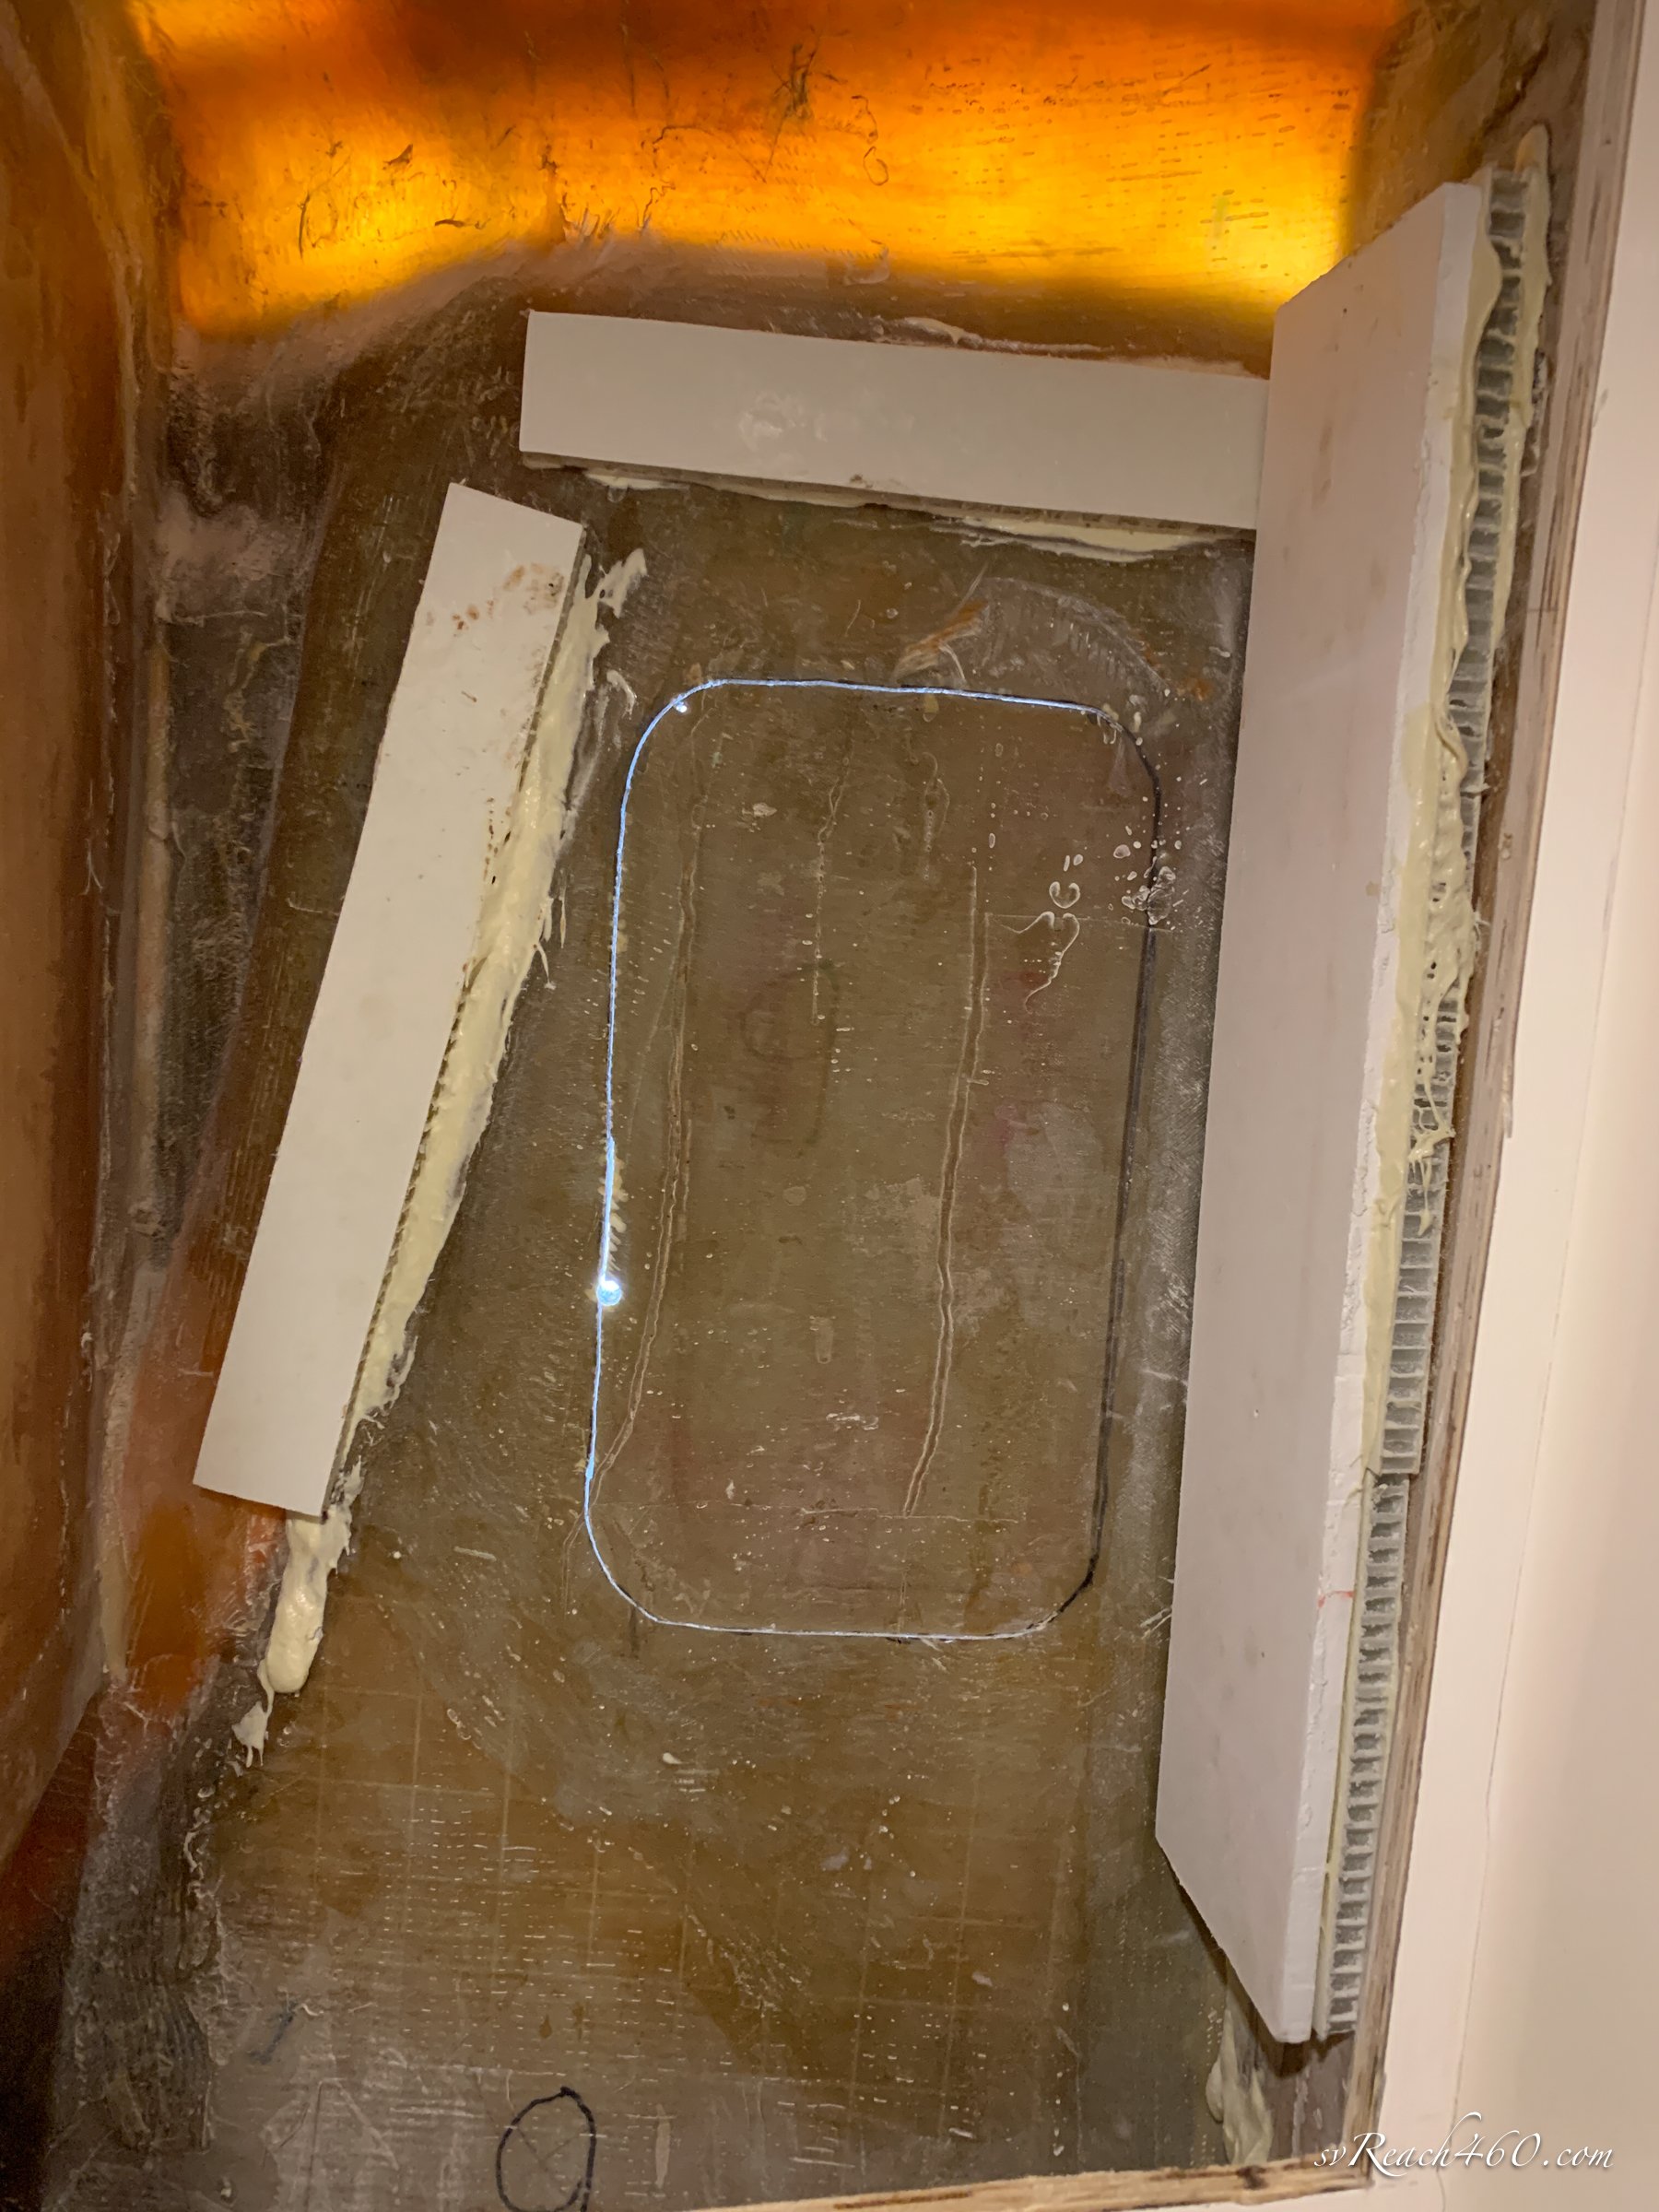

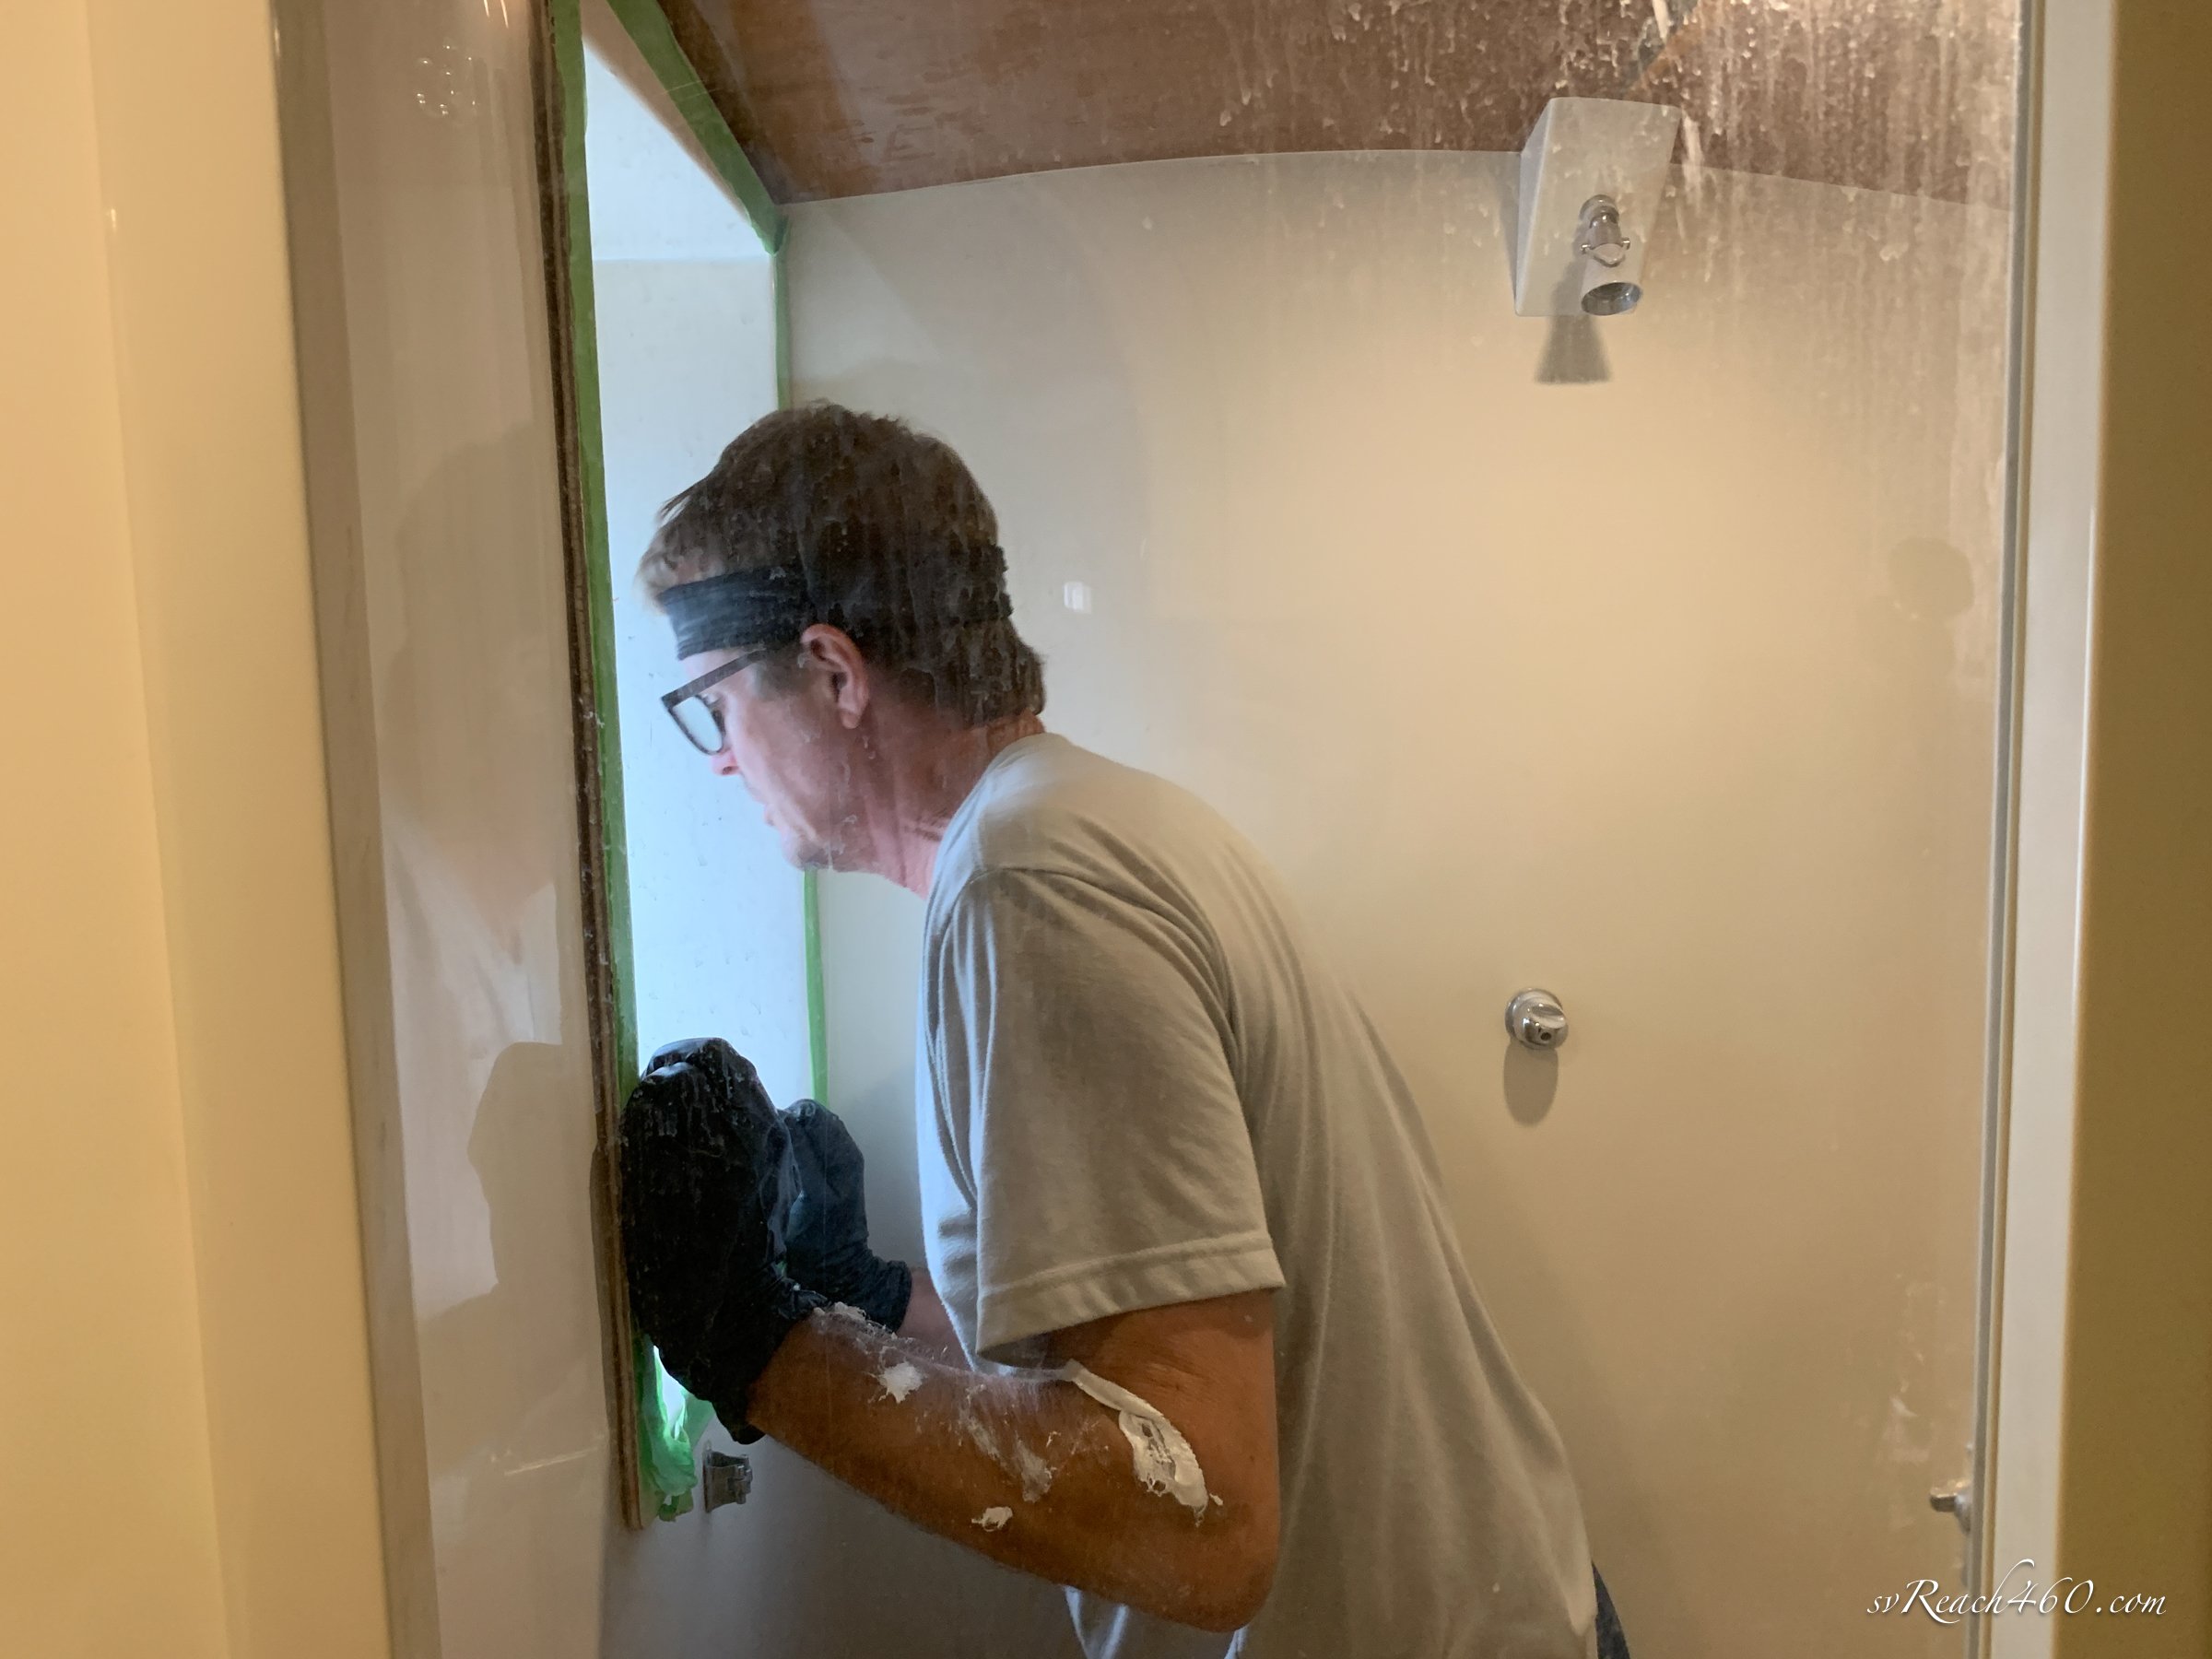
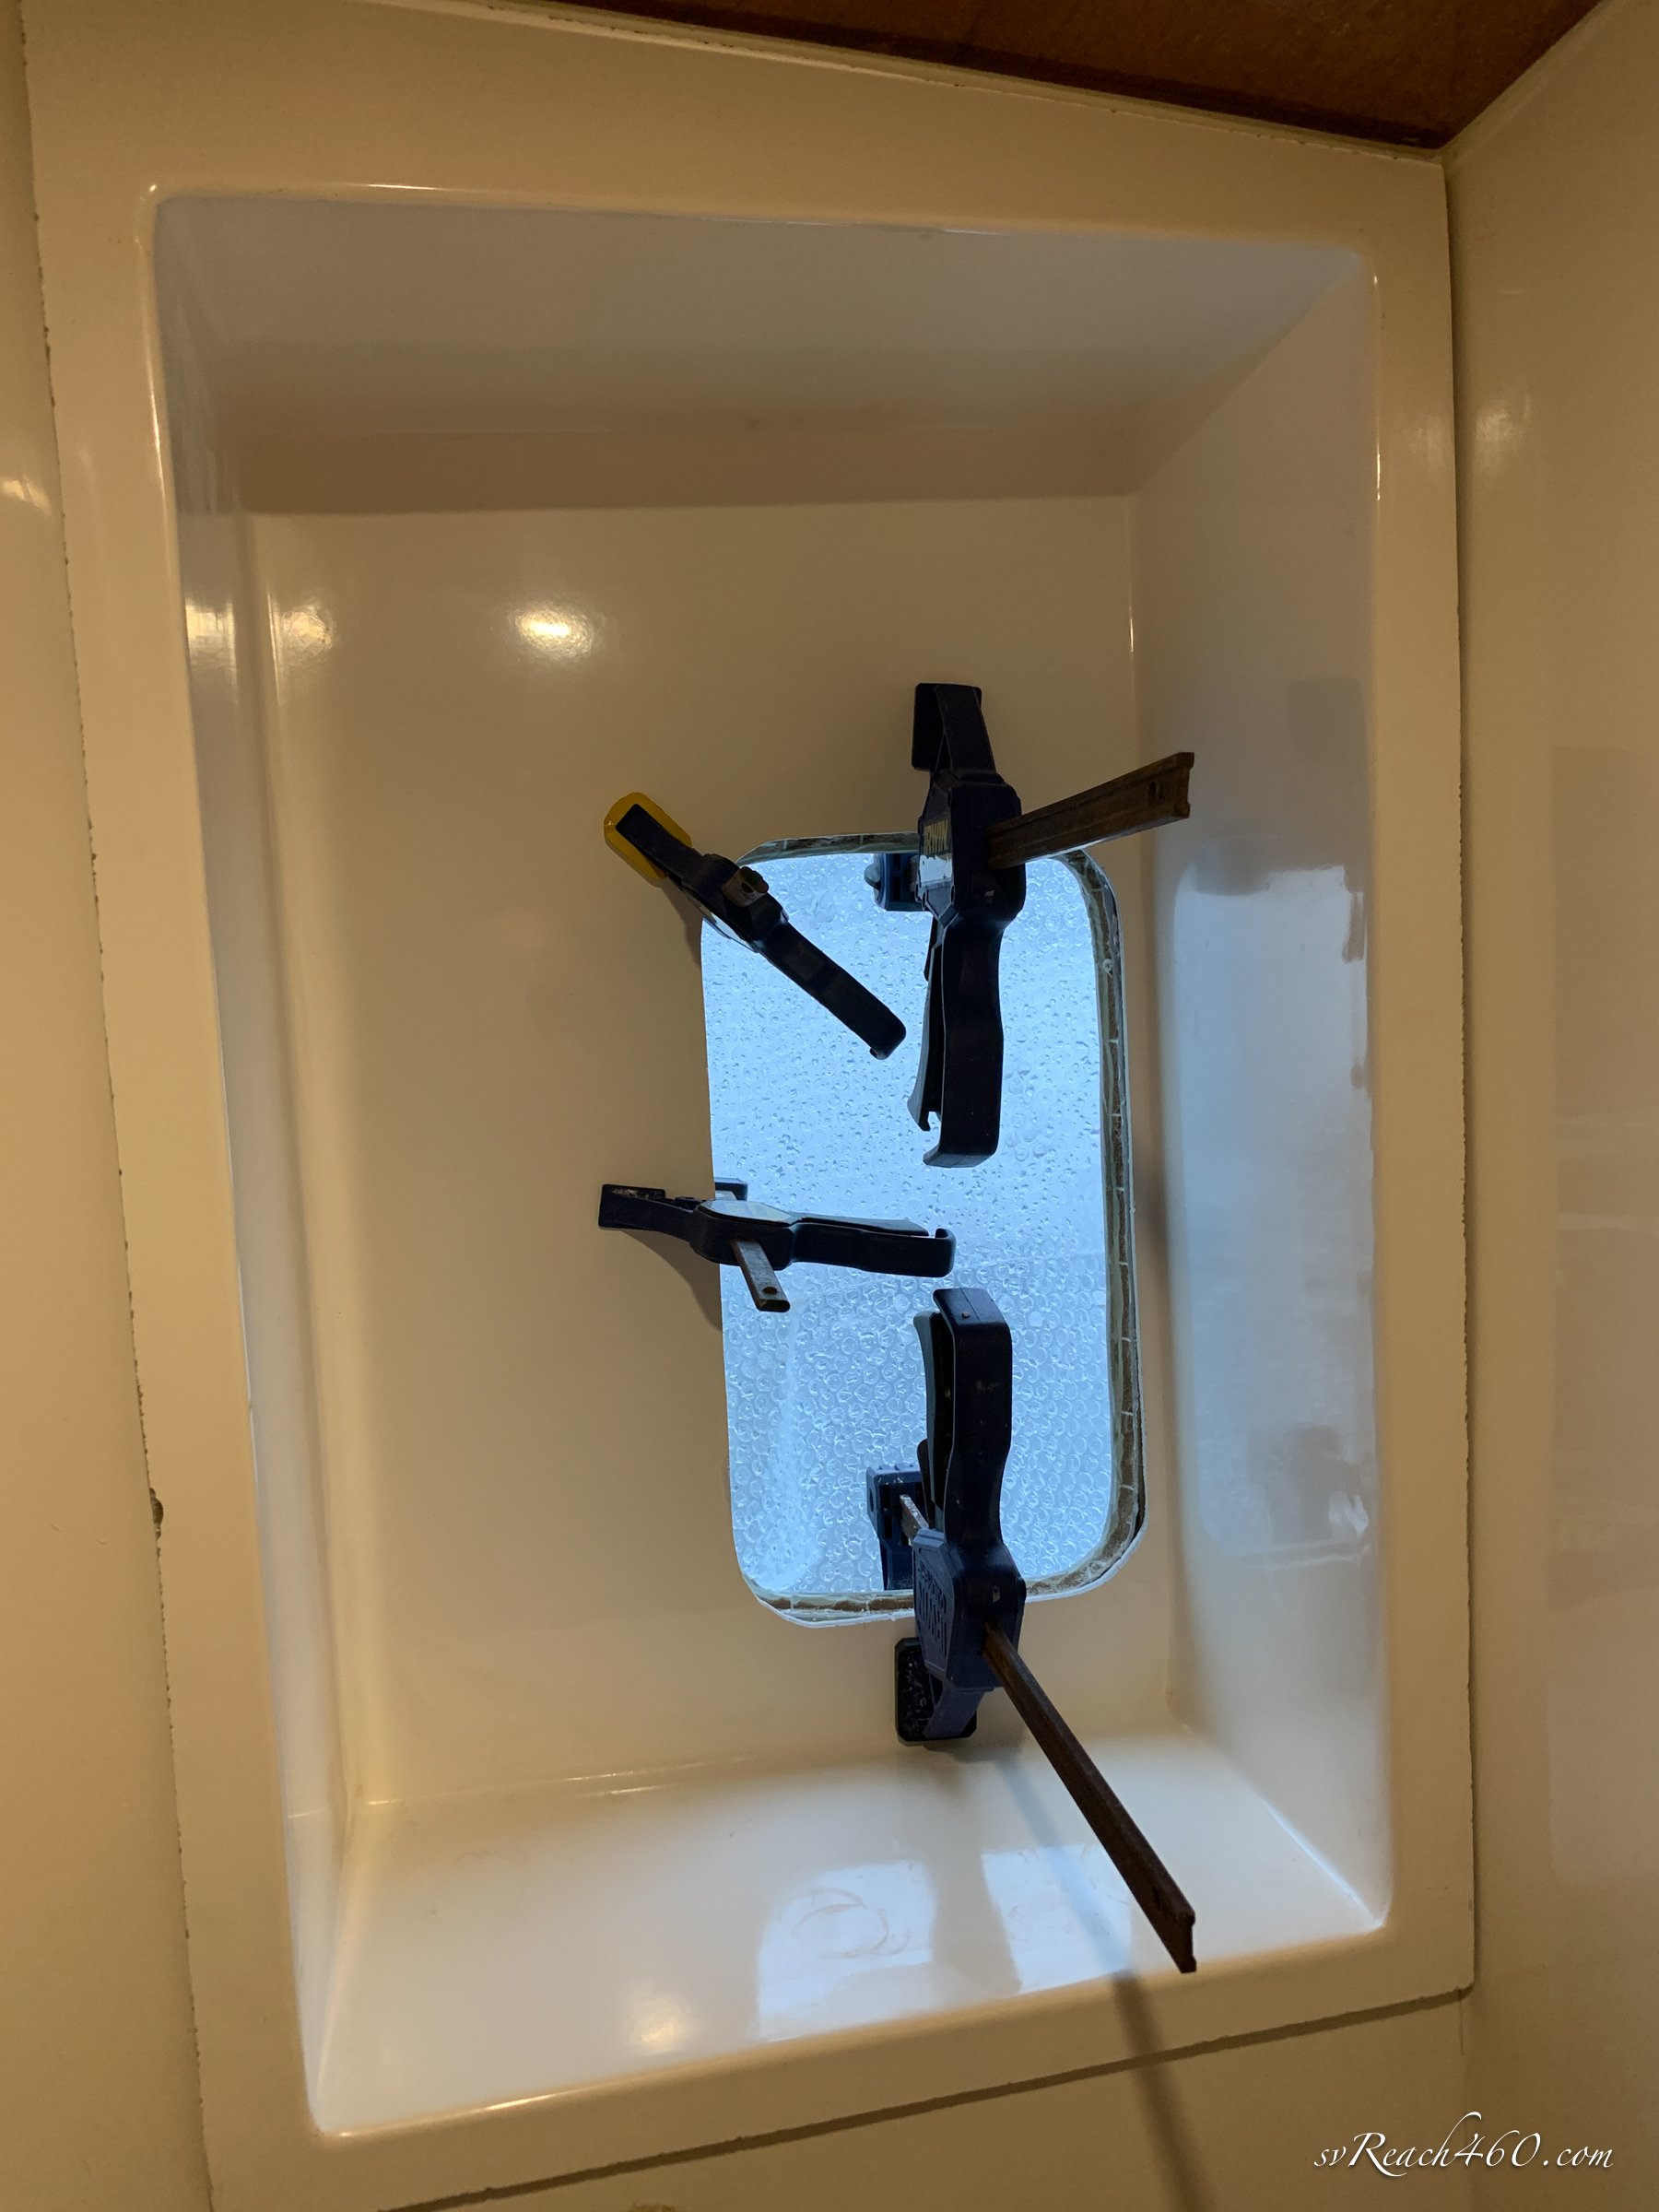
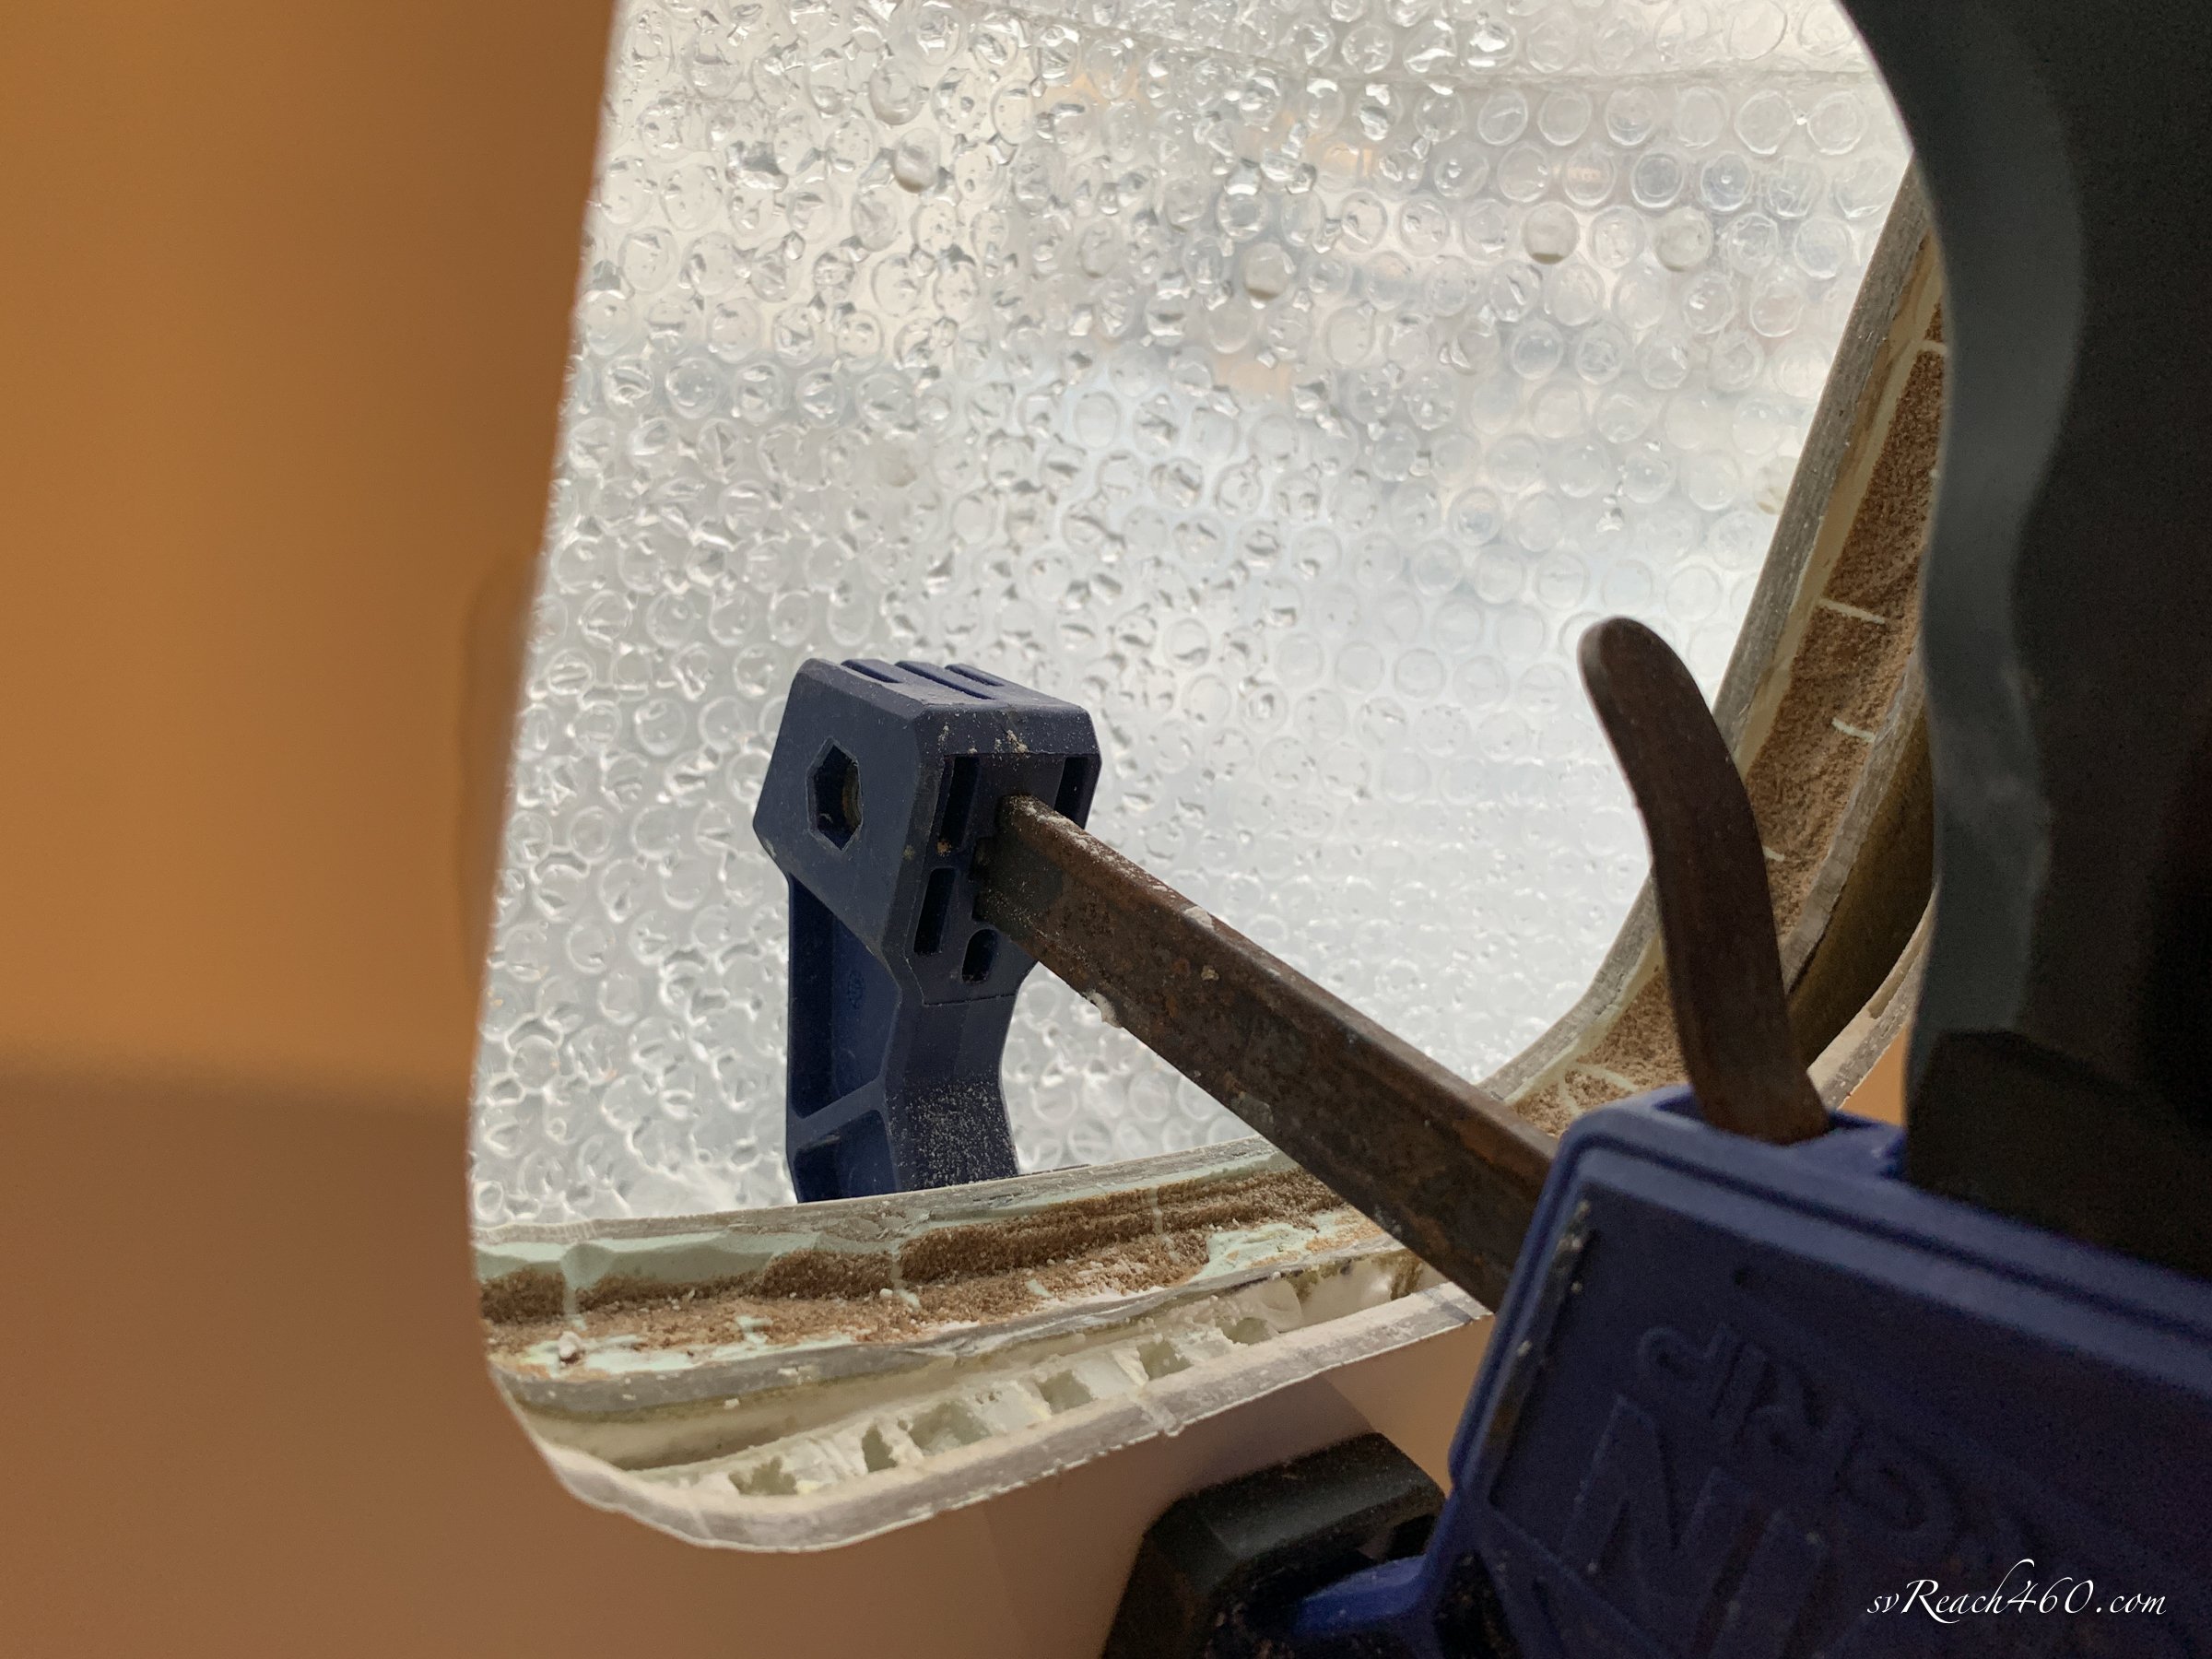

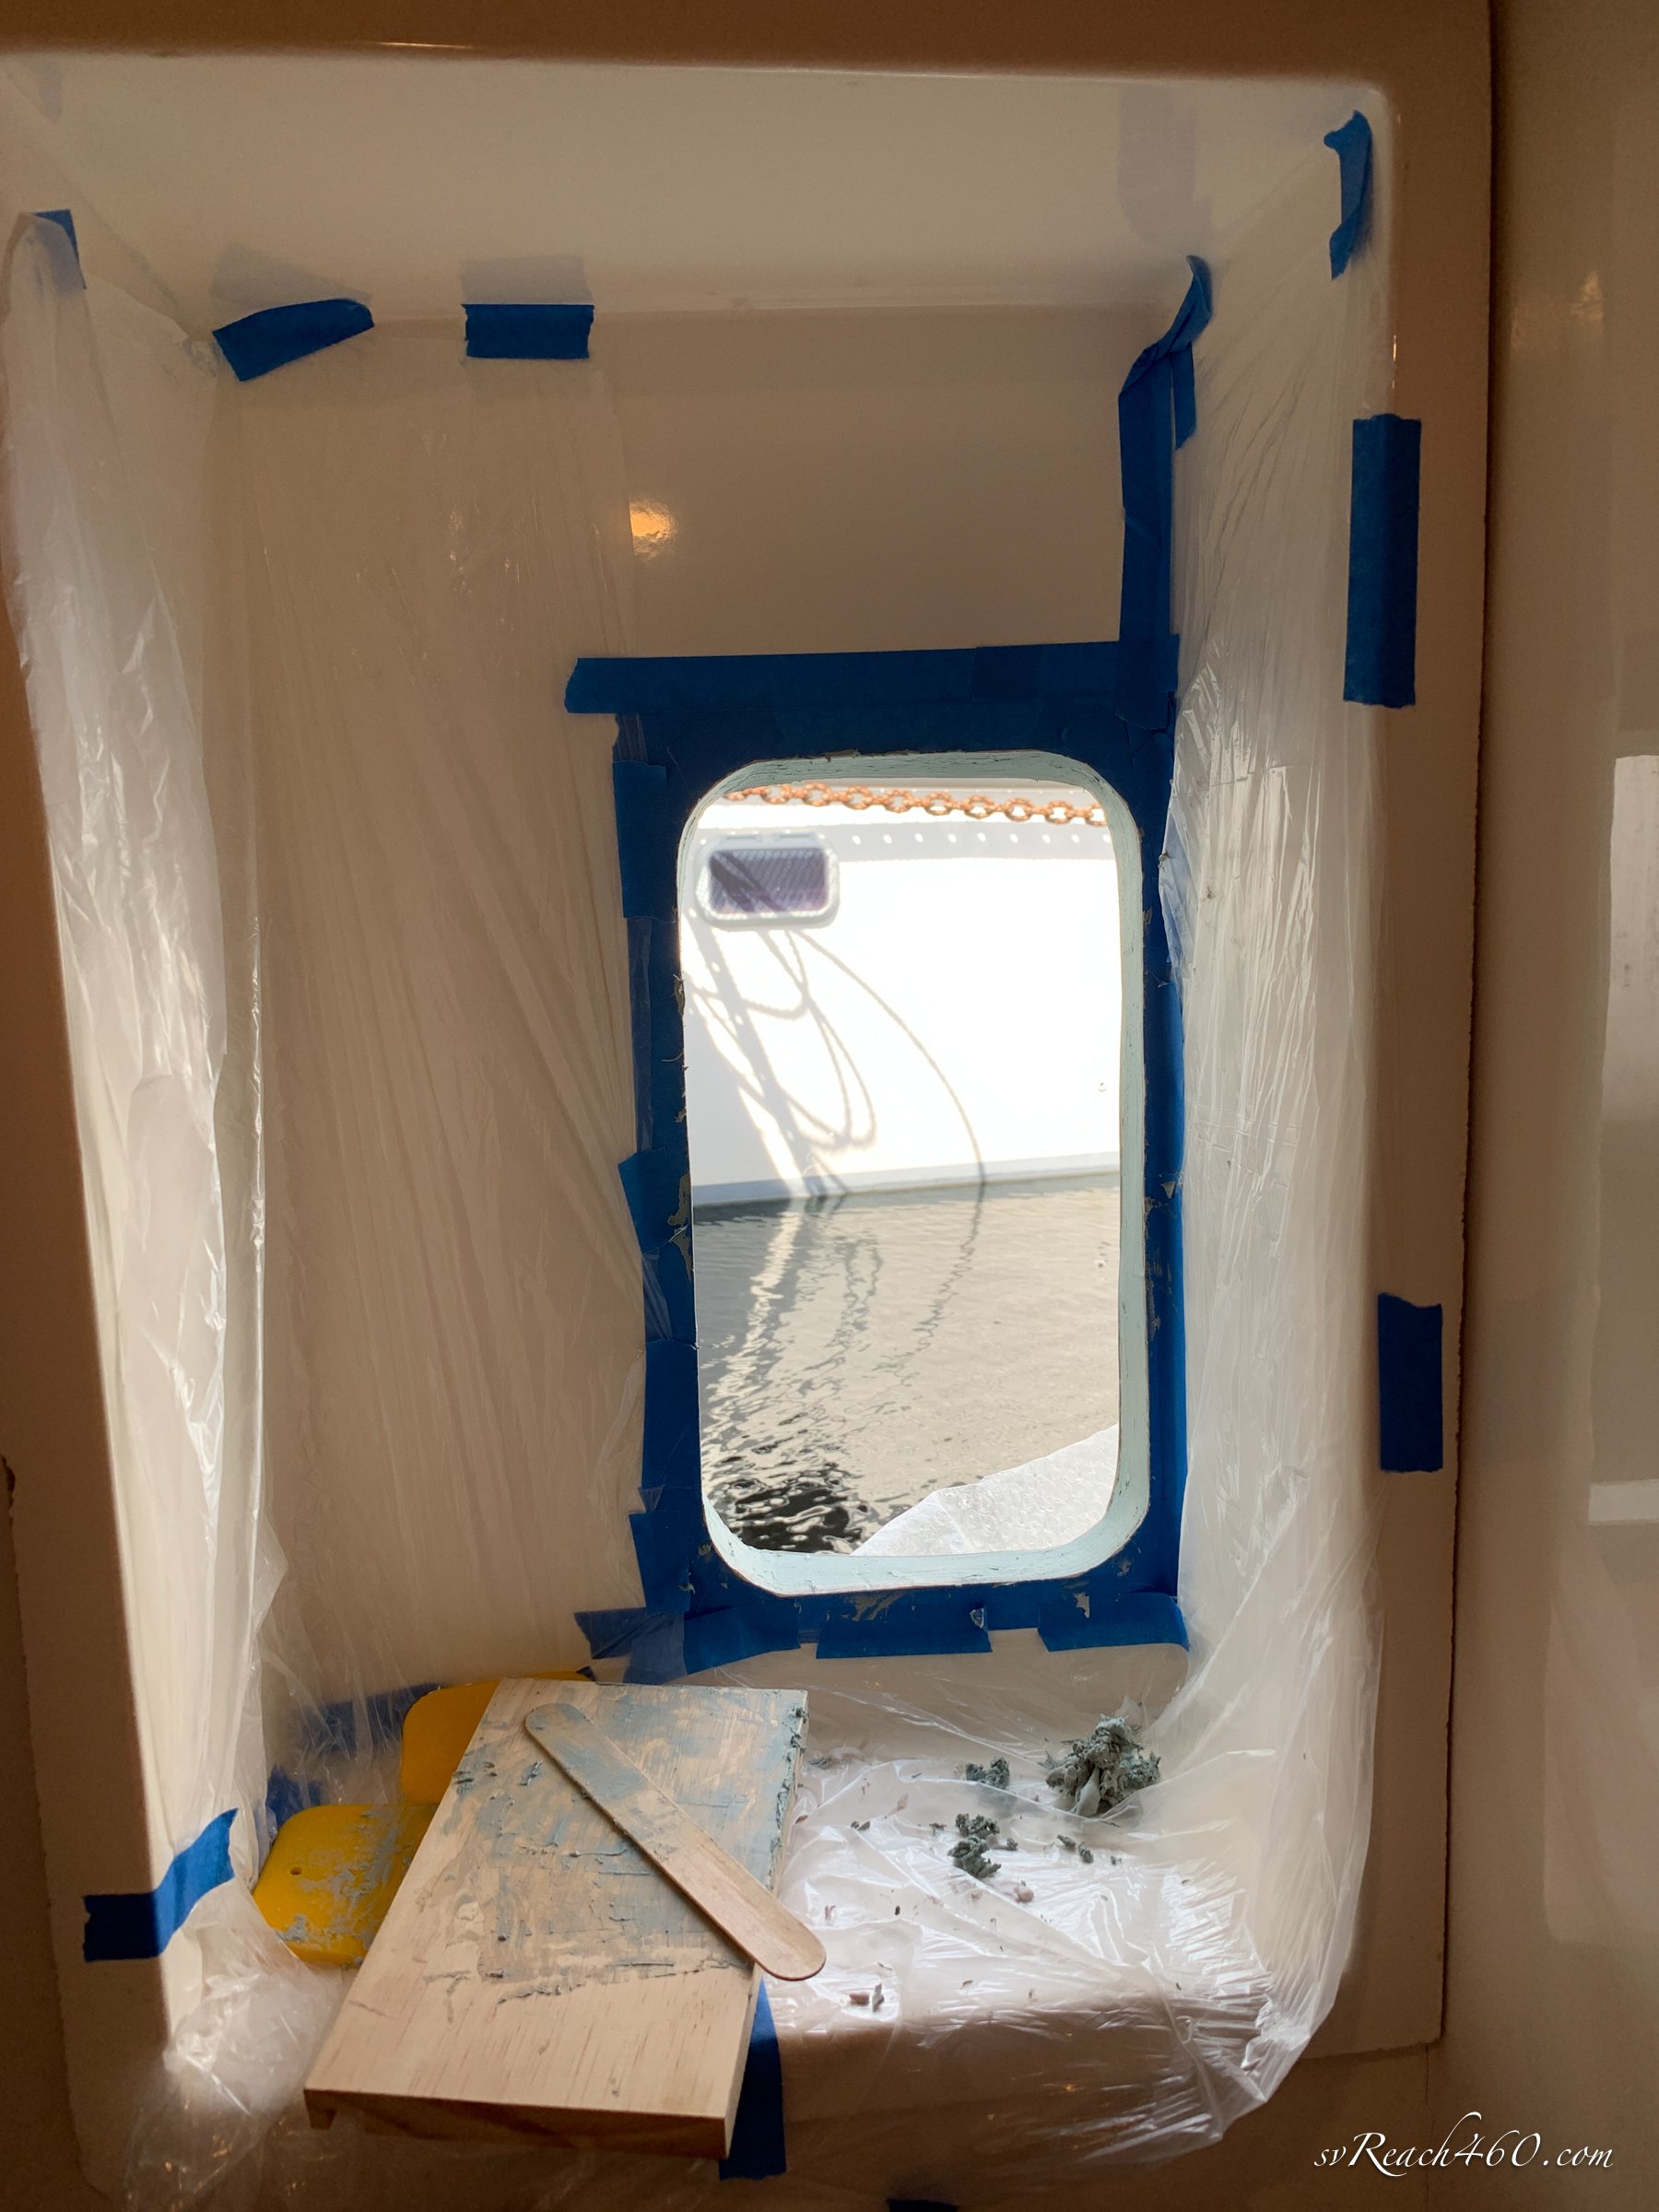
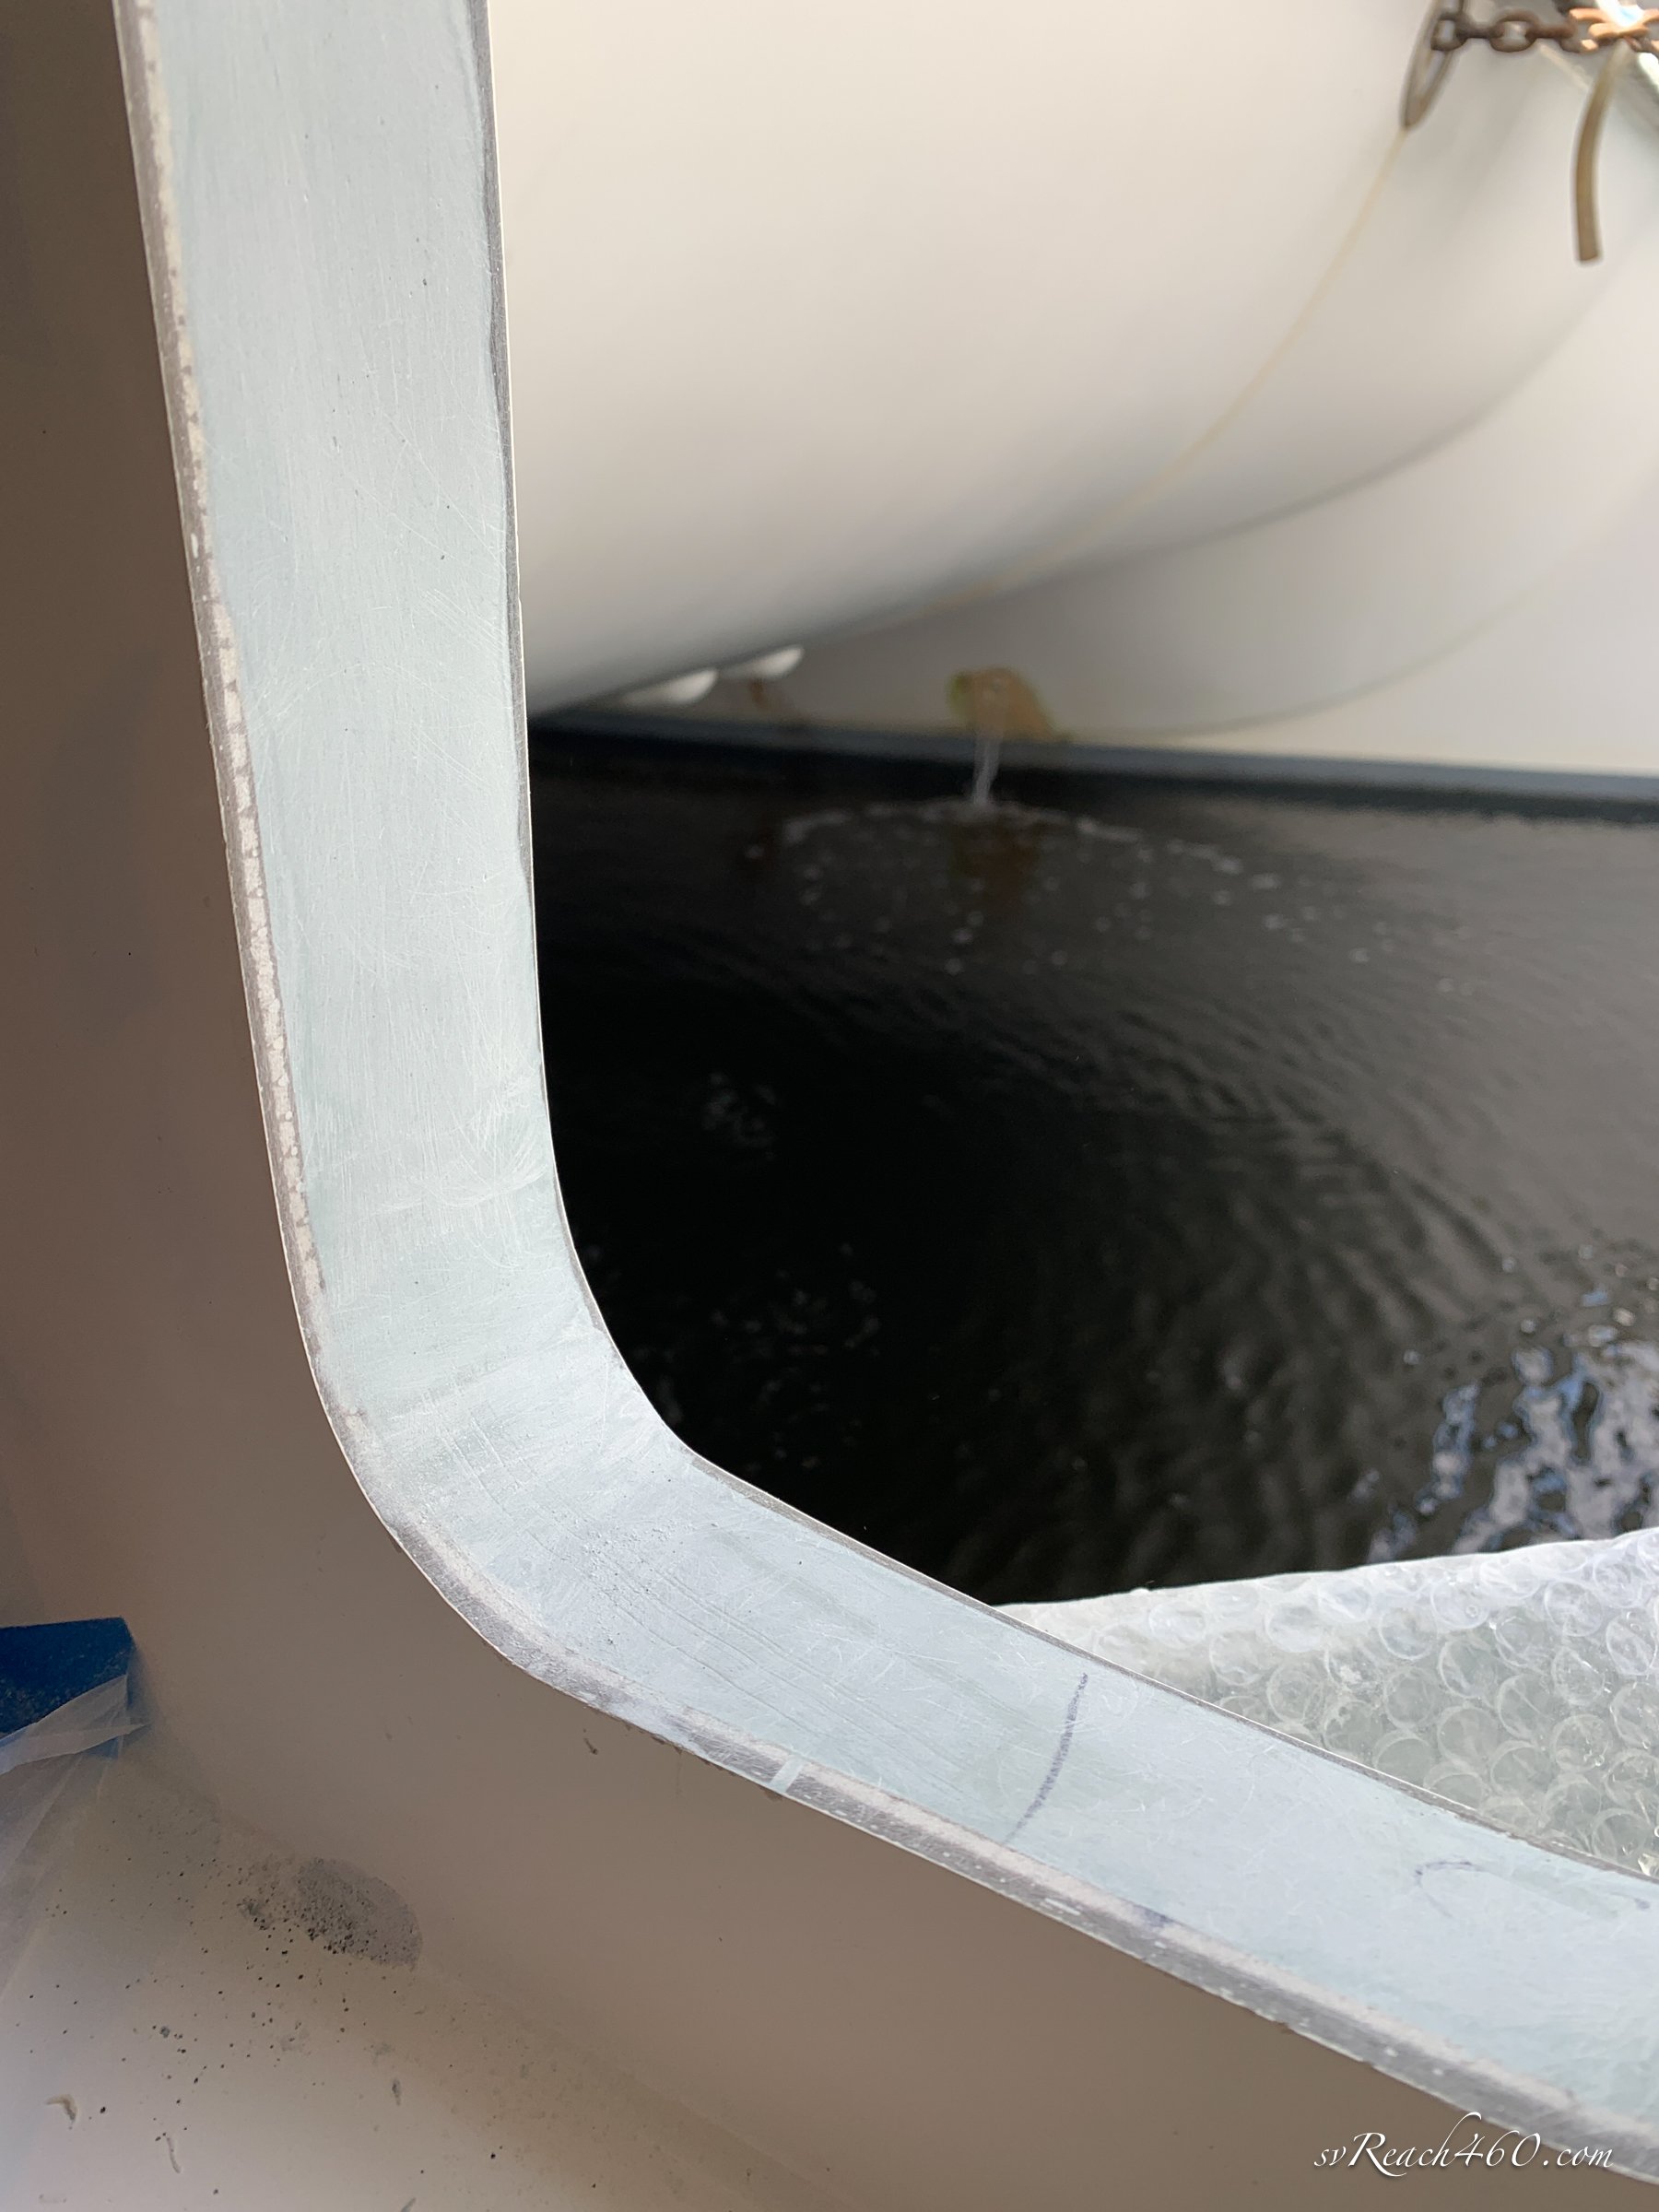
Once the box was finished, the hole for the hatch was cut into the box and finally in the hull itself. Then the box was permanently installed with some Nidacore spacers ~ more fiberglass & grinding fun ~ followed by more finish work and then hatch installation.
Now we also get a nice view from the shower!
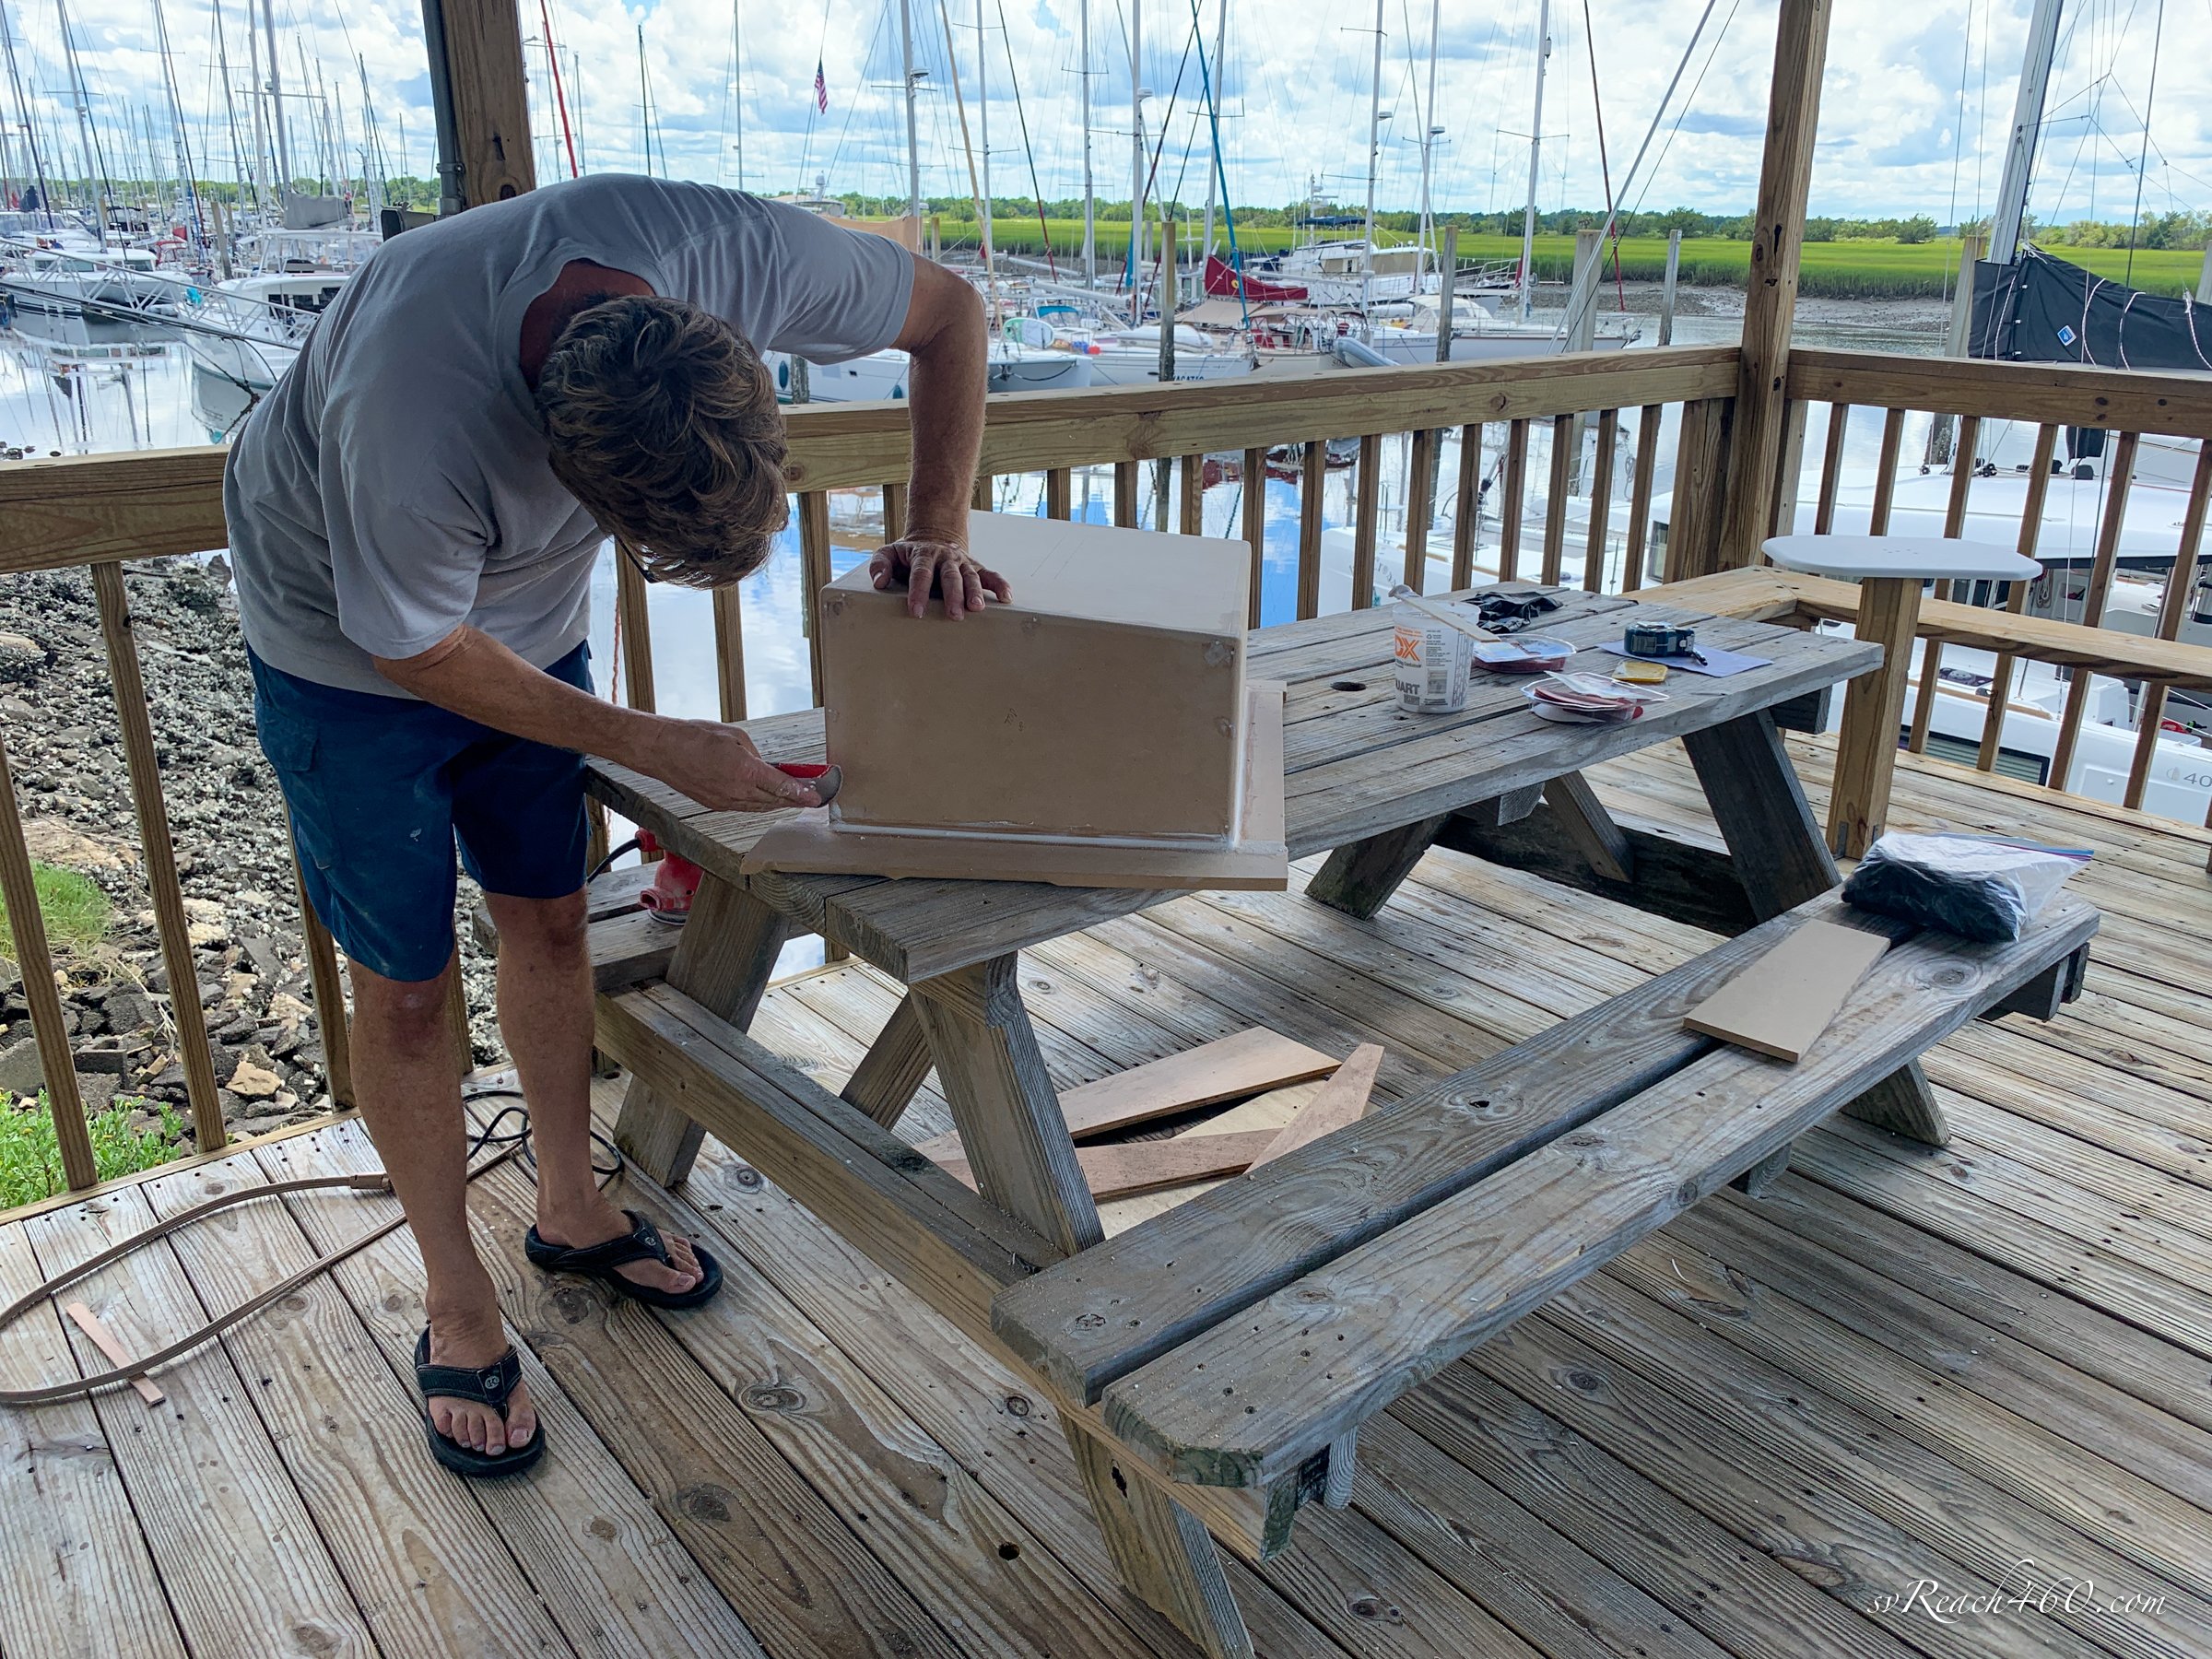
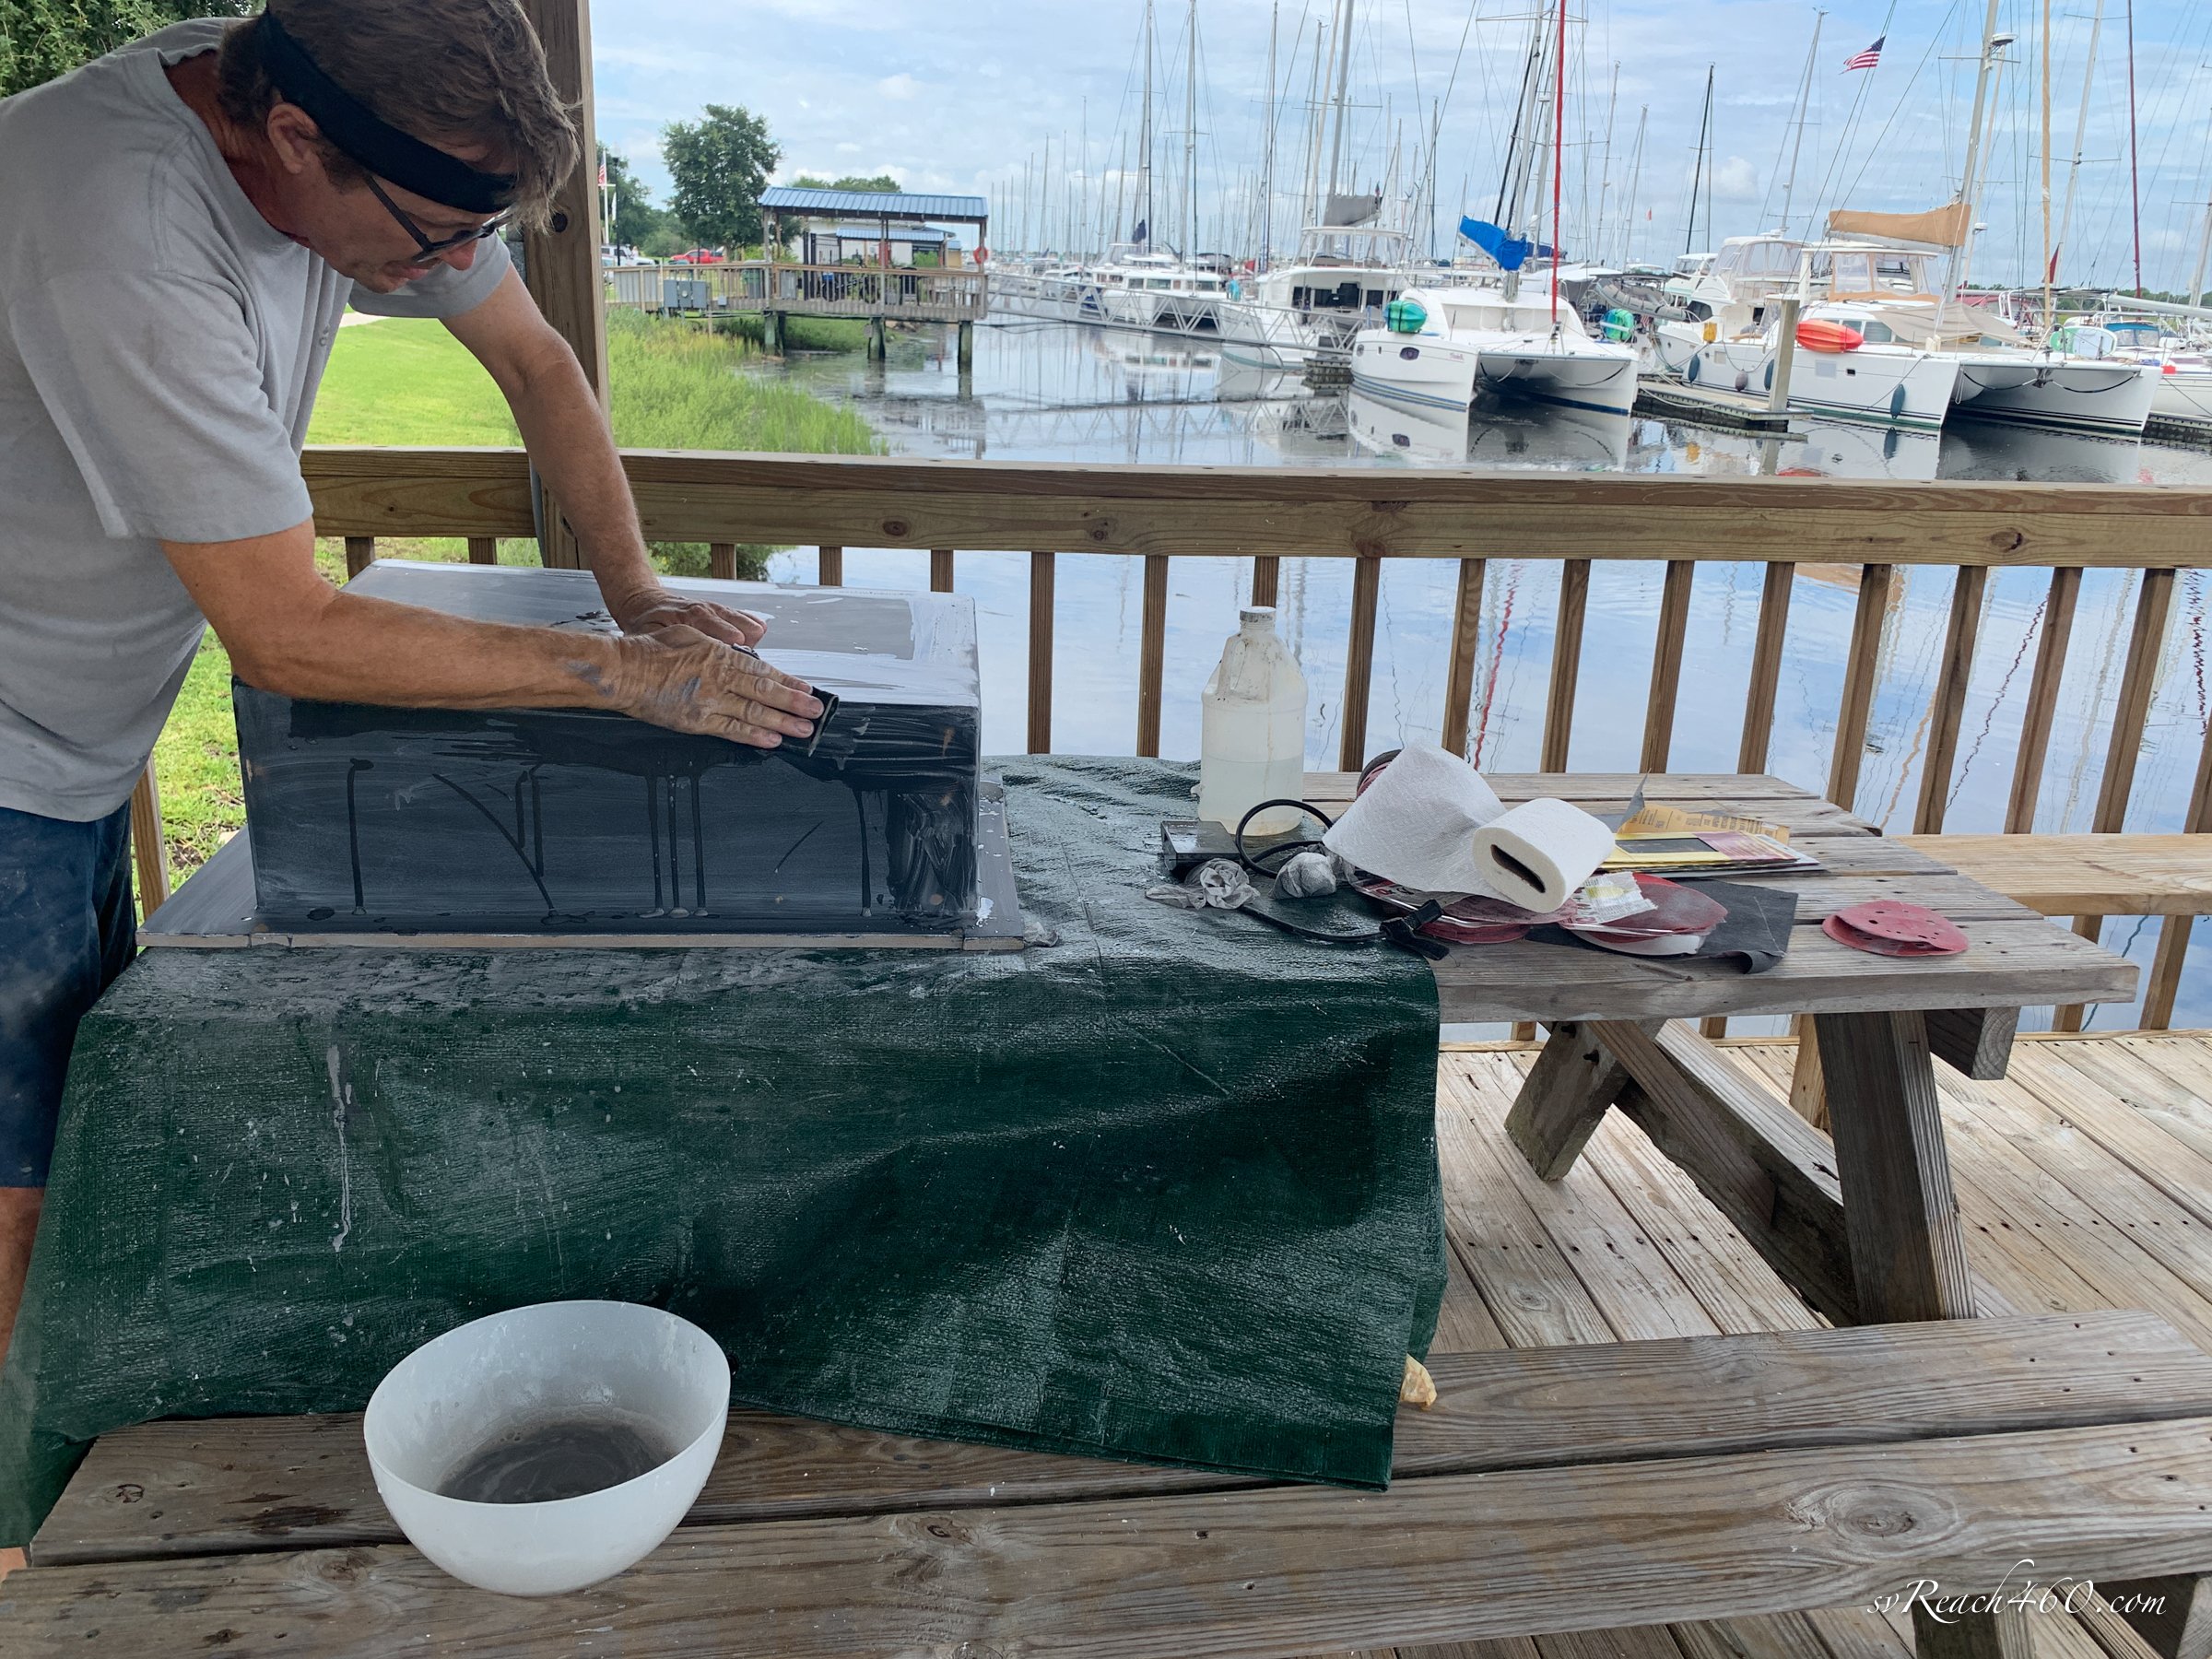
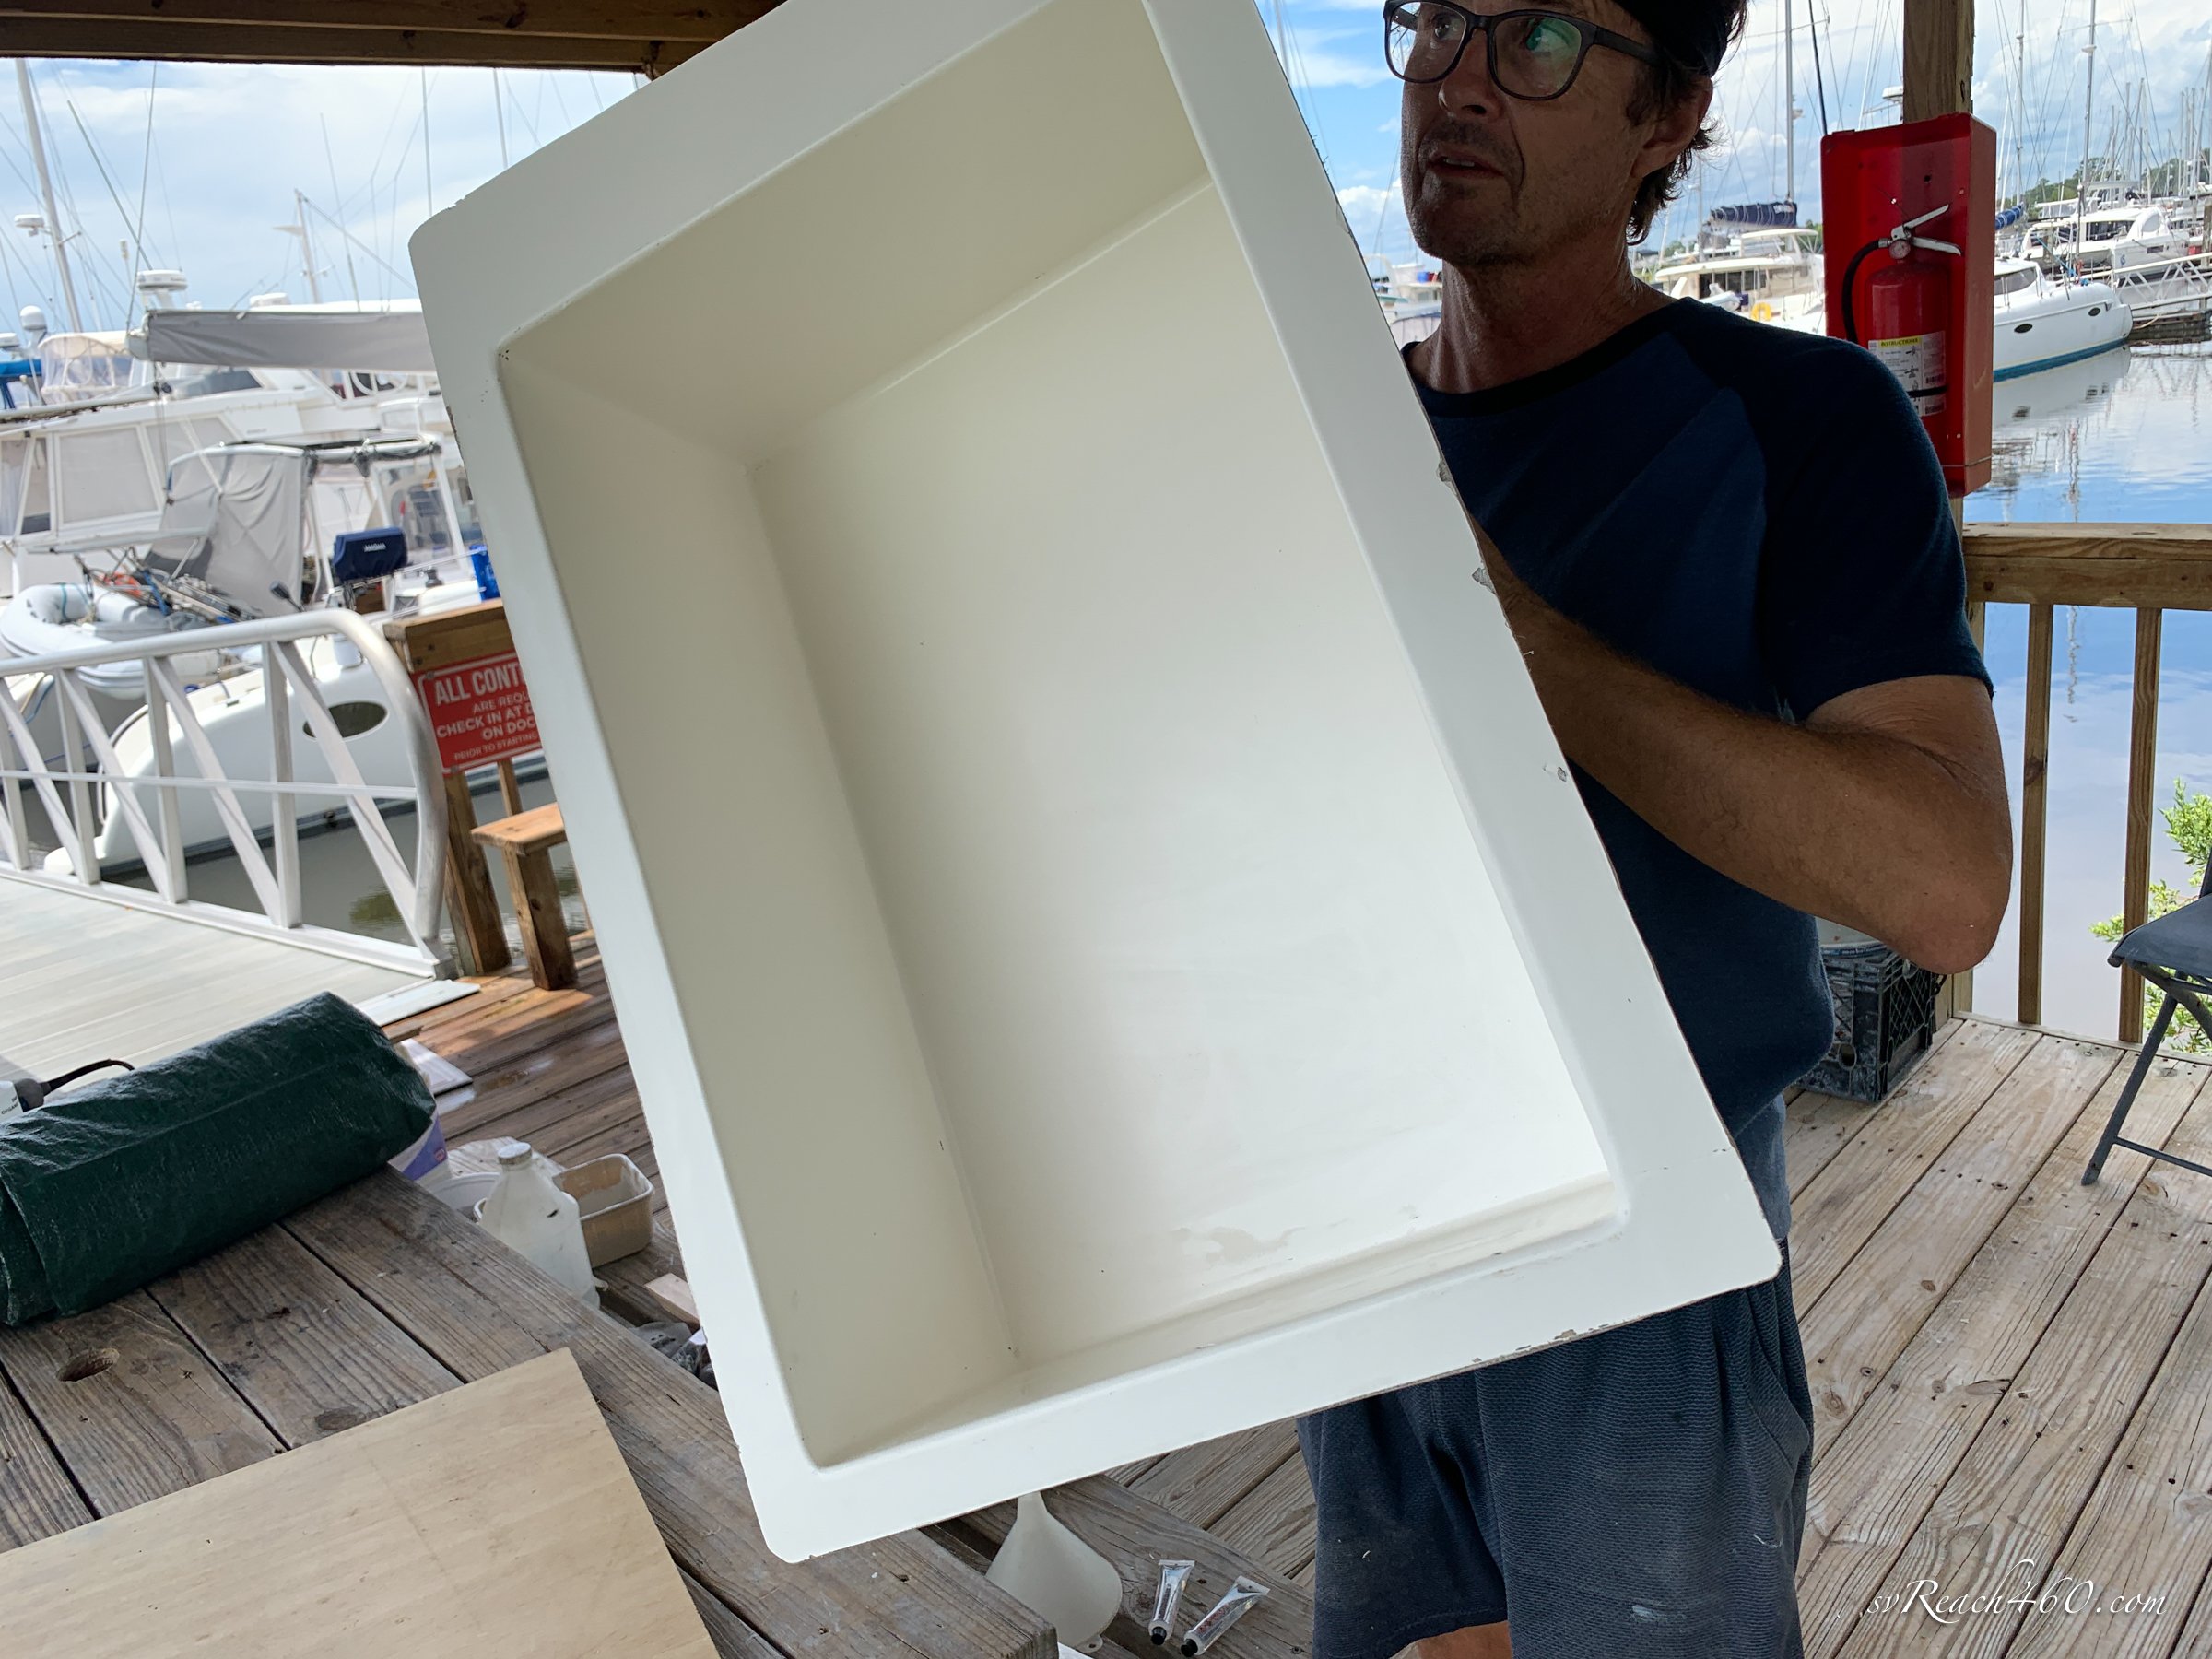
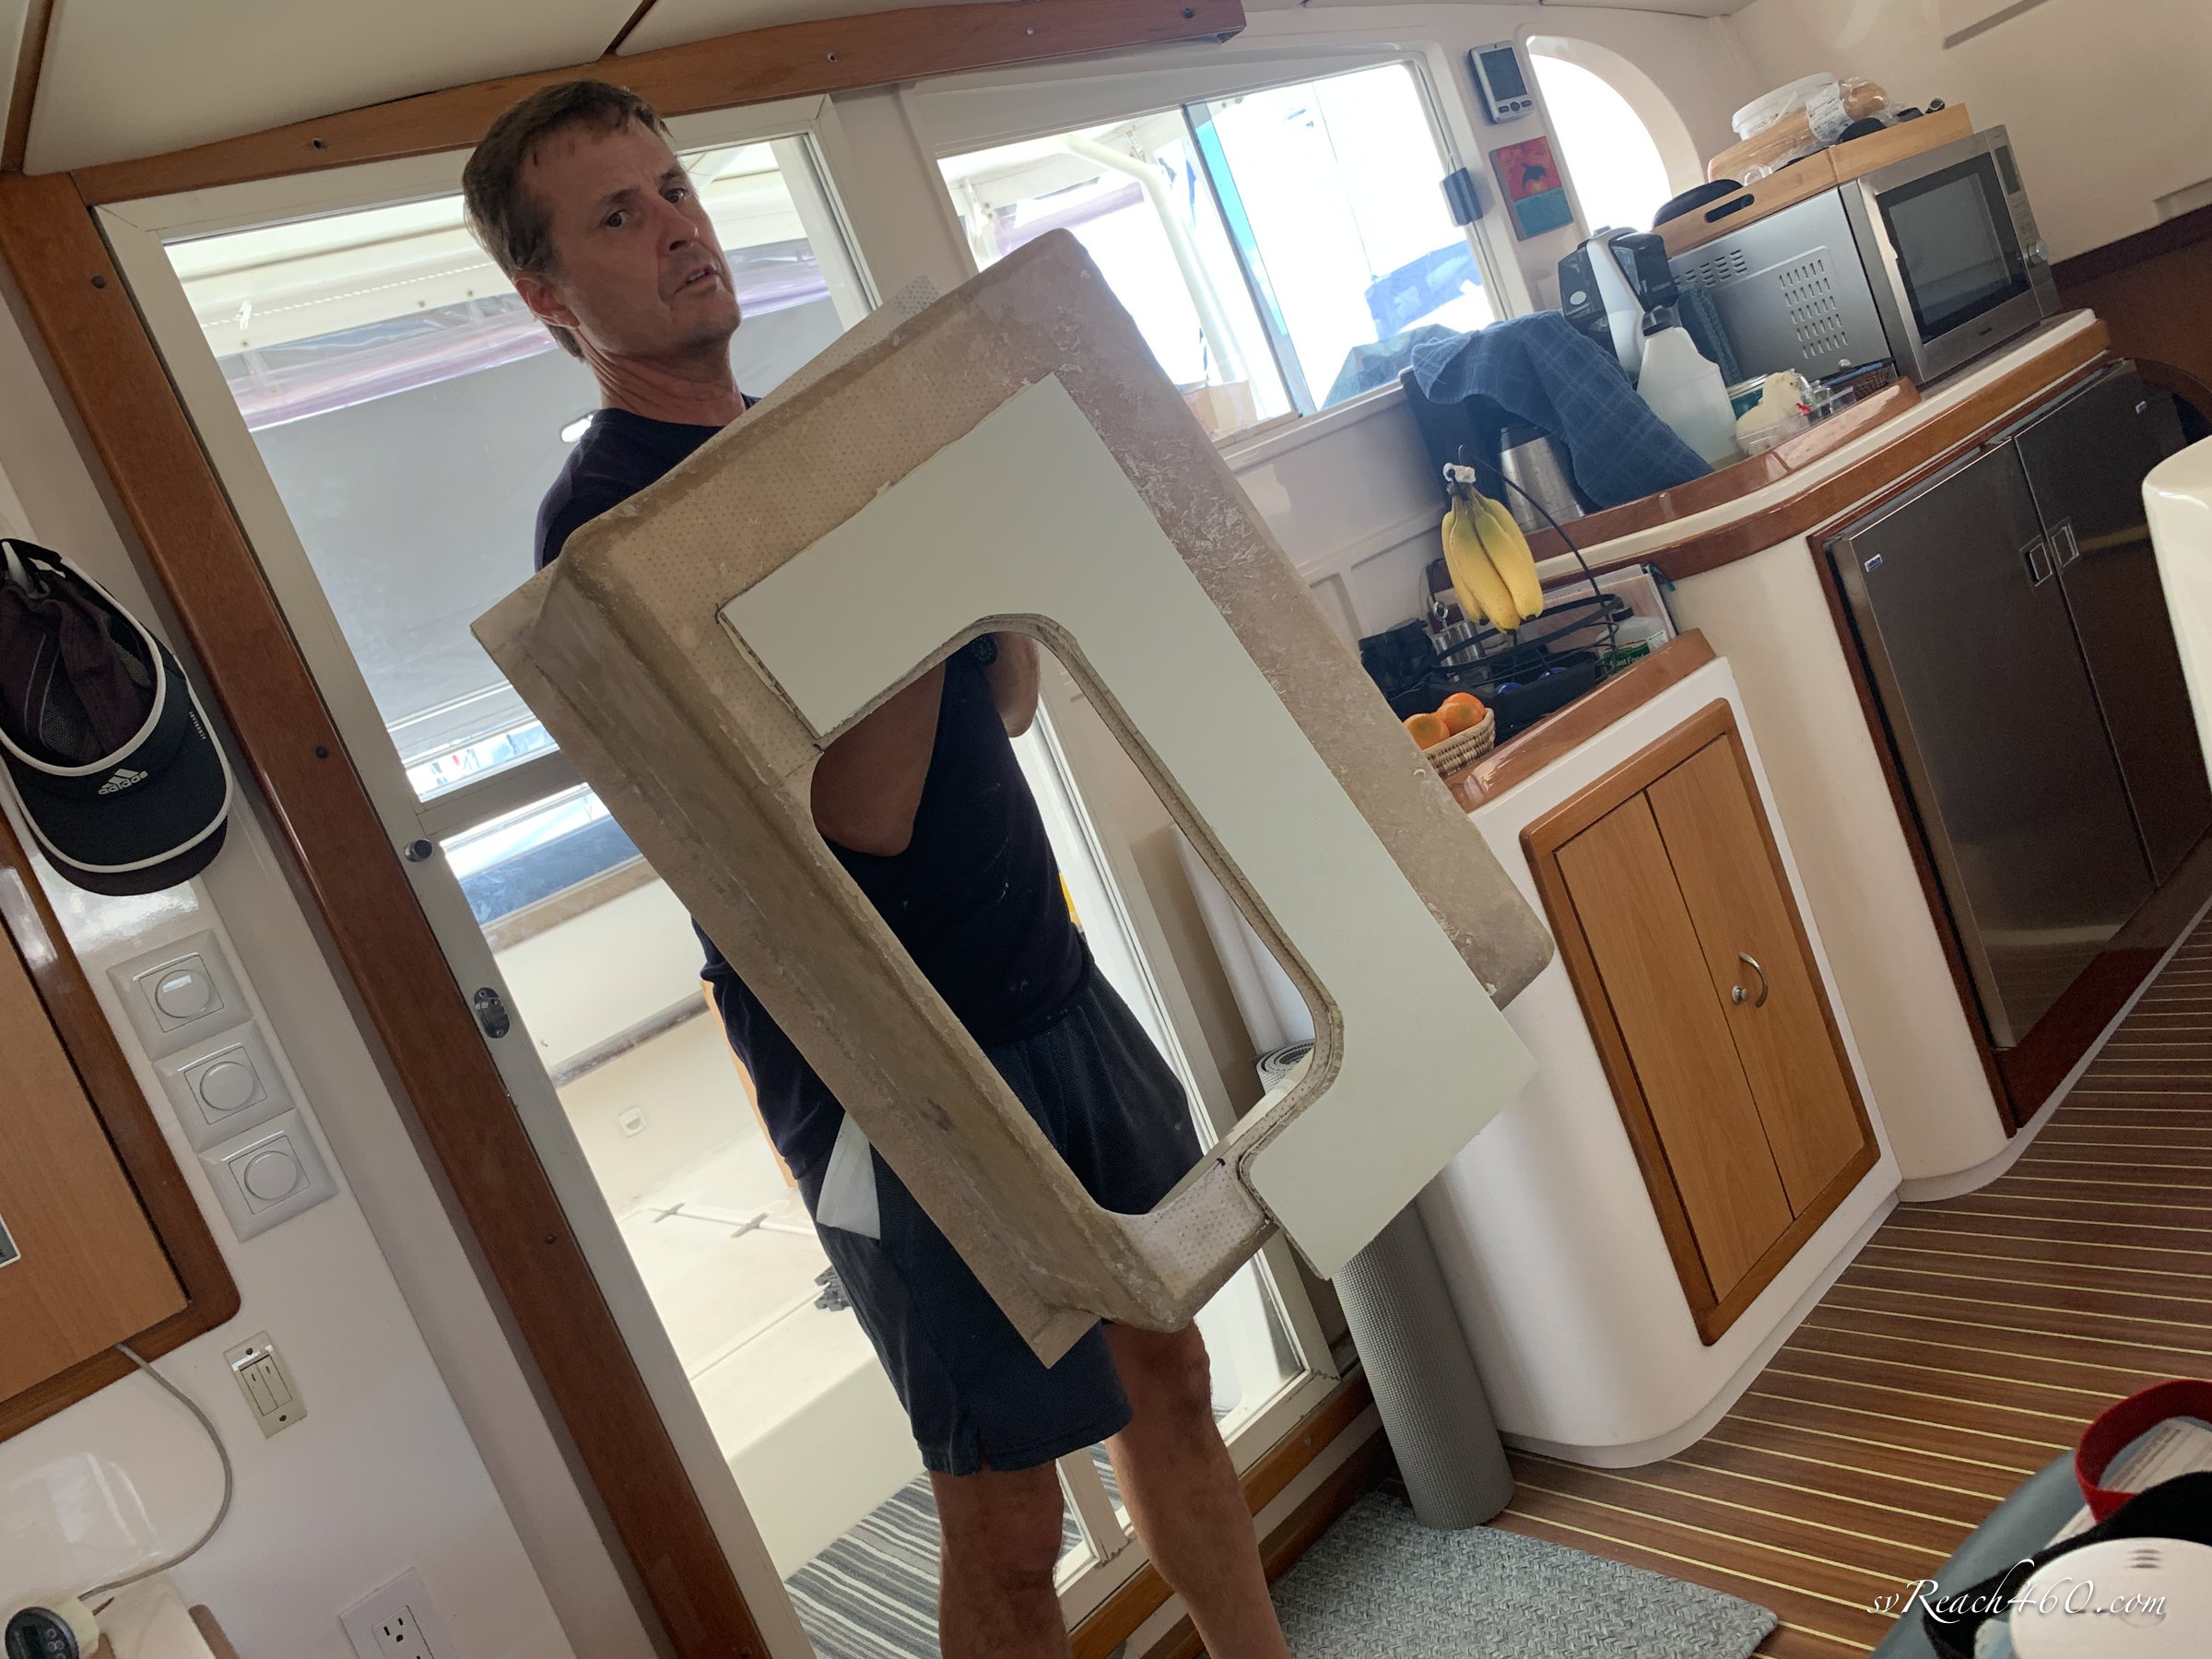
Chartplotter Box
Along these same lines, Mark designed and built a chartplotter box, using a female mold this time, to replace a box that was always in the way at the helm.
Something went wonky with the primer and the box didn’t release from the mold so it had to be chiseled out. Nothing a grinder and a lot more sanding and finish work couldn’t fix, but that defeated the whole purpose of the mold in the first place.
It turned out great in the end and makes our navigation station very functional.


Velair Air Conditioners
We replaced our Mermaid air conditioning units (5 BTU ea) in both hulls with newly released Velair continuously variable air conditioner units (10 BTU ea). The goal is to replace the saloon air conditioner (16 BTU) as well, but it wasn’t available last summer and has just been released (now we have to get it to Guatemala).
These are 115 Vac units and run off of our 1000 Ah Lithium battery bank and Victron 3000 kW inverter. All of this was done using our solar bank (2000 W) and the generator was never turned on… Hence, we just sold our Kohler 8kW genset!
One challenge was fitting them into the space of the former units on a utility shelf. We first installed one in the owner’s hull and having a unit in hand, saw how we could squeeze it into the shelf (with minor cutting) in the other hull.


More game changers! This season when the heat became unbearable, we would run the hull air conditioner all night for sleep. This also was used for watching TV and will be perfect for cooking dinner in the evenings once we get the saloon unit.
Since we’ve used these for half a year already, Mark has some power consumption data that he recently posted about on our Facebook page:
We installed Velair 115Vac units, not the Mabru. 10kbtu is their smallest unit, so we have those in the aft cabins and hulls. We are getting a 16kbtu Velair now for the saloon, as they were out of stock when we installed the 10's.
These are variable capacity units that can be run from 3-10kbtu (4-16 on the 16kbtu). Overnight in our cabin, we run it at 3kbtu and it uses 240W (with pump) and runs ~50% duty cycle. This equates to ~100Ah out of the battery over 10hrs.
At full 10kbtu output, they draw ~50A out of the battery with pump, but they ramp back down pretty quickly as the air cools. That is the difference how these work over conventional units - they only run at the capacity needed to maintain the set temperature. So as things cool, they use less power and less fan (quieter too) until they are cycling 50% at low capacity. Temp stays constant instead of swinging up and down with on/off units.
… Plus, some information on the installation and relocation of the temperature sensor:
The unit comes with its temp sensor inside the unit measuring the intake air temp. Since our unit is remote from the room we care about the temperature in, this wasn't working at all because the intake air wasn't coming from the room itself. However, the temp sensor is all coiled up with a 30' wire attached, so it was easy to move it into the room itself. Now it matches closely. But not completely accurately. This is the second complication - the remote thermostat can be set to F or C, but it is really measuring only in C. That means that the intervals between *F can jump a bit more than expected. So if you set it at, say, 78F, it might actually be 1.8F around there because of the C-F conversion. This isn't really a problem - either use C or just find by experiment what *F setting corresponds to the exact temp you desire (and it is only going to be off 1.8F at the most anyway).
Otherwise, once it reaches whatever temp it thinks it is supposed to be at, the range around that temp stays very tight - within 1C/1.8F.
Most of this has to do with the new remote thermostat control itself and not the operation of the unit.
Back-up Autopilot
We like redundancy, especially for critical functions like our autopilot. If you’ve ever had to hand-steer for 24 hrs or more, you will agree with that statement.
On our Manta catamaran, we had a spare RAM that could be attached if the primary autopilot failed.
New autopilot pump
On this Dolphin cat, the steering is hydraulic and one continuous system that drives both rudders. As a back-up, we have a secondary autopilot control head and compass installed… but not being a mechanical drive, we had no backup to drive the steering if the autopilot pump failed.
To do this, we planned to install a secondary autopilot pump. The trick was that it has to be installed in-line in our existing hydraulic plumbing.
We bought a new HyPro pump and installed it as our primary autopilot, moving the old one to secondary.
After plenty of noodling, Mark came up with a schematic that achieved the install with a shut-off value to isolate either pump if needed for maintenance. Draining and re-priming the hydraulic system can be a lot of work!
The install needed to be done with minimal dead volume and precision specifications so that the primary steering is not adversely affected (e.g., not too tight or loose steerage).
New Rudders
During our last haulout, we noticed some scoring on our rudder post. Mark put a sleeve on it when they went back in, but it was added to our list to replace eventually.
We had worked with Foss Foam for our Manta rudders in the past, including a re-design at the time. So we went to work with them again to replace our Dolphin rudders.
At first, we were just going to replace the one. Looking at all of the rudders and rudder molds at their shop, we tried a few that might be a close fit.


Ultimately, we decided to pay to have Foss make a mold of our Dolphin rudder. That way, other owners could also make use of this mold in the future. They also re-make the posts and internal webbing with a stainless contractor. We also decided to replace both rudders using the new mold.
This was the right call in more ways than one, as another Dolphin owner lost a rudder at exactly this same time and got to order replacements using this mold as well. It looks like we chose our own replacements just in time.
Mark was able to remove the rudders himself by dropping them out of the boat. Fortunately, we had our friends Dave & Judi visiting and Dave was able to help install the new ones… after a paint job.
They had to be weighted so that the bottom wouldn’t float up. Mark ran a line through the empty hole and tied to the new rudder. Then he dove under the boat while Dave lifted on the line. It was a tight fit though the rudder bearings and some swearing helped get the job complete.


Add Anchor Chain
The first 100’ or so of our 250’ Acco 3/8”chain that came with the boat was rusting out (go figure). We wanted to get rid of it and replace that section. Unfortunately, the Maggi chain that we really liked using on the Manta was not available.
Mark found 150’ of 3/8” LaClede chain available in St Augustine, so I went on a roadtrip to pick it up along with a new solar panel (more on that later).
We put the LaClede chain on the first 150’ in use and connected it with a C-link to the remaining 150’ of Acco chain, giving us 300’ total. Mark also re-designed the anchor roller to work better.
Bahamas sailing doesn’t require that much chain due to shallow anchoring, but we were moving southward this season and beyond so took on the extra length.


New Solar Panel
With a goal to become generator independent, we added another LG 410 W panel over the dingy davits. Mark figured if we turned the current one the other way, we could fit two in a similar footprint.
The bad news was that they were not making the LG bifacial panels that we had on the stern. He found an exact LG panel match in stock in St Augustine FL, but it wasn't bifacial. That would have to do.
I drove to Florida to pick up the chain and solar panel in our old Nissan Murano. Not only was it sputtering the whole way back, but there was a hurricane coming my way that I got caught up in.
I had the heavy chain in the floor of the passenger seat and the solar panel squeezed into the back… only if I pushed my seat ALL the way forward to drive! Thanks to friends Connie & Steve, I was able to make a safety stop in Ft Pierce to rest and let the weather pass.
Dad welding
My parents came to visit us in Georgia in October. It was our last summer staying here and we are going to miss it. I had my dad bring his welding gear,,, just in case. It was a huge help!
He and Mark fabricated an aluminum frame for the dual solar panels off the stern. It worked out great on our reinforced davits from our previous refit.
This and another Morningstar solar controller brought us to 2000 W of solar power total.


Those were all of the big ticket items… the rest of the list was no less significant and we were really pleased with the outcomes of all of the above.


After purchasing the Dolphin 460 in Dec 2018, we’ve enjoyed cruising between the USA and Bahamas. We spent our “off seasons” over the past 4 years gradually making our way through a complete refit, including one extended year during the pandemic.
It’s hard to think that there could be any more projects that Reach needs at this point… but here we are in Guatemala with a wee bit of a project list on the table. Stay tuned ~ Lol.